I am so in love with Bontik Vintage Designs on ETSY. Anton, the owner asked if I'd be interested in doing a collaboration with him using his designs to make whatever. I was really drawn to his Little Chapel collection and instantly saw an opportunity to turn the designs into Sympathy cards, something that is usually quite difficult for me.
I hope you'll check out my video and then wander over to his ETSY to check out what he has to offer, and trust me, grab a cup of coffee because you'll be there a while!
My project is being featured on the Canvas Corp Brands - The Creative Studio Blog today. I'd so love it if you'd pop on over there and give me some love. I had so much fun just playing and creating with the Tattered Angels Glimmermists. Do you have some of them sitting on your shelves just crying for attention? If so find them and start creating today, you'll be so glad you did!
Since I was really running low on Sympathy cards I choose to do a lot of those, you'll see them all on Video 2. If you love watching the process check out Video 1 (links below) where I'll share step-by-step the whole process of making gorgeous backgrounds for your cards. I also tried very hard to have one layer cards so they easily could go through the mail with no additional postage or worry of being snagged before arriving at their destination. This is a much harder process for me than you might think. I guess I like textures and bumps and bows and whatnot, but I succeeded on the majority.
Join me on the Canvas Corp Blog for the whole story and on the videos for the how to's and end results. Thanks everyone, I so appreciate you all stopping by to see what I've made.
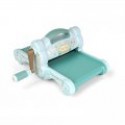
Supplies from my stash include Canson Cold Press Watercolor paper, embossing powders, embossing folders, dies, stamps, Big Shot, Score Board, bone folder
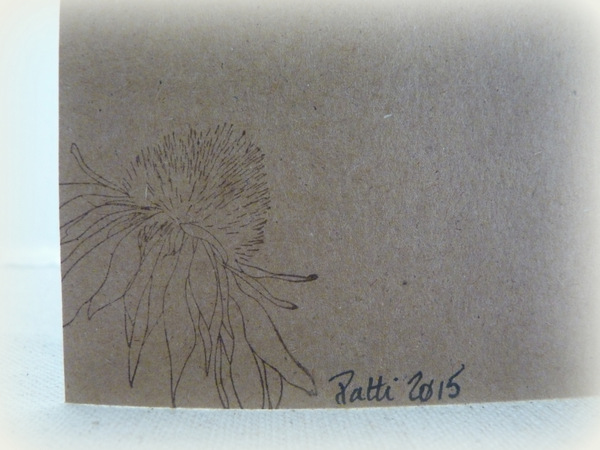
Today I'm sharing a couple of Sympathy cards I made using Stampers Anonymous, Tim Holtz Collection, Flower Garden stamps. These have lots of fall colors browns, ambers, golds and greens I love these colors and I think they make a soothing color combo for this type of card.
This first card is made using a crackle background (from JustRite Stampers) atop a piece of watercolor paper which I had colored with Tim Holtz Distress Ink in Fossilized Amber. Today's cards are A5 size - 5"x7", a little larger than I normally make but perfect sized for the flowers with longer stems. These stamps come with the flower heads and stems separate so you can mix and match as you see fit. (JustRite is not available any more but I did find a Tim Holtz Stamp called Cracks and Specks that's really very very close to what I used, and you get two stamps in this set, what a deal!)
Quite some time ago I treated myself to a set of Caran D'Ache Neo Color II crayons. These are a water soluble crayons so when used with an Aqua brush the colors blend beautifully. It was fun, but it's always fun to try new crafty supplies. I used a Penny Black stamp set called Eloquence for my sentiments and cut them out with Spellbinders Nestabilities Labels Thirty-Three.
This time I included a second generation stamp on the back of my cards as well as adding the flowers to my envelopes. These stamps come out so crisp and clear when used with Spellbinders Celebra'tions Berry Black ink, no smears, no smudges.
Come join me on the video and we'll make a card together plus I'll show you how I did the masking on the one card. This effect gives the illusion that the one flower is sitting behind the other, a really fun technique to use.
Supplies from the Cut at Home Store:
CMS215:Stampers Anonymous Tim Holtz Collection, Flower Garden stamps
Today I've used Heartfelt Creations Blazing Poppy paper and stamp collection along with Marianne Designs With Sympathy die to create my sympathy card. This is a standard A2 card on Kraft cardstock.
Join me on today's video where I share a super trick to getting the raised, multi-colored looked to the die cut.
I stamped the poppies several times and then after coloring them with
Tim Holtz Distress inks (on watercolor paper) I fussy cut and popped the
layers one atop the other to give a real dimensional look to the front
of the card.
Come join me on the video as I introduce you to Heartfelt Creations Blazing Poppy collection sharing the stamps, die and paper pad. We'll also make the card start to finish.
Unfortunately at some time or another we are all in the need of a Sympathy card and using this Spellbinders Die D-Lites Filigree Cross die creates a beautiful card to fill the need. The die is two pieces the outer, which cuts the aperture in the front of the cards and the filigree which creates the beautifully intricate filigrees when you use the two dies together.
I'm almost positive that the recipient of this card will love that I left the cross loose on the inside and made into a removable bookmark keepsake. I layered not only the die cut but several layers behind for stability and then used several coats of Mod Podge front and back to give it a sturdy feel. Using my Crop a Dile I punched a hole in the top and added fibers that complimented the colors of my decorative paper (which is from Prima's Fairy Rhymes Collection, Secret Garden).
By using the cross this way it presented two problems, one when removed from the card the inside was pretty blank when you looked through the cross from the front. To alleviate this I cut another cross (with the filigree in the middle) to use as a stencil and pounced my Tim Holtz Spun Sugar Distress Ink through it. Pulling the ink from the cross outwards to the edges gave the cross a radiant look.
The next problem was I didn't want to adhere the cross down but it wouldn't just stay put so when I adhered the inside sentiment (an old Stampin' Up Sympathy set) I glued a metal piece across the top and then glued all three sides down and across the top leaving only a small opening on the left to slip the bottom of the cross into and keep it in place.
You can see it peeking at you in the photo above.
Here's a glimpse of the second card, you'll see it made start to finish on the video, but I wanted to give you a close up of how beautifully these dies cut and emboss! Join me now on the video as I show you how I created the cards and give a few more photos for inspiration.
I think this card, with sentiments changed, would be a perfect Easter card for that special someone on your card giving list.
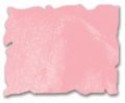
I embossed the pink mat with the Floral Embossing folder and then painted it with Distress Ink and a water brush.
The sentiment is a rub on, the flower from a swap. I heavily Glimmer misted the leaves (which are Recollections) and up close and personal they shimmer and shine with a lot of gold fleck.
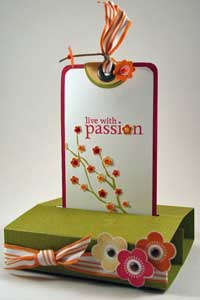
I saw this video at Splitcoast Stampers for a Free Standing Pop Up Card and had to try it. I must admit mine was more freestanding the first couple of times I popped it up, but I kept playing, adding a little ,popping up, popping down, well you get the picture so it's not as straight and sturdy as the one my friend and I made together yesterday, of course it was hers and I was showing her how to do it so she took it home, lol. But this will give you a good idea of what you can do, easily, with this card. The first picture above shows it almost fully closed.
When you pull the tag up by the curled ribbon it begins to 'pop' out of the base and appear.
Fully extracted this is the end result a darling card that has popped out and stands freely. Cool huh?
The chipboard pieces are from Me and My Big Ideas, the beautiful flower shown here is from Petaloo, called Mulberry Street
The chipboard bird is from Maya Road, covered in the same cardstock (which was from Costco) and a bead added for the eye. This is an extremely fun card to make, very simple, the hardest part is trying to decide which paper to have out, which to have in and how you want to decorate it.
The nest is a stamp a friend let me borrow, it was embossed with copper then place behind the cut out circle (paper from the Mariposa Paper Stack from DCWV). I cut a few pieces of the leaves so they would lay over the top to create a 3D effect. The little butterfly is also cut from this paper pad, two butterflies one atop the other to give dimension.
The little bird is a chipboard sticker from KC and Company, the sentiment from My Sentiments Exactly rub ons.
and for the My Time to Craft - In The Frame Challenge
I'm really loving these scrunched flowers, even though the wallpaper had a lot of color I still inked the edges (a lot) of almost everything here.
Button is from Bo Bunny, Rub on sentiment from My Sentiments Exactly, solid papers Martha Stewart
My friend Ale, from Alessandra Designs, created this beautiful kit called Shangri-La. I've had it for a couple of months but just have been side tracked with other projects. Normally I would have used Ale's kit for digital scrapbook pages, but I just loved the papers so much I wanted to see how they would look as greeting cards.
I cut the lady and tiger out and then recut out just the lady and popped her up for dimension. I added some glitter gel pen to the leash and glitter glue to her fur on her outfit. I'm liking the finished effect.
This paper I'm totally in love with, the snowflakes are just so very very pretty. I decided it would make the perfect card to give with a gift. I took Ale's snowflake and reprinted it and covered it with silver glitter.
This last card is my favorite, it is so soft and gentle looking. I took the bird and reprinted, added the silver glitter and popped him up on a metal branch. The sentiment continues on the inside saying - Our hearts, our prayers, and our love are with you, this is a rub on from My Sentiments Exactly. So simple and yet it has such effect.
Don't discount digital kits, they give you so much added flexibility in your card designs. Ales' designs are here at Digitals, please check her store out.


