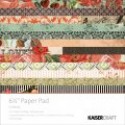
Showing posts with label Kaisercraft. Show all posts

Friday, October 28, 2016

Country Craft Creations - Christmas Shakers


Hi everyone.  I had paper left over from the Kaisercraft Christmas Wishes paper and decided to make a couple of Shaker cards.  I'll have the complete process in the video below.


For my cards you basically need a patterned paper, some solid cards stocks, your cardstock base, some glittery bits for the shaker, acetate and any other extras (ribbon, tulle, bling etc) you'd like to add.


This was my original card.  I found out, for me anyway, it's easier to use a square or a rectangular opening instead of round.  It's much easier to apply the foam tape to make the shaker with straight lines.  I just watched a video this morning from Jennifer McGuire where she used multiple cuts of a frame and glued them one atop the other in place of foam tape.  Great idea, I'm going to be trying that next time!


You can use any assortment of sequins or gems in your shaker window just make sure they aren't too thick to allow movement.  I used a piece of Acetate from Heartfelt Creations but you can use any leftover packaging you have available.  I like to run my static embossing pillow over the inside of the acetate before gluing everything together, it helps keep the bits from sticking to it.


Card number two (and the one shown on the video) has the rectangular window.  I've used Country Craft Creations Artisan Cardstock for my A2 sized card bases.


For the card from I embossed two mats with an older Cuttlebug embossing folder (Winter House) and then from one removed the window for my shaker portion.


With the second embossed piece I cut the snowbank from the bottom, covered it with Aleene's Glitter Snow, allowed it to dry and then popped it with foam tape over the top of the other.

I hope you'll try some Shaker cards as well, try different sized windows and shapes and see which ones you like the best.  You know the old saying practice makes perfect? Well I don't think I'll ever be perfect, nor would I want to but in my case practice sure would make the process simpler and used more often.

Enjoy the video, comments are most appreciated.  Links and supplies will be directly below the video.


Thank you for sharing your time with me 

Please visit Country Craft Creations here -
Country Craft Creations shoppe - http://countrycraftcreations.com/
YouTube - http://tinyurl.com/jkw6ptz
Pinterest - http://tinyurl.com/z49ueuc
Facebook - http://tinyurl.com/zbj7eu8
you can also join the Facebook group
Scrapbookers of Country Craft Creations here - http://tinyurl.com/zhess6s

Visit me at A Soul's Heartbeat on
Blogger -  http://asoulsheartbeat.blogspot.com/
Facebook -  http://tinyurl.com/zbph36l
YouTube - https://www.youtube.com/user/nwlady1949
Pinterest - https://www.pinterest.com/northwestlady/
Instagram - https://www.instagram.com/nwlady/

Supplies from Country Craft Creations -

Please note the Christmas Wishes Collection sold out the minute I shared my reveal video, BUT, the store has the newest collection, Kaisercraft Frosted  check it out, it would be perfect for this mini! This collection also has the Ephemera to match!

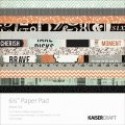
Kaisercraft Christmas Wishes 12x12 Paper Pad
Kaisercraft Christmas Wishes Collectables
Artisan Cardstock - White
Art Glitter Glue - 2 ounce with tip
Score Tape - Various sizes
Hug Snug Seam binding

Supplies from my stash - 3M foam tape; Heartfelt Creations acetate; sequins, bling, tulle, mini roses, Cuttlebug Winter House embossing folder, Aleene's Glitter Snow, assorted solid cardstocks, gold cord; embossing pillow


Friday, October 14, 2016

Side Tag Mini for Country Craft Creations


Today I'm sharing my first project as a Design Team member of Country Craft Creations.  If you missed my reveal video Tammy sent me the gorgeous Kaisercraft Christmas Wishes collection to play with.  It's stunning with very nontraditional Christmas colors of teals, pale greens and pinks.  I really enjoyed making my Side Tag Mini and I hope you like it as well.  I'm including two videos today the first will be a Walk-Through of the completed mini.  The second will be a Process video of some aspects of how I created the mini and tips, tricks and ideas I share of putting it together.  I did not share the basic construction since there are so many videos and tutorials online for that process.  But none the less if you have difficulty or questions please feel free to ask.  I'll try to list all the supplies I used at the end of this post but usually I miss something along the way, so if there's something I've used that I forgot to mention that you are curious about be sure and leave a question in the comments.


I created a sleeved box to slip my mini in for safekeeping when not being looked it.  The outer box has ample room for extra photos, special cards and tags, or memorabilia from the Holiday.  The box and mini were constructed with Graphix chipboard, covered in the Artisan Paper - white from the store, and inked with Tim Holtz Distress ink in Evergreen Bough.


Tammy sent me a set of Frank Garcia's domes and I just had to incorporate one on the box portion of my project. This is so simple to use. You can purchase the accompanying die that will cut the exact circle size from your paper.  Fill the dome, slip it through the circle opening, adhere the cut out piece to the back and place it where you want - - - Voila you're done! You can see my dome has Santa's Naughty or Nice list, a sign post leading to the reindeer or workshop and some Elf Magic crystals. 


I carried the Santa theme from the outside of the box to the cover of the mini.  I just love this old world looking Santa and left him primarily alone to speak for himself.  The 'Believe' is cut from the 12x12 page of words.  I matted it twice and used the Goldenrod Stickles over the letters.  Tammy sent me Hug Snug seam binding already dyed to match the papers and I used three here to make the bow and attach the bells.  Up close you'd see the fir boughs are all glittered with Diamond Stickles.


This mini includes six pages that open from the side resembling a tag, thus the name.  There are half inch gussets between each page which leaves lots of room for expansion.


Here you can see the front inside cover and the first tag page (on the right).  I loved making the clusters for the pages and the stoppers to slip the tag ends of the pages into.  I used almost all of the Kaisercraft Christmas Wishes Collectables, heavier weight, pre-cut embellishments, which just add to the creative process.


Each tag page, when opened, gives lots of room to add photos not only to the matted page but to the additional elements I added.  On the left are two tuck in mats and on the right is a ribbon tied book that will hold 12 4'x6' photos.  I left the inside of the tag points free as journaling spots or to add smaller photos to.


By clustering elements together, either from the pre-cut Collectables selection or from fussy cut pieces I chose from the papers, you can create a great 'stopper' to tuck the tag end under and keep everything snug and closed.  I used a combination of Eucalyptus, Golden Rod and Diamond Stickles on many of my elements.


I found that I could even incorporate the large sentiment strips from the 12x12 paper pad if I snipped them apart and put part on one page and the rest on the opposite page.  They made wonderful stoppers and belly bands for my tag inserts.


All the tag pages have elements to tuck the flaps under like the poinsettias that I fussy cut from the 12x12 paper.  I used Aleene's Paper Glaze over the top and sprinkled a small amount of ultra fine glitter into it.  Christmas Red Stickles gave the berries in the middle a real dimensional look.


I'm sharing two videos with you today.  The first will be the Walk-Through of the finished mini and box.  The second will be a process video of sorts sharing how I created the tag pages, the dimensions of the mini and other tips, trick and ideas I used in the construction. As I mentioned at the beginning of the blog post, I did not share the general construction of the mini.  The hinges are each 1/2" in size and have a 1/2" gusset between them.  If you decide to make my mini and run into any questions please just email me at asoulsheartbeat@gmail.com and I'll be happy to help.  All pages were inked with Tim Holtz Distress ink in Evergreen Bough.  This is the perfect color if you're wanting to pick up the teals from the paper.  Supplies will be listed under the videos as well as links to Country Craft Creations.


Video 1 - The Walk Through


Video 2 - The Process

Thank you for sharing your time with me 

Please visit Country Craft Creations here -
Country Craft Creations shoppe - http://countrycraftcreations.com/
YouTube - http://tinyurl.com/jkw6ptz
Pinterest - http://tinyurl.com/z49ueuc
Facebook - http://tinyurl.com/zbj7eu8
you can also join the Facebook group
Scrapbookers of Country Craft Creations here - http://tinyurl.com/zhess6s

Visit me at A Soul's Heartbeat on
Blogger -  http://asoulsheartbeat.blogspot.com/
Facebook -  http://tinyurl.com/zbph36l
YouTube - https://www.youtube.com/user/nwlady1949
Pinterest - https://www.pinterest.com/northwestlady/
Instagram - https://www.instagram.com/nwlady/

Supplies from Country Craft Creations -

Please note the Christmas Wishes Collection sold out the minute I shared my reveal video, BUT, the store has the newest collection, Kaisercraft Frosted  check it out, it would be perfect for this mini! This collection also has the Ephemera to match!

Kaisercraft Christmas Wishes 12x12 Paper Pad
Kaisercraft Christmas Wishes Collectables
Prima Flowers - Sweet Peppermint
Prima Remnant Domes (3 domes in package)
Prima Remnant Dome Memory die
Graphic 45 Shabby Chic Door Pull
Artisan Cardstock - White
Art Glitter Glue - 2 ounce with tip
Score Tape - Various sizes
Hug Snug Seam binding

From my stash -
Tim Hotz Distress Ink - Evergreen Bough
Ranger Glossy Accents
Sukara 3D Crystal Lacquer
Aleene's Paper Glaze
Christmas bells
Stickles in Eucalyptus, Dazzling Diamonds and Golden Rod
Ranger Perfect Pearls - Plantinum Pearl
Tattered Angels Glimmer Mist in Dazzling Diamonds and Iridescent Gold
Tattered Angels Glimmer Glam in Rockin on Sunshine
EK Success Border Punches - Eyelet Border and Scalloped Scallop
Martha Stewart Corner Punch - Snow Flurry
EK Success Corner Punch - Venetian
Little B Scallops die
SA Crafters wooden sign post
Assorted bling
Assorted glues and double sided tapes
Graphix Chipboard


Thursday, November 13, 2014

an intro to Kaisercraft Dies

 a Cut at Home Design Team Project


Kaisercraft has released new additions to their product line, wafer thin metal dies.  This one is the film strip with the words Smile and Love and a little heart included.  I love this die and can see myself using it in lots of projects.


The dies come in a protector outer sleeve of plastic, just like lots of dies do.  Inside you get a folder with a full size photo of the die on the back cover and the die on the front cover, notice in the photo above how the die stands in place even though my folder is vertical?  That's because inside is a magnetic sheet the size of the dies which hold them in place easily while you're working with them on your craft table or have them stored away waiting for the next project.


Check out my video today as I show you a more in depth look at the dies I tried out from Kaisercraft and of course a few more photos of the card I made with the film strip die pieces I cut.


Supplies from the Cut at Home Store


Wednesday, July 2, 2014

a Teeny Tiny Mini in a Box


a Cut at Home Design Team Project
OK I admit it, I like to keep odd shaped boxes, envelopes, mail etc.  Something that I can take apart and remake with pretty paper and embellishments.  My project today is one like that.  A friend had gone to an Estate sale and bought a box of 'stuff'.  In it were these boxes that at one time housed metal tins of cigarrilos.  

I kept looking at this little box and loved the way the top flipped over and tucked in to close.  The other day I pulled it all apart and made a pattern. I had to add a couple of flaps here and there but otherwise it's pretty straight forward. You can do this with anything that catches your eye.  Don't forget those flippy/flappy ads that come in the mail or how about the neat heavy coasters they put under your drinks sometimes?  Small boxes are a treasure trove to repurpose.


I made the box and then made a tiny little mini to go inside. The box is small, only 3 1/4" square and 3 3/4" high so anything inside has to be miniature.  The mini measures 3" x 3 1/2" small but oh so cute.    It's fun working with a little mini this way and you'd be surprised how many tiny photos you could tuck in here and there.  I also thought it would make a wonderful book of inspirational, uplifting quotes.


Check out my video which will walk you through the pages of the mini.  I used Kaisercraft's Storyteller and Curiosity but any paper that calls to you would work just fine. I also had just gotten a new die from the store, Heartfelt Creations, Celebrate the Journey, Luggage and Tags, oh I love the tags they are so adorable and the perfect size for this mini.


Supplies:


Wednesday, June 25, 2014

Kaisercraft's Mister Fox, a Manly Card

a Cut at Home Design Team Project

Here's an idea for all those guys out there that you're having a hard time creating a card for. Kaisercraft's Mister Fox collection is a perfect masculine line of paper.  Great colors and the 6 1/2" pad has some fabulous die cuts at the back.


This is a standard A2 size card 5 1/2" x 4 1/4", I love this size it's so great for envelopes and mailing.  The sentiment on the front is one of the die cuts from the back of the paper pad, Kaisercraft is so great at always including these.


I used a Sizzix die, the 3D Ribbon for the bow on the front.  Don't you just hate it when you forget you have something?  That's what I thought when I ran across this bow die.  I just love it, it's the perfect size for a card or scrapbook page.


I embossed the inside sentiment with Stampendous Black Detail embossing powder with the Penny Black 'Special Wishes' stamp set.  The ribbon is actually a piece of the designer paper cut and run through the slits on each side of the mats.  

The video will give you a complete step by step on how to make this card start to finish.


Supplies: