Showing posts with label Heartfelt Creations. Show all posts

Monday, September 19, 2016

The End of the Series!

Well I'm back my friends, and I've finished up the You and Me Making a Mini Series.  I have three videos to share with you

The outside covers 


A final walk through


and what to do with the scraps!


Thanks for following along everyone.  
If you haven't seen the other videos there is a complete playlist here

Thursday, April 7, 2016

Berry Darling

A Cut at Home Design Team Project

Today I'm going to be sharing a new collection soon to be available for shipment in the Cut at Home Store.  Heartfelt Creations Berry Cafe retraces your childhood with days of lingering over a soda sharing a straw with someone special.  Remember those summers with the warm sun upon you as you picked those luscious strawberries to fill your pail?  This collection will have you reminiscing with  a smile on your face I'm sure.  Wonderful summer colors of reds, greens and golds will fill you as you check out each of the 12 designed pages in this collection, you get 2 of each for a total of 24 papers. There are five different stamp sets and 3 die sets which will allow you a huge assortment of flexibility with Berry Cafe.

I'll be sharing all the stamps and dies that make up Berry Cafe along with a fast, simple and delightful card to share with someone special.  I also want to give you my impression of a new paper I just tried from Elizabeth Craft Designs, the Soft Finish Cardstock  I hope you'll join me on today's video, You can find the full blog post about Berry Cafe on the Cut at Home Blog here.


Supplies from the Cut at Home Store –
TIP33080: Tim Holtz Waterbrush with Fine Nib

Thursday, February 25, 2016

His and Hers Shaker Cards

a Cut at Home Design Team Project


Today I'm sharing a duo of  Shaker cards.  The one above is more feminine and created with Marianne Design Craftables Punch Star die. This is a single bar die that cuts out multiple sizes of stars and what I've used for the inside of my shaker spot.  I used Graphic 45's new collection Enchanted Forest with a 5" x 7" card base.


The second card, the one I'll make on camera, uses Marianne Design Craftables Punch Nuts and Bolts Die.  Again this is a strip die that punches out various sizes and shapes of nuts and bolts.  So fun!  I think this is a must die for anyone that makes masculine cards or projects.  It's always harder to find things with that manly flair.  For  this card I used a Kraft card base for a standard A2 sized card (4 1/4" x 5 1/2").  I used an older collection from Heartfelt Creations, All Geared Up, for this card. The paper is no longer available in the store but any masculine themed paper line would work.  Check out Tim Holtz idea-ology papers they have that grungy manly feel to them.


Come join me on the video, we'll do the masculine card together and then I'll have more photos of the feminine card to give you a taste of what these dies can do.  Presently there are seven of these punch dies available in the Cut at Home store so be sure to check them out to see which ones you should add to your crafty stash.


Supplies from the Store:
CR1324:
 Marianne Design Craftables Nut and Bolts Punch die set
CR1321: Marianne Design Craftables Stars Punch die set 
4501348
: Graphic 45 Enchanted Forest 12×12 Paper Pad
GBCC811: Heartfelt Creations Clear Cardstock
TIM43270: Tim Holtz Distress Ink – Ground Espresso
6604256: Sizzix Big Shot and in White and Gray
T-001: Spellbinders Tool  ‘n One
SCP-014: Spellbinders Celebra’tions Cuddle Cream cardstock

Friday, February 5, 2016

You and Me Making a Mini - Video Tutorial Series


July page features a flip up and down with magnets.

I thought perhaps you'd like to join in on making a mini using the premade album by Heartfelt Creations.  I've got a YouTube series going on right now in which I share a video showing how I create each page.  Since I'm using Graphic 45's Children's Hour collection there will be 12 pages one for each month.  Plus the cover and a few extras.  I've created a Playlist on my channel for ease in finding.  


May and June feature lots of tuck in and a gate fold

You are all welcome to join me but I'm doing this series at the request of many crafters who find it easier to watch the whole creation process of pages instead of just a walk through of the finished mini.


March and April share the luscious greens and purples from the collection

So if you're interested here's the latest video - July and 
I'll link to the playlist as well


Each additional video for this series will be added to the playlist for 
you enjoyment and ease of finding

Thursday, January 14, 2016

Making a Mini Together

a Cut at Home Design Team Project

Hello everyone, I have many viewers tell me over and over again that they love what I do but they can't do it themselves. I'm here today to tell you that anyone of you CAN make a mini especially with what I share with you today.

I'm using a new product from Heartfelt Creations called the 3D Flip Fold Album.  This is a pre-made base for your mini.  I think this is what intimidates a lot of you is creating your base with the spine and pages from scratch.  Well this is your solution everything is constructed for you, all you need to do is pretty it up!  And that's what I'm going to share with you today.

I'm going to marry Heartfelt Creations album with Graphic 45's new Children's Hour collection and share with you the first page I've done.  I want to inspire you to take a stab at this yourself if you've never done a mini.  Or if you're old hat try it anyway because there are always times when the benefit of having something pre-made out weighs the time of making it yourself.  So come join me.


Today I'm using primarily the two March papers from the Children's Hour Collection and some black cardstock.  As the mini progresses I will use from all three paper pad sizes (today I've used mostly the 12x12" pad) and the majority of the other products in the collection, stamps - stickers - tags and pockets.


On video I'm going to share how you can start with just a mat and add your photos or continue to step the basic page up to fancier with surprises galore.  I've precut everything so you can simply watch the thought process and see how I put it all together.  If I get a positive response to share the making of each of the rest of the pages I will turn this in to a series and share how I created each page just as I've done with this one.  So if this is something you're interested in seeing please let me know in the comments or on the video comments.


As always today's video will also include lot of tips and tricks I've stumbled upon while making minis, why I do what I do, and a host of other tidbits.  Of course there will be many more still photos as well.  So come join me on today's video and be sure and stop by Cut at Home and check out all the fabulous things they have in their store. Linked at the bottom of the post are the items I used today.


Measurements for this page:

Solid black mats 6 1/4" x 8 1/4" (I cut 10 because I know I'll need one for each of my pages the front and back insides will require larger mats) 
Decorative mats 6" x 8"
Top Insert 5 1/4" x 7 1/4" (this is the maximum this insert can be, you might even want to cut it down to 5" x 7")
Side Insert - 5 3/4" x 7 1/2" (again this is the largest you'll want it to be to allow for easy in and out access from the side, you might want to cut it down to 5 1/2" x 7 1/4" to allow for even more ease.)
Inserted folder: 10 1/2" x 4 1/4" score in the middle and fold at 5 1/4" to make booklet

NOTE: I suggest using the larger measurements for the inserts, seeing how they fit after you make the pockets, if they don't glide in and out easily re-cut them using the smaller measurement.  Nothing is worse than struggling to slide your inserts into the pocket, better to cut smaller than to be frustrated and hey this is going to be a fun thing so no frustration allowed!!!

Supplies from the store:

HCFA1-432:
 Heartfelt Creations 3D Flip Fold Album
4501228: Graphic 45 Children’s Hour Collection
HCD 727: Heartfelt Creations Vintage Floret dies
HCPC 3500: Heartfelt Creations Open Vintage Floret stamps
SCT-001:  Spellbinders Celebra’tions Linen Thread
SCI-001: Spellbinders Celebra’tions Berry Black Ink
TIM19541: Tim Holtz Distress Ink – Black Soot

Supplies from my stash:
Coredina'tions Black Cat Cardstock 8 1/2" x 11"
American Crafts Black Textured Cardstock 12" x 12"
Decorative brads
Strong double sided tape 1/8", 1/4" 1/2"
Strong wet glue

Wednesday, November 11, 2015

All Glammed Up!

a Cut at Home Design Team Project


Today I'll be sharing 4 projects that I've made using Heartfelt Creations All Glammed Up collection including paper, dies and stamps. Here's a little peek at my shaped shoe card.

Here's a snippet of my tag, don't you love the dress.  You'll see all these projects in their entirety on today's video at the end of this post.  


The third project is a card using the unique new dies that have a middle part and two outer cutting dies.  By using just one you can get a lovely flourish like the one shown on my card.  I'll share just how easy it is to achieve this effect on the video.


Last but not least is a tag gift card holder with more cut aparts and dies from the collection.  Fun stuff and an endless amount of projects just awaiting your creative touch with any or all of the All Glammed Up collection.  A linked list of the supplies I've used from Cut at Home will be directly below the video.


Supplies from the store:
HCDP1-260: Heartfelt Creations All Glammed 12"x12" Paper Pad  
HCD-774 : Heartfelt Creations All Glammed Shoe Dies  
HCD-775 : Heartfelt Creations All Glammed Dress and Flourish Dies  
HCD-776 : Heartfelt Creations All Glammed Eyelet Oval Dies  
HCPC-3702: Heartfelt Creations All Glammed Heels and Roses Cling Stamps  
HCPC-3703: Heartfelt Creations All Glammed Up Shoe Cling Stamps 
HCPC-3704: Heartfelt Creations All Glammed All Dressed Up Cling Stamps 
HCPC-3705: Heartfelt Creations All Glammed Lift Your Soul Cling Stamps 
HCPC-3706: Heartfelt Creations All Glammed Fashionista Cling Stamps  
HCPC-3707: Heartfelt Creations All Glammed Sentiments Cling Stamps  
4500849: Graphic 45 Large Tag Ivory Album  
TIM20219: Tim Holtz Distress Ink - Milled Lavendar 
SCP-013: Spellbinders Celebra'tions Whirl White Cardstock 
SCP-014: Spellbinders Celebra'tions Cuddle Cream Cardstock  
ACP6SG: Angel Craft Semi-Gloss Craft Podge (sold direct from Amazon)

Wednesday, November 4, 2015

SOLD - Heartfelt Creations Blazing Poppy Mini Album

a Cut at Home Design Team Project

This mini is has been sold
Thank you all for your interest!


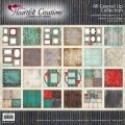
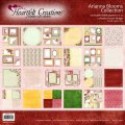
Today's mini is made from a pre-made journal designed by Frank Garcia and sold by Prima.  I've used Heartfelt Creations Blazing Poppy Collection on the six two page spreads.


I've used a lot of fussy cut flowers and elements from the paper line for decoration.  The spine is covered in three pieces of black lace from The Piece by Piece.  I used Diamond Stickles to accent the baby's breath on the front and back of the mini.

  The mini measures 5.5" x 7.5" with six chipboard pages.


Each set of paper co-ordinates with designer paper, pockets, tuck ins or unders and black mats stamped with stamps from the collection.


There is an abundance of places to adhere photos and journal spots.  Here I've created a pocket on the left with a matching belly band on the right and added a top and bottom stopper to keep mats and photos from sliding out of the mini.


Check the supply list at the bottom of this post for a complete list of the Spellbinders, Sizzix and Tattered Lace dies I've used.


On video I'll walk you through each page sharing what the inserts look like and also tips and ideas I used to create the pages.


I love the look of these pages.  They were created by fussy cutting the sentiment strip and flower spray from the top of one of the collections 12"x12" papers.  By gluing the sides and middle down I've created a belly band and open pocket for the mats and many extra photos to be tucked in. 


The chalk ink on the black mat stamped with the Collection's stamps just gives a pop.  Of course once the photos are placed many of the stamped images will be reduced or eliminated but they are nice until the photos glued down.


The vertical tuck in pocket on the right was created by putting a small hole in the top and bottom and then cutting a slit with my Kraft knife to join them.  Removing just a sliver of the paper leaves a nice way to slip the mat under the paper and allowing just enough to peek out for removal.

Come join me on today's video, there are lots more photos to inspire you to find a pre-made mini and decorate it yourself.


Supplies from the Store:
HCDP1-255: Heartfelt Creations Blazing Poppy Paper Pad  
HCPC3676: Heartfelt Creations Blazing Poppy Poppy Vase cling stamps  
HCPC3677: Heartfelt Creations Blazing Poppy Stems cling stamps 
HCPC3678: Heartfelt Creations Blazing Poppy Fillers cling stamps  
HCPC3675: Heartfelt Creations Blazing Poppy Corner and Border cling stamps 
S4-112: Spellbinders Nestabilities Classic Ovals Small 
S5-216: Spellbinders Card Creator A2 Tranquil Moments  
S4-544: Spellbinders Card Creator Victorian Arch 
S5-218: Spellbinders Nestabilities A2 Divine Eloquence
D304: Tattered Lace Demure Corner die
660225: Sizzix Thinlits Tim Holtz Friendship Words in Script  
TIM27133: Tim Holtz Distress Ink - Forest Moss  
TIM20202: Tim Holtz Distress Ink - Fired Brick  
TIM43270: Tim Holtz Distress Ink - Ground Expresso 
Please note Angel Craft Products are now sold directly through Amazon 
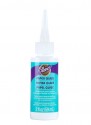
ACP6SG: Angel Craft Semi Gloss Craft Podge  
ACT1412: Angel Craft Tape 1/2" ACT1414: Angel Craft Tape 1/4"

Wednesday, September 23, 2015

Graphic 45 Botanicabella Tag Mini

a Cut at Home Design Team Project


Today I'm sharing a new mini created with Graphic 45's Botanicabella Collection and their Black Tag Album.  I used one of Sa Crafters arrows across the front and added a flower cut from the decorative paper using Heartfelt Creations Blazing Poppy die.


I used an old sheet that I'd been saving for the binding.  I sprayed the sheet with Tim Holtz Distress Stains in Ground Espresso, Abandoned Coral and Fossilized Amber.  The dyed and dried sheet was torn to a one inch strip and woven through the binding hole and then knotted securely.  I then tore the tails into thin strips which causes the great fraying and distress look.  The charms were gifted to me from my friend Julie.  They were a plain silver but I used Alcohol inks to co-ordinate with the colors of the mini.  Worked great.


There are eight double sided spreads and each page has the same tag cut from Spellbinders Celebra'tions Cuddle Cream paper using Spellbinders Labels Thirty-six and inking the edges with Ground Espresso

I hope you'll join me on today's video there is so much more to share and many more still photos to inspire you. 


Supplies from the Cut at Home Store:
4501166: Graphic 45 Botanicabella 12s12 Deluxe Dollector's Edition Pad 
4500981: Graphic 45 Regular Tag Album - Black 
HCD1-764: Heartfelt Creations Blazing Poppy Die  
S4-418: Spellbinders Nestabilities Labels Thirty-Six dies 
S4-503: Spellbinders Shapeabilites Arched Elegance Pocket Dies  
660225: Sizzix Tim Holtz Thinlits - Friend dies 
ACP6SG: Angel Craft Semi Gloss Podge 
TIM43270: Tim Holtz Distress Ink - Ground Espresso  
TIM43225: Tim Holtz Distress Ink - Fossilized Amber 
TIM43188: Tim Holtz Distress Ink - Abandoned Coral

Wednesday, August 26, 2015

Graphic 45's Mon Amour Card

a Cut at Home Design Team Project


Today I'm sharing Graphic 45's Mon Amour collection paired with a variety of dies to create my card and envelope.  This is a 6"x6" card base and I used my fav Whirl White cardstock from Spellbinders Celebra'tions line for the base and envelope.

The flower comes from Heartfelt Creations Blazing Poppy die and the flourishes are from Marianne Designs Vintage Swirls dies. 


With the addition of some Pearls, Glossy Accents and a little glitter my card's done.  Come join me on the video, I'll share my supplies, my plan and the finished card.


Supplies from the Cut at Home store: 
4501213: Graphic 45 Mon Amour 12x12" Paper Pad  
4501212: Graphic 45 Mon Amour 8x8" Paper Pad  
4501217: Graphic 45 Mon Amour Sticker Sheet 
4501211: Graphic 45 Mon Amour 6x6" Patterns and Solids Pad 
SCP-013: Spellbinders Celebra'tions Whirl White 12x12" Paper 
IN-009: Spellbinders In'Spire Love Vine die 
LR 0214: Marianne Designs Creatables Anja's Rose Corner  
LR 0269: Marianne Designs Creatables Vintage Decoration  
LR 0271: Marianne Designs Creatables Vintage Swirls  
HCD1-764: Heartfelt Creations Blazing Poppy Die

Wednesday, July 22, 2015

With Sympathy Card

a Cut at Home Design Team Project


Today I've used Heartfelt Creations Blazing Poppy paper and stamp collection along with Marianne Designs With Sympathy die to create my sympathy card.  This is a standard A2 card on Kraft cardstock. 
Join me on today's video where I share a super trick to getting the raised, multi-colored looked to the die cut.


I stamped the poppies several times and then after coloring them with Tim Holtz Distress inks (on watercolor paper) I fussy cut and popped the layers one atop the other to give a real dimensional look to the front of the card.

Come join me on the video as I introduce you to Heartfelt Creations Blazing Poppy collection sharing the stamps, die and paper pad.  We'll also make the card start to finish.


Supplies from the Cut at Home store:
 
HCDP1-255: Heartfelt Creations Blazing Poppy 12x12" paper Pad (back ordered until mid August 2015)
HCPC-3677: Heartfelt Creations Bazing Poppy Stems stamp
CR1315: Marianne Design Craftable Die With Sympathy
Tim Holtz Distress Inks in various colors
ACT1414: Angel Craft Tape 1/4"658300: Sizzix Big Shot Starter Package
656499: Sizzix Magnetic Platform for Wafter Thin Dies

Thursday, November 6, 2014

My Favorite Nut!

a Cut at Home Design Team Project

Here I am stuck again on making a masculine card when out of the crafty world appears Heartfelt Creations new collection called All Geared Up.  You could probably hear me at your house I was so excited.  I just love it when manufactures come out with grungy, manly papers!


This is the card I made for my friends birthday, I think it will be perfect since he's a real do it yourselfer.  I used a scrap from an old cardboard box to cut the gears from and love that look.  When you add a little Distress ink (I used Gathered Twigs and Evergreen Bough) it makes them look even more rusty and old.  Perfect!


Come and join me on the video, I'll share more ideas of how I created this card, fast forward so you can see it put together and end with a few more photos to inspire you to make some cards for those guys in your life today.


Wednesday, September 17, 2014

Introducing Spellbinders Labels Forty-One and Forty-Two

a Cut at Home Design Team Project

Today I'm sharing three cards I've made using Spellbinders Nestabilities Decorative Accents Labels Forty-One, Decorative Elements Labels Forty-One and Decorative Accents Labels Forty-Two.  


Check out my video below to see how using different colored cardstock or interchanging the dies will completely change  the look of your cards.  I'll also show you how to cut the shaped card base as shown on the card on the left above besides sharing tips and more photos.  For the complete blog post please check out the Cut at Home Blog.