Showing posts with label Cuttlebug. Show all posts

Thursday, September 19, 2013

Heartfelt Creations Fall Seasons Cards

This is a Design Team Project for Cut@Home
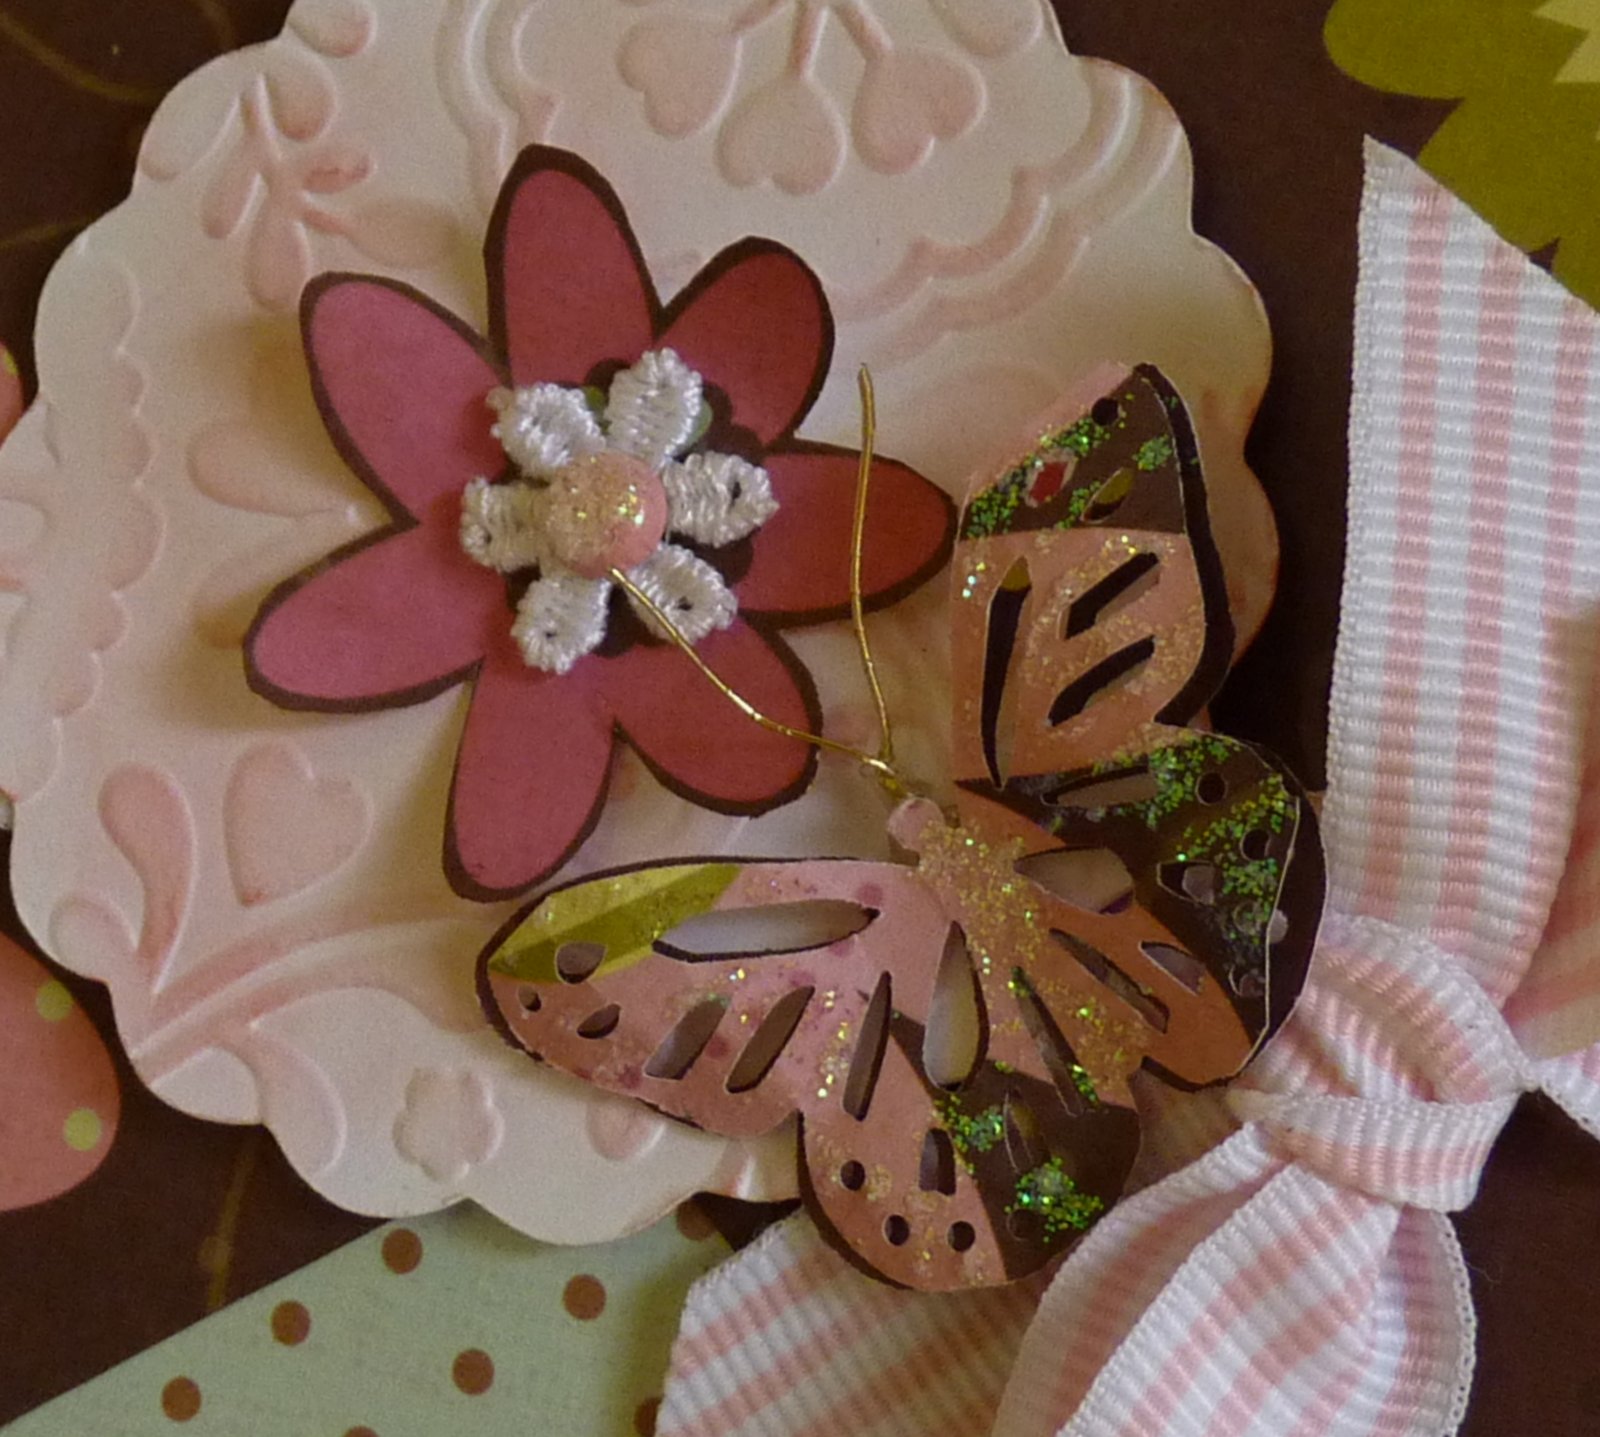
I've made 3 Fall Cards to share with you the new Heartfelt Creations Gateway to the Seasons Collection Sentiment and  Fall Season Stamps.  I used the Spellbinders Label Thirty One and Superellipse dies to cut the apertures for my cards and the Spellbinders Celtic Weave Embossing folder to create the wonderful dimension around the opening.  

On this card I stamped and cut out several of the words
from the Heartfelt Creations All Seasons Sentiment Stamps to
read 'Celebrate Life Everyday, Happy Thanksgiving'

On the inside I embossed it with Versamark and Clear Embossing Powder
Then I used Distress Ink to bring the image to life.
Over the top I sprayed Lindy's Stamp Gang Blazing Sun


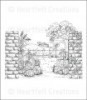
This was the first card I made and I used the Superellipse die on it to give the aperture a rounded edge.  I tried my hand using my Copic Markers, I am NOT a Copic painter by any means, but I had fun with it and gave it my best shot.  

I spent some time fussy cutting around the image and layering it upon a piece I had distressed with blue to form the background sky.  The bricks and flowers I cut again for dimension.  I really like how the corn silks popped out.


 You can see here how embossing with Distress Ink can really 
bring the lines and groves of the embossed area to life. 


Using Spellbinders Font One - Uppercase and Lowercase, I cut out the word Fall and
used Forest Moss Distress Ink and Glossy Accents to really make it pop above my ribbons
(which were white seam binding I dyed to match the card)
On the inside of this card I printed a sentiment from my computer
Distressed it with ink, matted it and added a brad from my stash.


This is the card I make, start to finish, in my video. 

On the inside here I again used Clear Embossing and Wild Honey Distress Ink.
The Sentiment is from the Kaisercraft Curosity set


Monday, April 16, 2012

Mini Squares


I used a 1 inch ruffled square punch and punched out a multitude of  squares
Inking each square around the edges

On a mat of white paper 5x6" I drew a faint pencil line diagonally from corner to corner
Working from the middle I started placing my squares along this line
Moving from row to row until the entire surface was covered, leaving a small space
between each square showing the mat below
I trimmed the square to 4 x 51/4" and placed it on my card front

Next I punched out a Martha Stewart Monarch Butterfly,
Inked the edges and used some Diamond Stickles on the wings
I took some light weight purple beading wire to form the antenna
and popped the butterfly up on the lower left of my card front.


On the inside I used a script stamp over a piece of printed paper from
the K&Company Best of Brenda Walton stack
I was given the butterfly (which was cut on white cardstock) in a RAK
so I used some spray and glittered it up,
ran it through the Polka Dot Embossing Folder in my Cuttlebug and
stamped it with a My Sentiments Exactly stamp

The last step was placing some small pearls
where each square met at the corners
Supplies used:

Thursday, February 2, 2012

Working from Scraps

One goal this year for me was to use more of my stash and scraps.
That's what his card is made from, including the envelope


Dotted paper was run through my Bug with the dotted swiss
embossing folder
The butterfly is the Martha Stewart Monarch punch,
which was a birthday gift from a friend.
I love the look with punched several times and
place on atop the other letting the wings flutter

Loved the addition of the little fabric flower
Circle mat was cut on the Cricut and emobssed and then lightly
inked with Worn Lipstick Distress Ink


Friday, December 2, 2011

adorable

Another stamp set from Penny Black's - Mimi's Christmas
The white from her hat is white flocking (love this stuff)
stamp is from Stampin Up
I used the Cuttlebug Snowflake embossing folder on the front of the card base
(just before I mailed it I decided it needed a little pop so I distressed the edges of the front of the card and the ridges from the embossing with Vintage Photo Distress Ink, much better.)
The ribbon is actually cut from one of the papers from the Warm Wishes Recollections paper pak
I punched the tag with my square Marvy scalloped punch 
The little Mimi's face is done with Copic markers
her hat and scarf are paper pieced
the bow was in a rac (thanks Lori)