Showing posts with label Altered Art. Show all posts

Thursday, February 15, 2018

Crafty Storage and it's Red!

a Canvas Corp Brands CREW project

Hello everyone, just a little sneak peek at a project I just completed for the Canvas Corp Brands CREW.  I had this paper mache pitcher and decided it would be the perfect holder for my stencil brushes. I used the luscious DIY and Decor Paint in Scarlet to transform it to fit into my crafty space.  Yep, you guessed it I use white with red accents anytime I can in my space.  Red is my happy color.  I hope you'll pop on over to the Canvas Corp blog to check out the full post and see how I did what.  As always I'll also have a full video of the process and the after photos.  Thanks so much for stopping by and don't forget Canvas Corp Brands is based right here in the USA and if you place a minimum $10 order in the USA shipping is free, yep you heard me right free.  So jump on over there and check out the fabulous offerings they have.  Be sure and hit the NEW button since new 2018 items are being added weekly and you sure wouldn't want to miss out on any of the yumminess available for your crafty hands!  You can see the full blog post, video link and how to steps and photos HERE


Follow Canvas Corp Brands StoreBlog and Facebook Collective Group (this is a group you must request to join, but boy is it worth it!!!)Canvas Home Basics at Facebook and Instagram.
7gypsies at Facebook and Instagram.Tattered Angels on Facebook and Instagram.

Visit me at A Soul’s Heartbeat on BloggerFacebookYouTubePinterest and Instagram.
Have a great crafty day everyone.

Thursday, February 25, 2016

Altered Vintage Clock with Blue Fern Studios Blush Collection

Guest Design Spot for Country Craft Creations


Tammy Merrill from Country Craft Creations gifted me a week or so ago this Blue Fern Studios Blush paper collection.  Such gorgeous paper!  I had had this Tim Holtz Assemblage Clock in my crafty drawer forever it seems and pulled it out because I could envision it with these papers.  What a perfect combination that turned out to be!


I fussy cut a lot of bits from the collection for the top, front and sides of the clock.  Here you can see the little bird flying off at the top, he's got a flower branch tucked beneath his toes.  I tucked a grouping of these flowers from my stash above, around and below the bells on top.  I brushed them with Distress ink in Ground Espresso just lightly to give them more of a vintage feel.


For the front main focal point I used the Angel fussy cut from the paper.  Using another decorative paper I die cut Heartfelt Creations Arianna Blooms flower, dipped it in Tattered Angels Dazzling Diamonds and Valentine Pink (which I had mixed together).  With the  pre-made yellow flowers  I diluted a little Tattered Angels Gold Glimmer Mist with the Dazzling Diamonds and dipped the flowers in it (they were originally cream).  I think the addition of the dimensional flowers really took the front of the clock up a step.


For the sides of the clock I again fussy cut strips from the decorative paper and put them around the curve of each side running the flowers from the top down to meet.  


The clock was originally silver which I painted with Gesso and then several coats of Martha Stewart Wedding Cake Acrylic Paint.  To get the yummy pale pink tint I first mixed Tattered Angels Dazzling Diamonds Glimmer Mist with Tattered Angels Plumeria Glaze in a small spray bottle, the result was an exceedingly pale pale pink.  To intensify the color I added Tattered Angels Valentine Pink Glimmer Mist to the mix and resprayed resulting in this soft feminine pink.


On the back I added a round circle cut from the Blush collection and dabbed some painted around the edge.  I slit the middle to go over the ring on the panel and slipped the paper over the top of it through the slit.  Attached to the ring I added the pale blue satin ribbon and the Handmade metal trinket from Tammy's store.  I did vintage up the trinket again with the MS paint.  To finish off the back I took just a single heart from the lace that was included in my goodie box and placed a fussy cut butterfly in it's center.  Falling from behind is one single heart another fussy cut piece.


When you pull the back off inside is a round mini album.  I cut circles with Tattered Lace Essentials Circle dies to fit the altered coasters and painted around all the edges with the Wedding Cake paint. To join them together I punched a hole on each side and alternated the ribbon ties so it will open as and accordion.


There are ten rounds which give ample room for a photo, journaling or memorabilia on each side.


I hope you'll join me on the video, I'll share the process of how I altered the clock and made the mini plus share many more photos. Please visit Country Craft Creations and tell Tammy hi for me!


Supplies from Country Craft Creations

Please visit Country Craft Creations at
Pinterest 

You can purchase the Tattered Angels Mists and Glazes
Direct from
Canvas Corp Brands


Tuesday, June 30, 2015

Forgotten Meadows Kraft Journal

a Meg's Garden Design Team Project


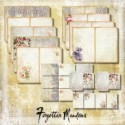
Today's project uses the beautiful new papers sold exclusively at Meg's Garden called Forgotten Meadows.  Kerry-Jean Watson is the designer.  Along with a Kraft Journal I found at Michaels.  I used Tim Holtz Distress Paints in Chipped Sapphire and Seedless Preserves blended to create this pretty shade of purple that complements the papers.


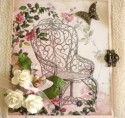
Here's a shot of the outside including the Prima Lace stenciled back and the fussy cut butterflies that I've covered heavily with Glossy Accents.


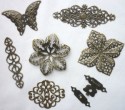
The front closure are two Vintage Trinkets from Meg's Garden, the square bottom was adhered directly to the book front (I used Beacon's Fabri-Tac for a super strong hold).  The top was actually this piece that I scrunched in the middle, I used my bone folder to make the creases in each side.  I wanted the middle part popped up to create a handle when I glued it to the bottom piece.  I also put the fussy cut butterflies top and bottom of the handle and really covered them with Glossy Accents.  Be sure and set things aside that you use heavy coats of Glossy Accents on (overnight is best) to allow for maximum drying time and less stressful moments of wishing you hadn't touched it yet!


Front inside cover sports a slotted angle pocket for mats.  You'll see the whole process including more photos on the video below, I hope you'll join me.


Supplies from Meg's Garden - - -


Monday, September 1, 2014

SaCrafters GDT - Framed!

a SaCrafters Guest Design Team Project

Hi Everyone!  I'm here with another Guest Design Team project for SaCrafters Zibbet Store.  If you've not visited her store yet you're missing out!  She has everything you could possibly want to make cut either from wood or chipboard, prices are fantastic and quality exceptional.  So go visit her today and don't forget for all my visitors Sa is offering a 5% discount when you spend $30 - just enter the discount code PATTIFANS


I wanted to make this set of frames for my youngest Granddaughter Brynnie, she's having her 5th birthday real soon and I thought the two picture frames, in pink and purple of course would look cute on her bedroom walls.


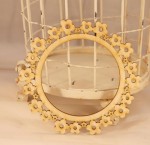
Here's a photo of Brynnie and I when she and Mommy came to visit last year.  The frames were painted with a coat of Martha Stewart multi-surface satin acrylic in Summer Linen.  After that I used a combination of Silks Acrylic Glaze in Pink Anthurium and Grapefruit topping the hearts with Stickles, glitter and Glossy Accents.  Bordering around the photo is a row of the Scallop Flower Trim from Sa's store, I tinted it a light pink.  I added a glittered Fairy and Butterfly also wooden pieces from the store.


It's hard to get a good photo to share with you what this looks like hanging, but this will give you a rough idea.  I took several different ribbons and fibers and tied some beads, a heart and a charm onto them at various lengths.  I thought it would look nice hanging down from the frame giving it almost a dream-catcher look.


Here's a photo of Brynnie and her Mommy, my youngest, Amber.  The second frame, the flowers, is the one I'll walk you through the start to finish process on the video.    The flat back pearls (from the store) were colored with a purple Copic marker.  I love things that are white you can change them up to match any project you're making!  


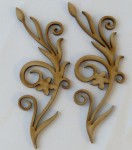
I used a couple of flourishes at the bottom to give this frame a different look and added a word tag saying 'perfect moment' above them.   The flowers are from Recollections and a few of the lace trim flowers from Sa's store were snipped individually to tuck in here and there, I like the addition of the single colored pearl in the middle.


Supplies from Sa's Zibbet Store:

Monday, August 25, 2014

Lace and Lovely - an Altered Notebook

The Piece by Piece Design Team Project

Being on the Design Team for The Piece by Piece is like a little slice of heaven.  I get to play with the most gorgeous laces, trims and embellishments.  Recently I was in JoAnn Fabrics and ran across the end of the season aisle and spotted this notepad.  What drew my attention was the cover was fabric and inside housed a wonderful notepad of Kraft paper, I'm very partial to Kraft.  So I picked it up uncertain when or how I'd use it, just sure that I would.  What I'm sharing today is the transformation of this little notepad into something Lacy and Lovely.

I covered the complete notebook, minus the paper pad and ties, with Gesso, dried it and sprayed liberally with Lindy's Stamp Gang Starburst in Love at First Sight Lavendar.  Next came the fun part figuring out which laces, trims and goodies from The Piece by Piece I wanted to add.  I chose a beautiful Venise lace that measures 5.25" wide for the front of the book letting it hand below the edge on the bottom and pulling in to the inside on the top.  What could be prettier?


Where the two sections of lace met in the middle I added a pale lavender silk ribbon under the lace edges extending it on the right side to tie the book shut.  Using the little flower trim I covered up the open edges.  The book had been tied with a hemp type string which definitely didn't fit now and the perfect choice was to add a second silk ribbon in cream.  I added a couple of candy gem sprays and a dragonfly atop the ribbon bow.  Not wanting large bows on both sides I pulled the knot to the bottom edge, wound the tail of the ribbon around the upper several times hiding the ends of the candy gems.


The main focal point of the front is the cascading candy gems and wheat sprays that tumble from behind this gorgeous resin flower in purple.  Perched on top is the mate to the other dragonfly.


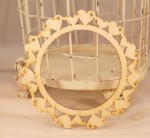
Inside on the back of the front as I said I pulled the top edge of the lace to the inside and glued it in place.  I took a strip of the baby mum lace and cut each flower apart and glued them between the points of the lace.  Using one of Bev's lace frames I created the perfect spot for an extra special photo and of course I added another dragonfly. Under the lace frame I added a piece of acrylic from some discarded packaging, now the photo will slip easily behind and be protected on the front.


The back inside cover houses one lone butterfly (they are called moths in the store but I refuse to  have a moth in my book so I'm bumping him up to butterfly status!)  When I glued the butterfly down I pushed him gently inward to create a little pocket at the top to slip a note or another photo or two into.


The back is a repeat of the font laces with the addition of a carved lace heart from the store which I sprayed gently with the same Lindy's Starburst.  You can't see it here but there is a metal piece on the spine which I changed the color up a bit with Adirondac Alcohol Ink in Eggplant.

If you'd like to see the complete (fast forwarded version) of the designing process please watch the video below, I'll also have a walk through of the completed notebook and additional still photos.


About The Piece by Piece
The Piece by Piece is an art and craft supply store that initially started on Etsy, but has grown and now also exists as a brick & mortar establishment in the Niles district of Fremont, California.  Beverly Ybarra, store owner sources her unique laces, trims and ribbons from all over the world, including France, one of her favorite supply sources. Some of Beverly's favorite local suppliers include Graphic 45 and Prima, so you are sure to find their products on the shelves at TPBP.  For those close to TPBP store in Fremont, each week there is a full list of classes to choose from. 

Shop and Stay in Touch with The Piece by Piece
Shop online at Etsy 
Shop in Fremont, CA:  37485 Niles Blvd, Fremont CA
Phone:  510 894-2488
Email:  thepiecebypiece@gmail.com
Sign-up for our newsletter:  Email
Follow The Piece by Piece on Facebook  
You can find a Complete Class list here

Wednesday, June 4, 2014

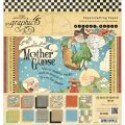
Mother Goose Series - Not a Scrap Left - Picture Frame

Mother Goose Series - Not a Scrap Left - Project 4
A Cut at Home Design Team Project 

Well I'm back with another Mother Goose project, this time I stepped a tad outside my box to use some new mediums I hadn't played with before.  I had bought this frame, which started out as a unfinished wooden frame, pretty plain and dull and altered it into a cute little Mother Goose accessory to a child's room. 

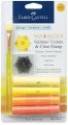
I loved this paper (and it's one of the few full sheets I have left) and thought yellow would be a great color to do all the edges that show.  I found some Lemon and Butter Cream Faber-Castell Gelatos and wondered if they'd do the trick.


I covered all the areas I wanted yellow with Liquitex white Gesso, allowed it to dry and then began coloring with the Gelatos.  Fun fun fun!  I had water near by and dipped my fingertips in it to ease moving the Gelatos around on the wood.  I'm amazed at how it colored and how fast it dried.  I think I'm hooked, gotta play some more with these!


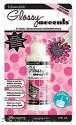
Once everything was dry I used the Twinkle Twinkle paper to cover the front and solid black cardstock to cover the back applying a heavy layer of Aleene's Collage Podge over the top (I used this to glue the paper to the frame as well.)  I fussy cut Mother Goose from the paper, added Collage Podge front and back used Glossy Accents and red Stickles to give her glitz and glam and then used Beacon's Fabri Tac to glue her securely to the frame.  The final touch was the handle to her basket which came from a paper bag I'd gotten at the fruit stand.  Perfect!


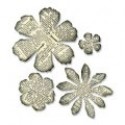
To finish the frame I used a combination of cotton flowers I'd cut from Tim Holtz Alterations Tattered Floral die.  Along with those I tucked in bit and pieces of Petaloo flowers, that's those wonderfully lacy pieces you see.  A few Kaisercraft Sparklets and it's beginning to take shape.  I fussy cut the little Humpty Dumpty, backed him with cardstock, applied a layer of Collage Podge, stuck him to a Tim Holtz memo pin and tucked him in among the flowers.  Finished!

So what do you think?  Do you like how my frame turned out?  If you'd like to see a step by step from unfinished frame to sticking Humpty in the flowers check out my video below.  If you're not a blog follower yet I hope you become one today, and if you have a minute leave me a comment and tell me how you're liking my Mother Goose series.


Supplies