Showing posts with label Christmas. Show all posts

Sunday, September 30, 2018

Authentique's Solitude Christmas Mini Album

a Country Craft Creations design team share

It's so hard to realize that Christmas is in the air, well at least the air of all of us crafty people.  Tammy Merrill from Country Craft Creations sent me the new Authentique Solitude to play with and it just oozes Christmas memories.  


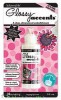
To me it's a very nostalgic collection full of images of Christmas and Holiday's past.  It will be the perfect mini album to house a huge amount of this years Christmas memories. I did a little cutting and pasting of images on the front cover to scoot the girls under the tree limbs and pull the limbs around them like a snowy embrace.  Using ArtDeco Snow Marker, Stickles Icle and Red brought the cover to life.

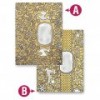
This is a 5"x7" mini with a 3" spine.  It's constructed of medium weight chipboard and covered with Artisan Kraft Cardstock. All edges were inked in Tim Holtz Iced Spruce Distress Ink.  There are 8 pages with many flips and flaps to add to the amount of space housing photos.  This mini was designed so that the receiver could add a multitude of 4"x6" photos.


I'm going to do a few tutorial videos, which will be added to the Authentique Solitude Tutorial Video Series Playlist on my YouTube channel.  I'm not going to walk you through where to glue each paper and embellishment but instead show you how I created the page designs I used.  That way you'll be able to use these designs in any project you so choose.  There is no cost to use my designs I'd just appreciate a shout out and link back to my blog, facebook or youtube.


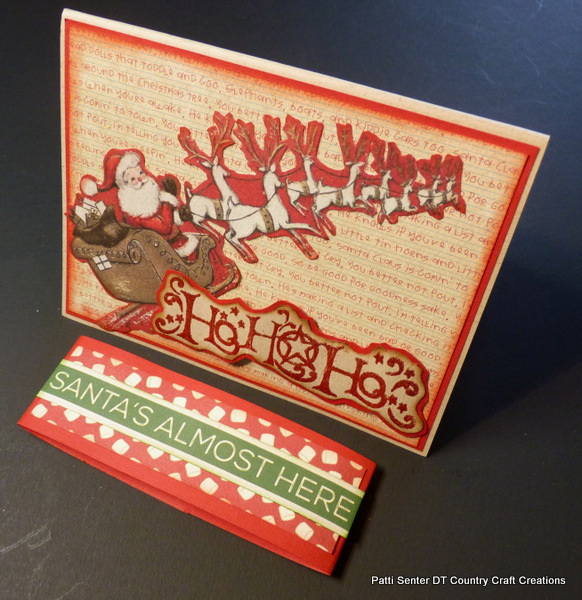
I used a split page design on the page on the right above.  You do this by splitting the hinge in half and adding a swing side pocket to the top and the bottom.  I also included this adorable belly band to slide a mat overtop.  I like using something like this or the stopper on the left page above to keep everything neat and tidy and help pages and photos from escaping the mini.


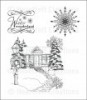
I also included some swing tab closures in this mini in place of magnets.  They keep the pages together and provide a nice visual interest as well, like the little bird above.


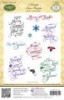
There are lots of mats, tags and a little book or two like the one above tucked here and there.  This allows for many more photos and memories to be added.  Don't forget when you add your photos to add journaling too so generations in the future will know where and who and why you added that photo.


On one of the tutorial videos I'll share how to make this swing out page using the belt loop tabs and a magnet.  Super easy and super fun to do.  Don't you just love the images?


As is usually the problem there is so much to share with you.  I think I'll end with this photo and let you join me on the walk through video which won't share any how tos but will share each page in detail with you.  Thanks so much for stopping by and sharing your time with me! 


Please visit Country Craft Creations here -
you can also join the Facebook group
which will provide you with an unending stream of creativity, tutorials and friendship

Visit me at A Soul's Heartbeat on


Saturday, July 28, 2018

This is it! Christmas in July Crop at Country Craft Creations

Country Craft Creations project share

HO HO HO - Merry Christmas!  

This is it my friends.  Well Merry Christmas in July anyway.  Country Craft Creations has been celebrating their Christmas all day crop long, today, July 28th, 2018, on their Facebook Page, Scrapbookers of Country Craft Creations.  I hope you've signed up for the group so you get  to be a part of not only the crop but this fabulous group of designers and members.  Lots of tutorials (all for free), lots of inspiration (all for free) lots of member participation and sharing (yep again all free).  So check out Scrapbookers of Country Craft Creations!  The crop started at 11 am Mountain Time Saturday July 28th and I'm bringing in the tail end.  The best for last huh?  Hahahaha!


I'm sharing a Christmas Gift Card Holder.  
You'll need these basic supplies -

Scor Board, cutter, bone folder, scissors, etc
Glue - I use Art Glitter Glue but you are free to use your favorite
1 card base color of your choice A2 size 5 1/2" x  4 1/4" (when folded)
Decorative Christmas Paper of your choice with elements you can cut out if you so wish
Solid Cardstock to match your collection paper I'm using Artisan Red
Stickles or something to make glittery areas
Embossing ink, powder and gun - optional

Here's the video tutorial, Have fun, be creative and I hope you've enjoyed Christmas in July at Scrapbookers of Country Craft Creations 


Please visit Country Craft Creations here -
you can also join the Facebook groups

Visit me at A Soul's Heartbeat on

Monday, July 23, 2018

Christmas in July Crop at Country Craft Creations

a Country Craft Creations project share

HO HO HO - Merry Christmas!  Well Merry Christmas in July anyway.  Country Craft Creations is celebrating Christmas with an all day crop July 28th, 2018, on their Facebook Page, Scrapbookers of Country Craft Creations.  You want to be a part of not only the crop but this fabulous group of designers and members.  Lots of tutorials (all for free), lots of inspiration (all for free) lots of member participation and sharing (yep again all free).  So check out Scrapbookers of Country Craft Creations today!  The crop will start at 11 am Mountain Standard Time Saturday July 28th but don't wait until then to join!

There's going to be a lot of activity all throughout the day with challenges to keep your scrapping fingers active, and yes I'm participating.  I'll have a video tutorial for one of the challenges, right here on my blog and on YouTube.  Tamra, owner of Country Craft Creations, will announce the time and activities over at the  Scrapbookers of Country Craft Creations Facebook group throughout the day.  So my thought is, you want to be a member NOW so you don't miss out.  

Oh yes, did I forget to tell you????  Their are PRIZES, and PRIZES and oh yes, did I mention PRIZES you can win!!!  Stay tuned more will be posted on this blog post on Saturday!!  But I couldn't leave you without a little sneak peak now could I????

For my project you will need basic supplies
Scor Board, cutter, bone folder, scissors, etc
Glue - I use Art Glitter Glue but you are free to use your favorite
1 card base color of your choice A2 size 5 1/2" x  4 1/4" (when folded)
Decorative Christmas Paper of your choice with elements you can cut out if you so wish
Solid Cardstock to match your collection paper I'm using Artisan Red
Stickles or something to make glittery areas
Embossing ink, powder and gun - optional


Please visit Country Craft Creations here -
you can also join the Facebook groups

 Visit me at A Soul's Heartbeat on

Sunday, July 15, 2018

Side Swing Mini using Authentique's Jingle Collection

a Country Craft Creations Design Team Prochject

It's always fun to create something new and fresh that no one else has done.  Today I'm introducing my new Side Swing Mini.  It's an 8" square mini with the front split into two sections each 4"x8" which swing in opposite directions to open.


I will be uploading a compete tutorial playlist walking you through the construction of the Side Swing Mini along with decorating each of the pages.  This mini incorporates two hinges one on each of the mini sides.  The hinges are 2" wide and house 3 pages.  The pages alternate side to side on top of one another.  


I've added 3 waterfalls to this mini, two are horizontal and one vertical  The horizontal ones will house 3"x4" photos 7 if you only use the one side double if you use both.  All three close with a magnetic strap. The vertical waterfall houses slightly smaller photos and has 4 flaps and the base photo mat.


This mini has lots of pockets holding mini booklets to showcase your photos.  The collection has darling cut aparts and elements to make your pages pop with Christmas happiness.


I used Artisan red cardstock for the base of the book (along with medium weight chipboard for the book construction).  The red is a great compliment to the colors in the collection.  I also used some Artisan Kraft and the green from the older 6" pad of Graphic 45's Patterns and Solids from the Home Sweet Home collection that was gifted to me from my friend Cheryl.


I'm not a good Washi tape user but my friend Paula had gifted me a roll of red glitter Washi tape some time ago and it was perfect to give some sparkle here and there.  I must admit I erred on the side of caution and glued them as well with my trusty Art Glitter Glue (also available in the CCC store).


If you've followed my projects for a while you know I like to see if I can use up the collection.  This time I have to share I even used (a lot) of the Jingle cover sheet which has the small pics of all the papers).  The Jingle above is from the header on that cover sheet, it made a perfect flag pennant for this page along with some mini clothes pins in red and green.  The  horizontal flag with the sentiment is the topper on each of the collections papers.  I use those quite often as well.

I hope you'll join me on the video for a complete walk through of this video. Thanks so much for stopping by my blog today, see you on the video.


The complete series sharing how to make this mini 
from start to finish is on 
the video playlist link below.
(I am in the process of uploading videos daily, please be patient I will get them all there ASAP.)

Video Tutorial Playlist

Please visit Country Craft Creations here -
you can also join the Facebook groups

Visit me at A Soul's Heartbeat on


Thursday, December 19, 2013

Holiday Favors

I've hung my Christmas favor on my Nutcrackers arm, wouldn't you love to add this little Holiday favor to your Christmas table?  Put a name inside to simplify your seating arrangement or add a collection of candies and nuts for the recipent to take home with them. However you use them, they're sure to be a hit with all your Holiday Guests.
Using Brenda Walton's BigZ die, Faceted Cone by Sizzix you can create Holiday favors 
for many occasions and Holidays throughout the coming year.

Perhaps New Years:
Include some Holiday Resolutions or Fortunes in the cone
for all your New Year's revelers.  

Don't have the die on hand and can't complete these in time for Christmas or New Years?
Then move on to Valentines Day and surprise some
lovely people in your life with a sweetheart favor
Just the right size to stick in 
some truffles, a gift card, or
a note of love and passion :-)
How about a baby shower favor.
Wouldn't these be darling filled with mints and nuts?
Or perhaps you could use this for the
door prize, give each shower guest one as they come through the door
and have a message inside saying they've won the prize

There are occasions of all kinds, Wedding, Birthday, Anniversary
May Day, 4th of July and the list goes on and on.
By altering the paper and embellishments this one die can get you
through a year of Seasons and Events. 


Christmas is almost here, enjoy the spirit, may it put a twinkle in your eye and a warmth in your heart that carries over into the New Year.  I feel very blessed to have all of you, my crafty friends in Cyber Space, to share my passion with.  
May your New Year be the best year yet!  
Hugs, Patti

Supplies Used:

From my Stash: Decorative paper, embellishments, hot glue, stickles, feathers, flowers, bling

Wednesday, November 6, 2013

Altered Laughing Cow Christmas Boxes

A Cut@Home Design Team Project

Do you ever go to toss an empty container and think wow I could make this or that with it?  That's how I've felt everytime I've tossed one of these Laughing Cow cheese containers.  So I decided it must STOP now!  So I altered them into some snazzy Christmas boxes to have on hand for neighbors, drop ins or those last minute 'gotta have' gifts.  What an absolutely perfect gift card holder these will be!  Or maybe some sweet chocolate wafers?  Just a little something to say, have a Merry Merry and a Happy Happy. It doesn't have to be a round Laughing Cow container, how about those empty boxes your Xyron refills come in?  Or the last little packing box you tossed out?  You'll be looking at your garbage in a whole new way!!! 
I used Heartfelt Creations Frosty Blanket paper pad to alter my boxes, and yes the one on the right did grow a tad, that's because it was a RAK from a friend and is actually a brown cardboard box that you can buy from a local crafty place like Michaels or Hobby Lobbby.  I wanted to give those non Laughing Cow eaters an option they could use as well.  
I was lucky enough to have some Lindy's Stamp Gang Moon Shadow Mist in Bucket of Blood on hand (now that's a mouthful isn't it? wouldn't you love to sit in on the product naming sessions at Lindy's?   what a hoot that would be!)  This is a great mist, it has brown undertones in the red with a gorgeous glimmer of gold dust.  
Some of the papers have these gorgeous flowers printed on them, for a few tips and tricks to get them to look 3D check out my video below.  The centers are from Prima's Say it in Pearls.  Again I used the Lindy's mist on these.
I also wanted to play with my new Tim Holtz Alterations die, Tattered Poinsettia from Sizzix.  OMG I love this die, it's going straight to the top of my favs list, you must must must have it in your collection. I used another of the papers for the flower (and I used more than one cut of it, even tucking in individual petals in here and there to give it a fuller look).  The little add on paper embellishments were from last years City Sidewalks collection.  The lace is a RAK from my friend Julie (thanks Julie I love the laces). 
So what can I say?  Start hunting through your trash today (Oh heaven's don't do that, lol) instead look at those cute little boxes you sometimes trash a different way and see if you can come up with some great altered 'gotta have' gift boxes of your own.


Supplies:

Wednesday, October 9, 2013

White on White Reindeer Cards


A Design Team Project for Cut@Home.  How often have you done a monochromatic card?  I always seem to shy away from them and yet I love the elegant look they produce.  When Cut@Home sent me the Spellbinders Reindeer Magic Embossing folder I knew right away I wanted to do a White on White card. 
I was pleasantly surprised at how easily they came together and how great they looked when finished. Coloring the reindeer just gave that pop to the front. 
I used several different mediums for the reindeer, trying them to see if I had a preference.  Magicals from Lindy's Stamp Gang, Perfect Pearls from Ranger and Twinkling H20s by Creative Imaginations.  I think my favorite was Lindy's for the shimmer and coverage, but you try a few and see what you think.
Cutting the aperture was easy peasy with the Spellbinders Labels 31, it's a perfect fit.  A good hint, line your embossed mat and your card front together, secure them so they don't shift with a little washi tape and then cut your label die through both layers at the same time, that way you'll have a perfect match to line up the layers.
You can do the inside with either a simple sentiment as shown above
Or
with an embossed image as shown below
(I used Heartfelt Creations Winter Season Stamp embossed with Lindy's Queen Sheba powder)
I kept all the 'additions' to the cards in silver
Any way you do it you're sure to end up with gorgeous Christmas cards sure to dazzle your friends and family.  For hints and tips and additional photos check out my video below.


Supplies Used:
http://www.ucutathome.com/store/cat/Spellbinders/id/11