Showing posts with label Penny Black. Show all posts

Thursday, March 31, 2016

Simply Playing With Blooms

A Cut at Home Design Team Project


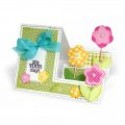
Today I'm sharing four cards I've made using Penny Black's All Abloom stamp set.  I love this set of stamps!  I wanted to see if there was a method to coloring that I like best so I tried my Chameleon Markers, coloring with a paintbrush and Tim Holtz Distress Inks and doing a direct-to-paper with the Distress Inks. I found out there wasn't one I liked 'best' I liked all the methods for the different results they provided.  I'm sharing only a sneak peek of the cards you can find the full blog post on the Cut at Home blog post here.

Please join me on the video where I'll share my stamping/coloring methods, the products I used and more photos to inspire you to pick up your stamps, inks and markers and just have fun.


Supplies from the Cut at Home Store:
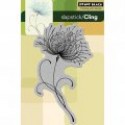
30-325: Penny Black All Abloom Transparent Stamps
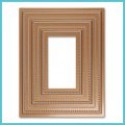
DF3424: Marianne Design Pearls Design Embossing Folder
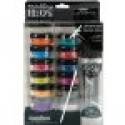
CT2201: Chameleon Markers Deluxe set of 22 Markers
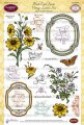
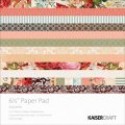
HCDP1-244: Heartfelt Creations Arianna Blooms Paper Collection
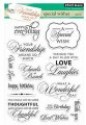
LF844: Lawn Fawn Scripty Sayings
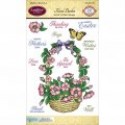
30-162: Penny Black Eloquence Transparent Stamps
TIM27195: Tim Holtz Distress Ink – Victorian Velvet
TIM20240: Tim Holtz Distress Ink – Tattered Rose
TIM27164: Tim Holtz Distress Ink – Spun Sugar
TIM20233: Tim Holtz Distress Ink – Peeled Paint
SCP-014: Spellbinders Celebra’tions Cuddle Cream Cardstock
SCI-001: Spellbinders Celebra’tions Berry Black Ink
TIM27201: Tim Holtz Distress Ink – Wild Honey
TIM43225: Tim Holtz Distress Ink – Fossilized Amber
TIM21483: Tim Holtz Distress Ink – Scattered Straw
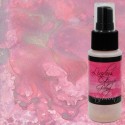
Supplies from my stash: Tattered Angels Glimmer Mist in Iridescent Gold and Dazzling Diamonds; Double sided tape, 3m Foam Tape, small pearls, Ivy Hollow Scrap Fusion adhesive; Seam binding; Crochet thread; Sharpie fine line detail pen; Martha Stewart Cathedral Lace Edge Punch; Canson Cold Press Water color paper.

Thursday, June 11, 2015

Dreamy Cards

a Cut at Home Design Team Project


Penny Black couldn't have picked a better name for her stamp than Dreamy, that's just what it is, dreamy and you feel like it's blowin' in the wind.  I've loved it since the first moment I saw it and was so happy when I was finally able to sit down and play.


I have four cards to share, three I had completed the fourth I'll do with you on the video.  I am so in love with the new Tim Holtz Distress inks and used them on today's cards.  Seeing how the distress ink and watercolor paper react just makes me happy and I seem to be using it a lot lately.  I know I'm way behind the times and these techniques have been out for a long time but we crafters each discover our new loves at different times and right now mine is Distress ink and Watercolor paper.


I went back and searched through my stamps and found a couple sets from JustRite Stampers that worked so well with the colors I was using.  I'll list all my supplies right below the video below.

I'm so glad you stopped by, I'd love for you to leave a comment or join my blog.  Don't forget the video is really where you want to go next for I'll share the making of one card from start to finish, lots more photos and any tips I could think of while in the process.  


Supplies


Thursday, December 18, 2014

A Little Bird

a Cut at Home Design Team Project

It's hard having birthdays in December, I know because both mine and my sons are in December but even harder is when it falls on a big day.  My Brother-in-Laws isget left in the dark.  I always try to make a special card for my BIL and this year I think I've found a winner.


Penny Black has this stinkin' cute stamp set called A Little Bird, isn't it just a kick?  I added a few misplaced feathers from the bird and a couple of googly eyes to the kitty.  I think it's so adorable.  

You can check out my video for a complete step by step.


and for inspiration a few more paper and color changes


Wednesday, October 29, 2014

Combining Bo Bunny Stencils and Penny Black Penquins

a Cut at Home Design Team Project

Don't you love trying new things?  I sure do!  Bo Bunny introduced a new product to their line which Cut at Home is now stocking, Stickable Stencils.  That's right stencils that you can stick down and pull up.


Cool huh!  There are four 12x12 sets one of which is shown above.  I got all but the alphas and so far am extremely happy with them.  I'll share lots on the video below showing how they come packaged, how to remove and clean them, and of course ideas using different mediums with them.


Now here I had these great examples and knew I had to get creative so I married the stencils with Penny Black's Let's Chill Stamps and the cards above are the result.  Yes, I had a ball with these and so can you.  Check the store out today and get some new stencils and stamps to have fun in your crafty space too.  


Supplies I used


Thursday, May 22, 2014

JustRite Stampers Coffee Cup Cards

a Cut at Home Design Team Project


Today I'm sharing a pair of cards using JustRite Stampers Coffee Cup Stamp set and on the front their Vintage Labels Five to create the stacked cup effect.  By using 3 of the 4 dies and then using a single layer of foam on the second layer and a double layer of foam the large outer layer you get this great dimensional element for effect. 

I used my water brush and various Tim Holtz distress inks to paint the cup and saucer onto Strathmore Watercolor paper, 90# (190 gsm).  This was a pad of paper I'd gotten for an art class and it was gathering dust in the craft closet.  Wonderful weight and feel to make a card with!  


I have a real thing about finishing the inside of my cards, it just makes me happy.  I used Kaisercraft's Storyteller 6 1/2" paper pad to do the matting on the front and inside. To mat my sentiment (Penny Black's Special Wishes stamp set) I used JustRite's Vintage Labels Six Dies and finished the side off with a flourish cut from Marianne Designs Vintage Swirls.  


What do you think of my stencil work?  Looks just like the Vintage Swirls doesn't it?  I took the negative space that remained when I cut my flourishes out and pounced some ColorBox Craft ink through the openings to create these gorgeous stencils here and a single one on the back.  I cut the flourishes with the leftovers from the card base so it's that same luscious watercolor paper and quite substantial so I think it will hold up to many future uses.  So STOP.... don't throw those negative spaces away stick them back to create your own stencils!

I hope you liked my cards and will give these dies and stamps a try.  I'll show you a step by step of how to make the other card (shown in the first photo above) in my video below.  I'd also like to give a shout out and special thanks to fellow YouTuber Zroby Sama for sharing her video Stamping with Spellbinders Dies. I'll share this technique with you in the video.


Thanks for sharing your time with me, I hope you'll subscribe to my blog, check out my other videos on YouTube and  visit A Soul's Heartbeat on Facebook!

~~~~SUPPLIES~~~~