Wednesday, August 27, 2014

LIttle B Dies - How I Love Them!

A Cut at Home Design Team Project


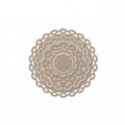
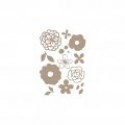
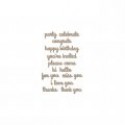
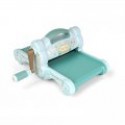
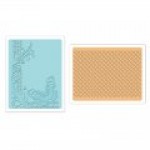
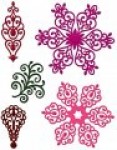
This week I'm sharing a few tidbits about Little B Dies. They were new to me and I thought perhaps they might also be new to you.  I've made up a sample card using the Dies I have so you can see how beautifully they cut and emboss.


Take a look at my video for an in depth look at the dies & packaging along with more photos of my card.


Supplies:

InLinkz Project Manager account expired

Monday, August 25, 2014

Lace and Lovely - an Altered Notebook

The Piece by Piece Design Team Project

Being on the Design Team for The Piece by Piece is like a little slice of heaven.  I get to play with the most gorgeous laces, trims and embellishments.  Recently I was in JoAnn Fabrics and ran across the end of the season aisle and spotted this notepad.  What drew my attention was the cover was fabric and inside housed a wonderful notepad of Kraft paper, I'm very partial to Kraft.  So I picked it up uncertain when or how I'd use it, just sure that I would.  What I'm sharing today is the transformation of this little notepad into something Lacy and Lovely.

I covered the complete notebook, minus the paper pad and ties, with Gesso, dried it and sprayed liberally with Lindy's Stamp Gang Starburst in Love at First Sight Lavendar.  Next came the fun part figuring out which laces, trims and goodies from The Piece by Piece I wanted to add.  I chose a beautiful Venise lace that measures 5.25" wide for the front of the book letting it hand below the edge on the bottom and pulling in to the inside on the top.  What could be prettier?


Where the two sections of lace met in the middle I added a pale lavender silk ribbon under the lace edges extending it on the right side to tie the book shut.  Using the little flower trim I covered up the open edges.  The book had been tied with a hemp type string which definitely didn't fit now and the perfect choice was to add a second silk ribbon in cream.  I added a couple of candy gem sprays and a dragonfly atop the ribbon bow.  Not wanting large bows on both sides I pulled the knot to the bottom edge, wound the tail of the ribbon around the upper several times hiding the ends of the candy gems.


The main focal point of the front is the cascading candy gems and wheat sprays that tumble from behind this gorgeous resin flower in purple.  Perched on top is the mate to the other dragonfly.


Inside on the back of the front as I said I pulled the top edge of the lace to the inside and glued it in place.  I took a strip of the baby mum lace and cut each flower apart and glued them between the points of the lace.  Using one of Bev's lace frames I created the perfect spot for an extra special photo and of course I added another dragonfly. Under the lace frame I added a piece of acrylic from some discarded packaging, now the photo will slip easily behind and be protected on the front.


The back inside cover houses one lone butterfly (they are called moths in the store but I refuse to  have a moth in my book so I'm bumping him up to butterfly status!)  When I glued the butterfly down I pushed him gently inward to create a little pocket at the top to slip a note or another photo or two into.


The back is a repeat of the font laces with the addition of a carved lace heart from the store which I sprayed gently with the same Lindy's Starburst.  You can't see it here but there is a metal piece on the spine which I changed the color up a bit with Adirondac Alcohol Ink in Eggplant.

If you'd like to see the complete (fast forwarded version) of the designing process please watch the video below, I'll also have a walk through of the completed notebook and additional still photos.


About The Piece by Piece
The Piece by Piece is an art and craft supply store that initially started on Etsy, but has grown and now also exists as a brick & mortar establishment in the Niles district of Fremont, California.  Beverly Ybarra, store owner sources her unique laces, trims and ribbons from all over the world, including France, one of her favorite supply sources. Some of Beverly's favorite local suppliers include Graphic 45 and Prima, so you are sure to find their products on the shelves at TPBP.  For those close to TPBP store in Fremont, each week there is a full list of classes to choose from. 

Shop and Stay in Touch with The Piece by Piece
Shop online at Etsy 
Shop in Fremont, CA:  37485 Niles Blvd, Fremont CA
Phone:  510 894-2488
Email:  thepiecebypiece@gmail.com
Sign-up for our newsletter:  Email
Follow The Piece by Piece on Facebook  
You can find a Complete Class list here

Saturday, August 23, 2014

Sharing a Viewer's Project

Viewer's Project

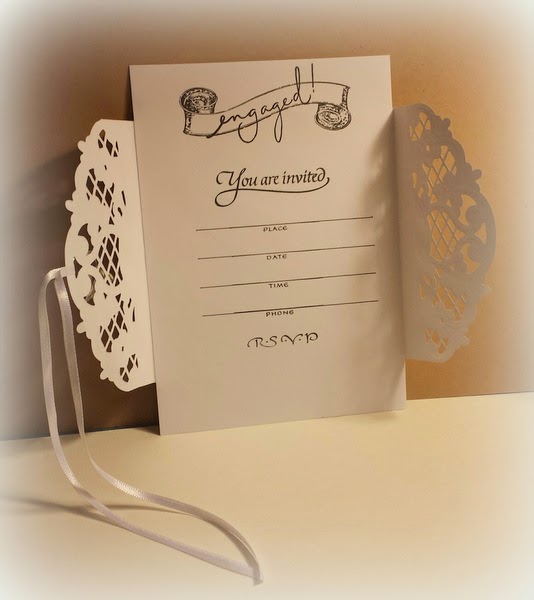
I just love when something I make inspires a viewer to make it as well.  A short time back I received a nice email from Eve with a couple of photos of the card she made fashioned after my Marianne Design Creatable Card post and video I'd done back in May.


Eve did this fantastic invitation to a friend's daughter's engagement party.
How beautiful is this!


Eve used the stamp 'You Are Invited' from Rubbersole.com (A C Moore) for the inside.
Now don't you think this makes just the perfect invitation
or announcement card?

Eve doesn't have YouTube or a blog and I didn't want her creativity to go unnoticed. 
If you want to leave her a little praise her I'll be sure she gets it.

Thanks everyone for stopping by!  Patti


Wednesday, August 20, 2014

Spellbinders Celebra'tions Just Because Cards

a Cut at Home Design Team Project


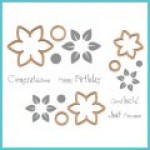
Lately I've seen a lot of trending about using an image multiple times on your project as the focal point.  That's what I've done here with Spellbinders Celebra'tions Just Because dies and stamps.


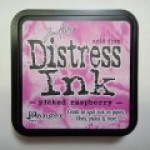
I placed all 3 petal sizes of the flower stamps on my Fiskars stamp press together and inked them heavily with Tim Holtz Distress ink in Picked Raspberry.  Then instead of stamping just one time I stamped 3 times not reinking between impressions.  You can see the variances in the depth of color between the three flowers.  


By using three flowers this way on an A2 size card (4 1/4" x 5 1/2") you've just about covered the main portion of your front, add a banner with a sentiment from the Just Because set, a few accents and several mats and your card is done.


Check out my video as I show and share how I created
the cards above and of course more photos to 
inspire you to create your own cards.


Supplies I used:

InLinkz Project Manager account expired

Saturday, August 16, 2014

RAK - from Bunny Bow (Manuela)

If you're like me you often just wander your YouTube channels looking for something that captures your eye.  It might be the style or technique, the personality of the maker or just the color combos used.  But often times something grabs you and pulls you in.  I was doing that a couple months back and found a subbie's channel Bunny Bow

I was watching a video that she'd posted which she'd called Scrapbook 6 - Steampunk. I liked the way Manuela had made her papers so I shot her off an email asking where she gotten them or how she'd done them.  I also loved the closures she'd used.  

It wasn't long after a return email came with a great description of how she had inked and stained the papers to give the Steampunk effect in her book.  She also asked for my address so she could send me a couple of samples to see along with a couple of samples of the closure.  Manuela has a tailor/sewing shop and makes a lot of her own laces with her Bernina Artista Machine.  Clever clever lady.   (Right now she's not shipping internationally because of fees and shipping costs)

As any good addicted crafter would do I replied with my full name and address.  Well what she hadn't told me at the time, and I didn't realize, is that she lives outside of Zurich Switzerland!  It took quite a few weeks for the package to arrive and let me tell you it wasn't just a little sample of her paper and a closure or two it was a whole little package of love sent just to me.  I was doing the Happy Dance!


She sent these gems she'd colored


Samples of her papers she'd stained and embossed


and pieces of lace (including the white in the photo above)
that she'd made, yes that's right, she made on her Bernina Artista machine!
I told you this was one clever lady!


There was also handful of little metal goodies like these 
scattered among the lace

So my crafty friends please show Manuela some love,
pop over to her YouTube and subscribe
and tell her Patti says hi!

Manuela's YouTube Channel - Bunny Bow 
and her shop - Manufkatur Ott


And just one final thought, I've said it before and I'll probably say it many times going forward.  If you have questions when you watch YouTube or check out a blog post drop the creator a note.  There is nothing more satisfying than to open your email and see someone really liked your stuff well enough to ask 'How'd you do that'.  New friends are born everyday from all parts of the globe because someone took the time to ask 'How' or to leave the words 'Good job!' 

Happy Crafting everyone!  Patti 


.

Wednesday, August 13, 2014

Heartfelt Creations Arianna Blooms Flowers

a Cut at Home Design Team Project


Today I want to share another of my passions with you, creating flowers from stamps and dies.  The flowers shown above were all made with Heartfelt Creations Arianna Blooms and Lace dies and stamps.  I'm in love, how about you?


The end result of your flowers is hampered only by time and your imagination.  So share a little time with me and see how easy and rewarding it is to make your own custom flowers to fit any paper collection and any project you might have.


The look of your flower is changed by the way you shape and bend the petals.  I used the McGill flower tools but Cut at Home has a marvelous set you really should check out by Susan's Garden.  If you dampen the petal, pleat them and then let them dry before you unfold them you'll get the look of the larger cream and black flower shown above. Curve the petals downward with the ball stylus and you'll achieve the look of the pink flower on the left.  


Simply changing the color or weight of the paper also affects the finished look of the flower.  I love adding these beautiful lace elements cut from the Arianna Lace die, it just gives a beautiful lacy layer for your flower to rest upon.


Join me now on the video and I'll show you how I created the flowers above.  Plus I'll include many more photos to inspire and spark your own creative flow.

Supplies I used from the Cut at Home store:


InLinkz Project Manager account expired

Thursday, August 7, 2014

Little Girl Dress Mini Album

a SaCrafters Guest Design Team Project


Well what can I say?  I must still be a little girl at heart and loved playing paper doll dress up with this darling little girls dress chipboard mini album from SaCrafters.  It was such a fun time putting all these dresses together.


Each chipboard dress was not only covered in a decorative paper but I also made 3 different pinafores/aprons to choose from to not only add appeal to each page but also double the amount of space for photos.


Here's the inside the top will hold a 4"x6" photo and the bottom unties and 
unfolds with spots for 22 - YES you read that right 22! 3.5" square photos!


I combined papers from Prima's Divine A7 paper pad, which was in my DT package from Sa and American Crafts Dear Lizzy Neapolitan collection which I had picked up from a Tuesday Morning last year. 


I have to tell you this was one of the most enjoyable mini's I've made, it just made me happy to see these little dresses take shape.  I tried to allow for spots for large 4"x6" photos whenever possible.  Adding the pinafores/aprons really was a nifty solution to expanding the number of photos that this mini will accommodate.  As you'll see most of the pages sport a pocket of some sort which allows photos or mini foldouts to be tucked in.

I hope you'll visit Sa's store, I loved the little mini, the wonderful flat back pearls, the first I've ever used.  The 6" wide rose lace was wonderful, I just trimmed it to fit the bodice like in the photo below.


Please check out the video below as I walk you through each page, give you ideas as to how and why I did certain things and end with a complete photo shoot of each page with highlights of areas I think you'll enjoy a close up of.

Sa is offering a 5% discount when you spend $30.00 or more
Please use the discount code PATTIFANS


Please visit SaCrafters

Supplies:

InLinkz Project Manager account expired