a Cut at Home Design Team Project
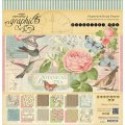
As you know if you read my last DT post I have a new box of goodies I've been drooling over. There were lots of new Spellbinders dies (thank you Cut At Home!!) So I put four of them to good use on the card above. Do you like it? I'm loving the new Graphic 45 Botanical Tea Collection, that's the paper I used for the die cuts along with this yummy rose solid from Core'dinations.
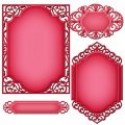
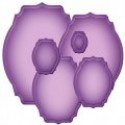
I started with the Spellbinders Divine Eloquence and used two of the dies to cut the frame with an opening. Next I used the Spellbinders Labels 36 to cut the opening in the card base (check out my video below it will show your step-by-step how to cut and assemble the card). By the way the card is a basic A2 size, 4 1/4" x 5 1/2" when folded and on this one I used a cream colored cardstock.
Using the Spellbinders Expandable Pattern die, Crisscross, I cut and trimmed a piece of the rose color solid to fit the frame and glued the two together. To pop it off the card base I used foam squares cut into small pieces, you just need to make sure that the foam doesn't show through on the inside.
Here's a look at the inside where I used a piece cut from the Divine Eloquence die and then used the small die in the Spellbinders Die D-Lites Outrageous Butterfly to finish off the straight edges top and bottom. Now tell me would you know this isn't how it was suppose to look?? The sticker with the bird on it is from the paper Collection as well.
To finish the front I cut the butterfly from the Outrageous Butterfly and covered it with the clear Wink of Stella, if you do this on a paper towel before you place it on the card it's so much easier you don't have to worry about getting it where you don't want it. I used clear glue dots, the real small ones to adhere the butterfly to the card, I didn't want them to show on the inside. To give the butterfly that floating look I stacked three glue dots together and placed them under the body and curled the right side under. The final touch was adding the teardrop pearl for the butterfly body and a few flat back pearls inside and out.
Check out my video to see the start to finish and as usual an additional card made from the scraps left over on my desk. Thanks for watching, I'd love if you'd subscribe and leave a comment!
Patti
Supplies




1 comment:
Beautiful card Patti. Love the die.
Post a Comment