Recently I placed an order for some spices online and when it arrived it came in this bright, shiny, yellow box. I think I was more excited over the box than what was in it. From the first moment I knew I was going to have to alter that box into something fun and useable.
I know, I know, I throw you that great tease and then what do I do just give you this little snippet of a photo. But you can already see the fantastic effet the High Impact Aqua paint made over the shiny yellow of the original box! Pretty cool huh? I'd love for you to pop on over to the Canvas Corp Brands Blog and take a look at the complete project.
Not only is there the transformed box but also the cutest little mini tucked neatly inside. You're going to love how I've used the Architextures Collection to make this mini!
As always I've added a video to the mix, a complete walk through of the box and mini. But wait! This time I'm sharing a playlist of three videos, two are process videos, how to alter the box and how to make the mini so if you'd like to replicate my idea with any box you have lying around this will give you great food for thought. The entire Playlist can be found here Upcycled Box & Mini Playlist
Please check out the complete blog post - Upcycled Box and MIni Book using Architextures Collection over on the Canvas Corp Brands Blog.
From my Stash – Artisan Cardstock – Black; Black cording/twine; Versamark Ink; Clear embossing powder; Art Glitter Glue; Kraft Tex – Black; Glossy Accents; Wink of Stella; Metal Rose embellishment; Aleene’s Collage Podge
Tools I used – Fiskars Cutter; Martha Stewart Scor Board; Bone Folder; WRMK pokey tool; Large Eyed long needle
What to do, what to do, when you have leftovers. My biggest suggestion, hint, observation is never ever nicely store them away!! Why??? Because I've found my nicely stored scraps most times stay that way, nicely stored away never to be popped out to play with again. Now of course this isn't always the case. BUT!, if you keep the scraps on your worksurface after your main project is done and just keep playing you'll end up, often times, with scads of projects and often a dozen or more cards.
Here's my first set of leftovers. My niece called one day from Crafter's Warehouse, a local store here in the SW Washington area. She said Aunty they have this set of 5 Kraft things for around $4 do you want one? Nope, get me two. And now I'm kicking myself because the 3rd set had some broken snaps and I told her no don't get that one, duh, what was I thinking? It's so rewarding to find a 'super buy' and watch it transform with paper, paint and embellishments into a gift or card you'd be proud to share with anyone. That's how I feel about these three items. Of course it never hurts to begin the process with a gorgeous paper collection like this one from Graphic 45 called Midnight Masquerade.
This set consisted of the three items here plus a large box (perfect for housing stamps, dies or embossing folders, watch for it a little later since I'm not sure how I'm altering them - I have 2) and a magazine holder which I always use to hold my 8 1/2 x 11" paper. I used Tim Holtz Distress Paint in Wilted Violet to paint everything before adding the papers and pretties. I did remove the front and back covers, painted all the edges, covered them with my main paper and then gently replaced them in the binding. Worked great.
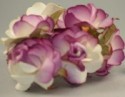
Tammy Merrill shared this lovely collection with me so that I could play. She also had sent a gorgeous set of Petaloo flowers called teal Dahlias. Whenever I start with my leftovers I start searching my crafty spaces (of which there are many) for things that have the same color tones or things that I think would enhance what I'm playing with. I found another set of Petaloo flowers that were perfect to accompany the teal ones Tammy sent. These had hints of purple along with teal excellent for my cluster on the front of the notebook.
Also in the set of flowers was this one, well you tell me was this not the perfect headdress for this dancer? It complemented her outfit perfectly. Since I had two sheets of this paper I fussy cut this lady from the second paper popped her several times on light weight chipboard (fussy cutting each time) and then I inked the edges with a black marker. I find this helps the chipboard piece pop, almost like it has a heavy shadow around.
The second item was this little 4 1/2" square box. These items were all covered in Kraft which is easy to alter and my Wilted Violet paint did the trick perfectly. I covered the box with paper then added two pieces of black lace and then added the cut apart on top. The cut apart has a purple mat and black chipboard to pop it up above the lace. I used 3D Crystal Lacquer for the lady and gent on the top of the cut apart. I also fussy cut another flower to pop above the main sheet. Adding these simple elements gives the finished project a lot more dimension.
Here's a peek inside the box. The notesheets were included I simply tied a piece of colored seam binding into a bow around them. Country Craft Creations has almost any color of seam binding you could possibly want in the store. The lid has been lined with a purple paper from the collection, you can see there how perfectly the Wilted Violet paint matches it.
Using one of the chipboard pieces from the Decorative Chipboard package along with two embossed Embossabilty embellishments finished the inside of the lid.
I found, for myself, it was easier to put a glop of paint on my craft mat and spritz it with a little water applying it to the Kraft items with a brush.
The final item was this little pop up box. It came flat and the inside bottom popped down to create the box. I covered inside and out with papers from the collection and also again used the Wilted Violet to paint the exposed Kraft edges. This box is 4" tall and each side measures about 3". A great size to hold pens or pencils, fill with candy, add a small vase of flowers.
I always try to check out the close out bins and areas at the stores I'm shopping at. Even the local grocery stores have promotional, seasonal, items that close out at large discounts. It doesn't matter if it's red, white and blue for the 4th of July or red and green for Christmas, once you grab your paints, mists or whatever you can change it up to whatever you want. So look beyond what you see to what it might be. Have fun everyone and enjoy your crafting time,
Well I dove into my first Craftology box and since I NEVER have enough birthday card it just made sense that would be my first choice. I used black Book Box from Graphic 45 to house the cards, perhaps it will make a nice gift for someone. There's a video at the end of this post that will walk you through all the cards and give you lots of idea to make your own. If you aren't familar with what Craftology boxes are it's a monthly subscription from Country Craft Creations loaded with all kinds of goodies to play with.
I had to incorporate one of the Art Impressions Vintage stamped and paper pieced ladies into the top of my box, she's perfect here whipping up her birthday cake don't you think?
I stacked some of the paper petals that were included in the Craftology box and tucked a little snipped of cheesecloth behind and attached a brad to the centers to hold the petals together.
Inside there's a nice little package of cards and envelopes for the recipent to use for all those birthday wishes. The box was covered inside and out with the Echo Park Party Time papers.
I made a lot of cards, the box easily fits six, perhaps a couple more and then I wanted a few for myself. I even used the other paper pieced Vintage ladies from both sets of Art Impressions stamps I'd shared with you earlier.
This is one of my favorites, I fussy cut the cupcakes and candles out so that they pyramid to the top. With some foam tape to pop them up and stickles to make the candles flicker it's a really cute card.
Here's another super simple idea, Just cut the candle paper to fit the front of the card, glossy accent each candle and glitter the flames in two colors of glitter. Add a touch of Marvy's Snow Marker across the bottom and you're all set.
Here are my Art Impressions paper pieced ladies and the sentiment that went with them. They really make the front of a card don't they.
There's always the option to supplement the Craftology boxes with a couple of add ons. This time one of the add ons was a set of stamps of which this sentiment was included. I'm always on the lookout for a good set of Birthday stamps and this set from Echo Park certainly fits that bill.
I hope you'll check out the video. I'll link to the supplies used from Country Craft Creations below the video and links to Social Media sites below that.
Today I've got a wide assortment of inspiration for you all cut from Sizzix's new BIGZ XL die Box with Drawers. I just love how different each looks from the change of papers and embellishments.
Each year I try to find something small and cute to make up for Christmas presents for my neighbors and I think I've found what I'll be making this year. Here I've used Graphic 45's newest collection A Christmas Carol. All I need now is to decide what sweet treats I'll fill each drawer with.
I like to have things on hands to give to friends as well and wouldn't this work well for a thank you or Happy Birthday? Filling the drawers with some money for my teen aged Granddaughters wouldn't be a bad idea either.
The drawers measure a tad over 2 inches square x 3/4" high so in total the case is just shy of 3 1/2" . You can use any paper collection to decorate the drawers inside and out and line the inner and outer case to hold them in.
With just bits and bobs of lace, bling, flowers and trinkets you're sure to have just what you need for the top as well. I used Spellbinders Coredina'tions Celebrations Whirl White and Cuddle Cream for my base and drawers.
The possibilities are really endless with just a little imagination. With these drawers I misted them with 3 of Tim Hotz's newest colors, Cracked Pistachio, Fossilized Amber and Abandoned Coral, great color combos.
I hope you'll be inspired to make your own boxes real soon!
On today's video I'll share the tips and tricks I discovered while making my boxes, the sizes you'll need to cut to mat everything and loads more photos. Thanks for joining me everyone.
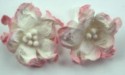
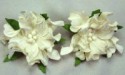
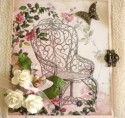
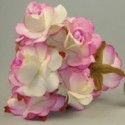
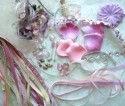
Today I'm sharing a gift box, note papers and a card all made with luscious goodies from Meg's Garden store. I had a gift set that I took apart, painted with Tim Holtz Distress ink in Seedless Preserves and Chipped Sapphire mixed together they create a beautiful deep purple. I added all the yummy flowers and extras to make it my own personalized gift. I love these paper roses from Megs, especially the purple ones, and the pink and white gardenias went so well tucked in alongside.
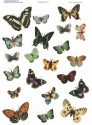
On the note paper belly band I dipped a white gardenia into a watered down solution of the mixed distress ink to get this pretty purple/lavender to match the paper. I tucked another of the acetate butterflies in. To get the look the butterfly is floating you leave a tab of the acetate on when you fussy cut them from the sheet and score, fold and glue the tab behind the flowers. I love how this looks.
All gifts need to include a special card and I took bits and pieces of the scraps from several of Meg's paper collections to make mine. I know I'm evil and have only given you snippets of my project, that's because I want you to join me on the video to see the rest of it. Thanks so much for visiting me, please take a moment to leave a comment and subscribe.
Remember back not to long ago when I told you I wasn't a hoarder? Well please keep that in mind when I share what today's project is. A couple of years ago I bought Paul a watch and the outer box it came in was so neat, it had these super flaps that tucked in to close. Well I've moved that box here, there and most everywhere but always making sure it got kept, I knew one day (that's today by the way) I'd be so glad I had it!
The box transformed from the plain white into this lovely gift box I'll be happy to share with any of my family or friends. I covered the box, inside and out with papers from the French Garden Collection, a paper line designed exclusively for Meg's Garden by designer Denise Boddy. Gorgeous papers filled with flowers and leaves and lovely design details. On the top, cascading down the front, are Open Paper Roses from Meg's Garden, aren't they lovely? I tucked in a couple of lilies from the store I'd dabbed with a touch of Tim Holtz Victorian Velvet.
Inside is a set of eight 3 1/2" square note cards with envelopes. I tied them with ribbon and lace to make a pretty little bundle when you lift the lid. I purposely left the note cards blank and made sentiment cards that can be chosen at the time and glued to the inside. I also made some round stickers from the paper using my Xyron sticker maker to close the envelopes when all done.
I hope you'll join me on the video, I'll walk through the box and cards, show you more of the naked box and envelopes and finish with lots of still photos to help inspire you to alter those boxes you've been hoarding too!