Monday, May 20, 2019

Using the Scraps from the Lavender MIst Kit!

Hey everyone, you know how I love using my scraps up.  Well I've uploaded a couple of videos and made two cards so far with the little snippets of leftover paper bits from the kit and I thought maybe you'd like to take a look-see.  I'll be adding more videos and examples throughout the week.


--- Check out the videos for the complete process on both cards ---


Dimensional Card with Flowers


Process of building Quilt/Pieced Mats
and resulting card.


Two cards and a Tag!
More inspiration for your leftovers

Find A Soul's Heartbeat at


.

Tuesday, May 7, 2019

Portfolio Tutorial Playlist!

Hi everyone, my playlist is up and running for the Lavender Mist Portfolio Tutorial Series.  There are seven tutorial videos and one walk through video.  I have listed under the video and on the video thumbnail the number of the video and what it covers.  If you're hunting for a certain aspect of the portfolio hopefully this will keep you from having to go through all seven videos to find it.   See the bottom of post for Supply List and most measurements used.


As always if you have any questions just pop me off an email and I'll get right back to you.  At the time 
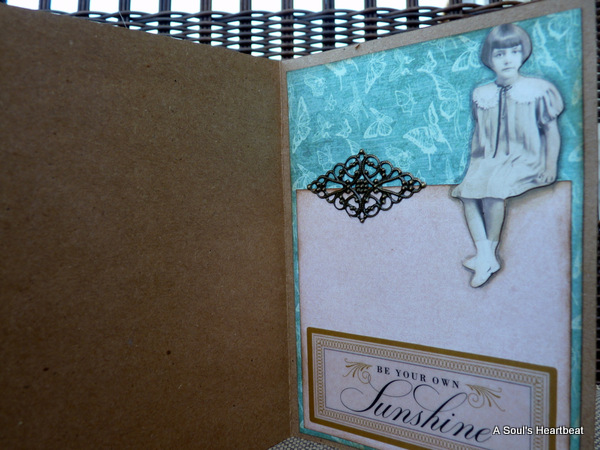
of posting this was created using a kit from Crafty City with Stamperia's Provence paper, but any paper and embellishments could be used in its place!

Enjoy and happy crafting, if you make something using my portfolio directions I'd love for you to share with me.  Patti


                                         Supply List
Lavender Mist Kit
Sookwang (Scor) Tape
Art Glitter Glue
Purple Tulle
Magnets
White seam binding dyed lavender
Optional - I used an additional partial pack of Stamperia Provence Paper
4 sheets solid 12" for wrapping and matting inside
23-25 sheets 12" solid for matting, backing etc.  I used 3 shades of lavender
2 sheets medium weight chipboard

Cutting Guide for Chipboard (Video 1)
1 - 8 1/2" x 10 1/2" for back
2 - 1 1/2" x 10 1/2" for spines
1 - 3 1/2" x 10 1/2" for front right
1 - 5" x 10 1/2" for front left

Wrapping outside and Matting Inside (Video 2)
4 sheets solid 12" for wrapping and matting inside

Inside Waterfall, right side (Video 3)
Measurements for Waterfall flip
Contrast solid cardstock for back strip - 3 1/4" x 10 1/4"

NOTE- Do not cut your decorative mats for the waterfalls until the end then you can use your scraps instead of cutting into full sheets.  Also see *note below about alternative method to completely matting all flips.

Waterfall flips, you will need 14 - solid cardstock -
                each measures 3 1/4" wide x 4 3/4" high
                score on the 4 3/4" side @ 1/4" to glue to base strip

Optional depending on the amount of decorative paper you have
You will need 14-28 3" x 4" pieces of decorative paper to mat each flip.  Your choice will be whether to mat inside and out. *If you are low on paper an alternative is to just cut a 3/4" x 4" strip for all but the two top flips (one on bottom, one on top).  You can put just the 3/4" across the bottom (leave 1/4" on side for matting with your solid cardstock).  When the flips are closed, before photos are placed, it will still look as if you matted everything.

The other optional is to mat the 1/4" area between each flip.  As an alternative you can add a strip of solid ribbon here like I did on the outside edges of the portfolio.

Back Insert - Video 4
Inside back mat (decorative paper) 8 3/8" x 10 1/8"
Solid Paper -
Double Middle Pocket in center back - 8" x 11 3/4" score at 5" on short side
Left flip page - 8 1/4"  x 10" score on long side @ 1" to form skinny pocket, score opposite long side @ 1/4" to form tab to glue to book
Right flip page - 7 1/4" x 10", score on long side @ 1/4" to form tab

Left pocket (attached to left flip page)
8 1/4" x 12", score @ 1/4" and 7 1/2" on the long side
Accordion insert 1 12" solid cardstock cut in half and each piece scored at 6"
Accordion joint piece is 1/2" x 6" to join the sections together


Back Insert Matting - Video 5
Top part of pocket - Decorative paper 7 3/4" x whatever length you have, make sure it is deep enough so it covers back when pocket is glued.

Triple mats for two center pockets
Solid 3 3/4" x 4 3/4" and 3 1/2"x 4 1/2" (pick 2 different solids)

Decorative - top mat 3 1/4" x 4 1/4"


~   ~   ~
Lavender Mist Kit - https://tinyurl.com/y6buwn65
Crafty City Store - https://tinyurl.com/ybx2uvje
Archana Joshi (owner) YouTube - https://tinyurl.com/y4xa97vk
Crafty City DT Showcase Blog - https://craftycitydt.blogspot.com/
Crafty City Facebook - https://www.facebook.com/CraftyCity
Crafty City Pinterest - https://tinyurl.com/y5zgh4lx

Visit me at A Soul's Heartbeat on

Monday, May 6, 2019

A Portfolio using Crafty City's Lavender Mist Kit

Hello everyone!

I'm sharing a new project today, a portfolio I designed with a kit from Crafty City called Lavender Mist.  This is my first project as part of Archana Joshi's design team and I was so happy to have this kit to play with.  It's packed full of scrumptious goodies including a pad of Stamperia's Provence paper.  Which is lavender!  Oh my goodness you guys know how I love lavender.  This project seemed to make itself or perhaps I just felt that way because the kit made me so happy to work with it!


I'm not going to go on and on here since I have a pretty lengthy post over on the Crafty City Blog which you can pop over to and read. But I did want to share a little to get you perhaps as excited as I was to make one of these portfolios for yourself.  I will be uploading a Playlist of videos sharing how I created the components of my portfolio so you'll be able to follow along, adapt it to your paper and creativity and make one of your own.  


There are lots and lots of photo spots!
The double waterfall itself will house 28 
3" x 4" photos (or maybe just a tad smaller)


Then there are pockets
and mats galore 
throughout the whole portofolio!

        Lots of places that tuck under
 

and behind

                                                                                   and into!

Fun stuff!  
Be sure and watch the 
walk through on the video
so you don't miss
a thing!!!


Check out the kit 
and pick up one for yourself


Find Crafty City here -

Find Me on - A Soul’s Heartbeat - at


Thursday, May 2, 2019

Beebeecraft Supplies to Cards


Hi Crafty Friends!

A few weeks back I shared a package I'd received from a company called Beebeecraft.  They have an enormous amount of gems and findings to make jewelry but in amongst that I found a lot of great treasures that work well with my cards and mini albums.  They allowed me to pick out some goodies to work with and today I wanted to share some cards I'm made using them and giving you some ideas.

I have a video at the bottom of the post that will share how I did some things and walk you through all three cards, be sure and check it out and if you not a subscriber when you get to YouTube please take a moment to subscribe and hit the little bell so you don't miss my next video.


I only want to share my first card with you and the rest will be a surprise when you watch the video.  Here I've used the Glass Cabochons. the tags, key and metal pieces all from Beebeecraft.  The little girl is a Tim Holtz unclaimed relative.  These people cut outs are so fun to incorporate into cards.


I used this crown topped key and had the little girl like she was holding it.  I also used a needle to fray the twine that is looped through the tag hole.  When I had it all frayed and trimmed I dusted it over with some Distress Ink in Vintage Photo and Age Mahogany.


The inside of each card is completely finished too.  These are 4" x 5 1/2" cards made from heavy Kraft cardstock.  When you are adding heavier items to your cards it's always best to offset the weight on the front with something on the inside, otherwise your card kind of flaps because the weight is all centered on the one piece of the card and not distributed throughout.  Who doesn't love to get a card that has fun stuff on the inside too? This is another of the Tim Holtz unclaimed relatives, and the metal piece from Beebeecraft.  The sentiment is a clear sticker I had in my stash.

Thanks for stopping by, don't miss the video and the other two cards.  Oh alright I'll give you just a sneak peak of what I'll be showing you how to do on video with the metal butterflies, you won't want to miss that!  


Beebeecraft Store - https://www.beebeecraft.com/
Beebeecraft Facebook - https://www.facebook.com/WHPHE
Beebeecraft Pinterest - https://tinyurl.com/y5896wc9
Beebeecraft Instagram - https://tinyurl.com/y2qxfj7c
Beebeecraft YouTube - https://tinyurl.com/y65leeh4
Beebeecraft Facebook Group - https://tinyurl.com/y3xswcdp

Visit me at A Soul’s Heartbeat on BloggerFacebookYouTubePinterest and Instagram.