Wednesday, July 30, 2014

Spellbinders In'Spire On The Road

a Cut at Home Design Team Project

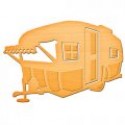
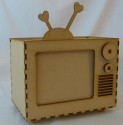
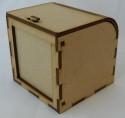
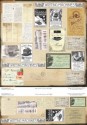
For some time now I've had this darling little die in my collection, it's a trailer and from the moment I saw it it made me think of the old I Love Lucy days when Lucy and Desi went off down the road, calamities and pitfalls galore followed them. I had friends who recently went off on a Motor-home trip and I just had to make this little die up into a Travel card for them. You know the kind of smart-aleck card only one good friend can send another.  

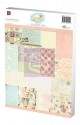
The die is from Spellbinders In'spire collection called On The Road.  I think sometimes we often overlook the simple dies, like these, that are primarily one image and yet given a little boost they can really make your project pop. I was super happy when I flipped through my stamp catalog and found an old Stampin' Up set that had the truck in it.  It was the perfect size to accompany the trailer down the road (which is a paper strip from Tim Holtz Idea-ology collection Destination).


In this instance I cut the trailer out multiple times, I think I have 8 or 9 layers here stacked one on top of the other, it makes a thick, almost chipboard, piece once you are done and gives the die the added umph you need to make a statement.  I colored the pink in while the paper was still in the die using a Copic marker.  It's a simple process to outline and fill in the spots you'd like some color on using the die outline, then it's just a matter of popping it out and gluing them together.  Of course I used my new favorite tool, Spellbinders Tool 'n One to release the paper from the die.


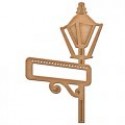
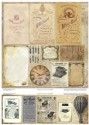
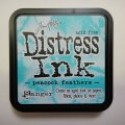
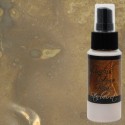
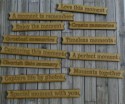
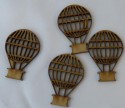
The sign post was left over from my Hot Air Balloon project (from Sa Crafters Zibbet store).  There were two in the package and I thought this was just the punch the card needed.  I cut out words from the paper, mod podged them on and then inked with Tim Holtz Distress ink Gathered Twigs and Lindy's Starburst Mission Bells Brown.   


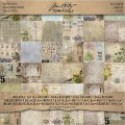
Really this is a pretty simple fast card with a big 'fun' factor enclosed.  I cut the postcard from the paper stash, some papers are also from Tim Holtz Wallflower collection.  I printed the sentiment on my computer, cut the words individually and glued to the post card.  I was lucky enough to find a free font to download from Google that was close to the old I Love Lucy fonts.  Just a perfect combination of things to bring a smile to my friends face when she opens the envelope don't you think?

Thanks so much for joining me, if you haven't become a follower to my blog I hope you'll do so today.  And, check out my video below, I'll show you how I put the card together, share a few tips and give you a few more photos to In'spire you to create your own popped up elements from Spellbinders In'spire collection.


Supplies:


Announcing - Sa Crafters Guest Design Team

SaCrafters Guest Design Team Announcement

I was so pleased to be asked to be a Guest Design Team member for SaCrafter's Zibbet Store.  If you'd not visited her Zibbet store yet you'd best grab your favorite beverage and get yourself comfortable for an enjoyable look-see at all the fabulous things she has for sale!


I was so excited to open my Design Team package of goodies.  There is just so much fun stuff to play with.  I'll be doing several projects using the supplies above in the next few weeks.  You may, if you follow my YouTube or Blog, have seen my recent Hot Air Balloon mini, that's also one of Sa's designs.  

So keep a watch out for my SaCrafter's Guest Design Team projects.  You might want to subscribe to my YouTube and follow my blog, I'd hate for you to miss out!  There's a short video below showing you each of the items from the photo above.  One of the great things about Sa, she not only sells her items but she also posts videos showing how to assemble and often times how to decorate and create stunning finished items.  Be sure and check out her YouTube channel as well.


Goodies from my Design Team Package
Available in Sa Crafters Zibbet Store


Friday, July 25, 2014

Vintage Girls File Folder Mini

a Meg's Garden Design Team Project

I'm excited to share my first Design Team Project for Meg's Garden.  I'm an avid YouTube watcher. I glean all kinds of ideas and information from watching the crafting community create.  These last few weeks I've seen an influx of file folder minis appear and when my package from Meg arrived I just had to create one for myself.

Using Kerry-Jean Watson's paper collections, The Gentlemen's Collection and The Correspondence Collection along with the Vintage French Girls page and strip I created this little file folder mini using just 1 1/2 folders.   The book measures 6 1/4" x 5 1/4" (it really should be 6 1/2" high but I got a little trim happy and it shrunk a quarter inch :-)


I really enjoyed making this mini.  I love the distressed look and as you'll see I had a heavy hand with Tim Holtz Gathered Twigs and Tattered Rose Distress Inks.  It's easy to adjust the look to suit you taste if you don't care for as much inking as I do.  On the front I did a simple seam binding ribbon closure dying the seam binding and the lace with the Tattered Rose providing a perfect color match. Using embellishments from Meg's Garden like the Pearl Loops, Dyed Lace, Carabella Rose Posies, one of the Vintage French Girls along with a few of my own embellishments completed the front cover.


I like to tuck a 'Made With Love' heart charm somewhere on my projects 
and tucked behind the velvet posies was the
perfect spot on the front of the mini.


This is a mini overflowing with 
pockets and booklets for a multitude of photos and keepsakes.  
Because of the way the closure on the front is done 
there's lots of room for expansion.


I even included a couple top pockets complete with postcards 
stamped with one of the teeny tiny Vintage French girls 
I used my Stamp Scissor to give it that true postage stamp look.  
(Thank you Eva for the wonderful stack of post cards!)


When I started the mini I had intended on just using 
The Correspondence Mini Pack 
but as I went along I soon realized how interchangeable 
I could become sliding in bits and pieces from 
The Gentlemen's Collection as well.  


There ended up being a lot to this little mini 
and you'll see each page as I walk you through it 
on the video and yes, 
I've included many more photos 
to give you ideas and inspiration to make your own file folder mini.


Just a note about ideas -  I didn't do a tutorial for this mini because there are so many floating around YouTube right now, but if you need step by steps check out Dawns Inspirations channel, she has lots of file folder mini ideas, that's where I got mine from. You can also check out Michele Mooney's channel The Paper Addiction, she also has scads of file folder tutorials.   Do what I did, watch a few and take what you like from here and there to make your own unique style.  It's all a matter of cutting and folding and trimming and burnishing maybe several times over until you get the look you like. Remember - there is no wrong way!!

Supplies from Meg's Garden:


Thursday, July 24, 2014

Celebrate the Journey with a Hot Air Balloon Mini!

a Cut at Home Design Team Project

Paul and I have been so fortunate to see five different Hot Air Balloon festivals up close and personal.  I love standing next to a balloon and watching it fill with air and take off. Each time I get the same feeling of awe, it's just something when you can reach out and touch the balloon as it rises into the air!  Like lots of you I still have all the pictures sitting on my hard drive!  They don't do a whole lot of good there do they?


When I got Heartfelt Creations, Celebrate the Journey, paper collection I knew right then and there that I had to do a mini to house my Hot Air Balloon photos and memories.  It was by sheer luck that I happened to watch a video of SaCrafters sharing some of her new Zibbett items.  She had just released the Hot Air Balloon mini cut from chipboard to alter!  I couldn't wait to get it.  And I'm so happy I did!  I had so much fun putting this mini together, it's the first time I've done a shaped one like this and I loved it! I have another one bouncing around in my brain that I know I'm going to have to do as well.


Adding this cool wooden sign post was the perfect solution to labeling the festivals we went to.  I figured out the mileage from our doorstep to the Hot Air Balloon destinations, printed them on my computer and then mod-podged them onto the wooden sign.  Adding distress inks and Lindy's sprays gave it that old worn look.


I used Tim Holtz grungeboard and a hitch fastener to close the top


And my Cinch with jute twine for the bottom closure


There are tuck ins


flipouts


foldups


and pullouts

All of these house a multitude of photos, 
enough that I'm sure I'll be able to cover all five events without a problem!


So I hope you'll join me on the video as I walk you through page by page
and share scads of additional photos
to inspire YOU
to also create a shaped mini for yourself!


Supplies: