Friday, November 28, 2014

Swap Package of Loveliness

Today's mail brought me the most gorgeous box of loveliness from Nery Ortiz, DCScrappinRooster on YouTube.  Wayyyyyyyyyyyyyyyyy back in the Spring of this year we decided to do a swap.  Well you know how real life can alter the best laid plans.  We are just now getting around to swapping our packages.  


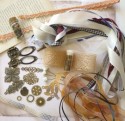
Nery made me a whole collection of gorgeousness!  
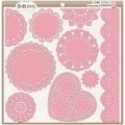
All using laces and Painters tarp!
Now tell me how clever is that?
I love the natural look
so pretty.


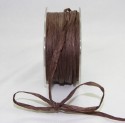
First was a runner trimmed with this luscious lace edging, 
you'll be seeing it often for I'm sure I'll be using it again and again
as the base when I film my projects.

Next tucked inside was this heart, 
covered with all these stunning
pieces of lace.


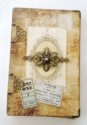
Nestled inside the heart box was a heart mini.
I told you it was gorgeous!


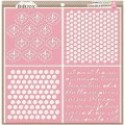
Beautiful pages, this one has a pocket with tags.


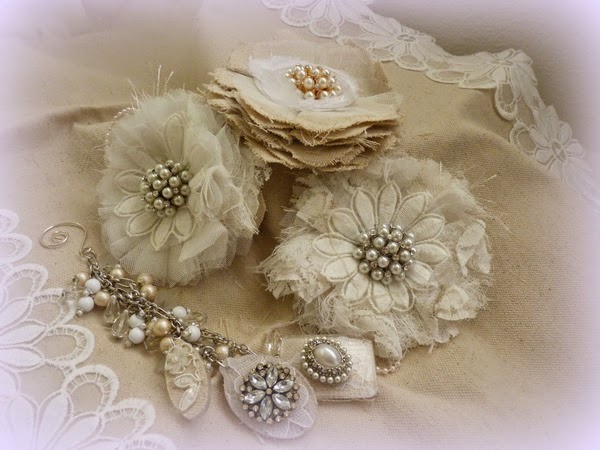
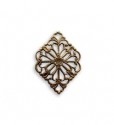
Next were these beautiful flowers for me to use.
That may be a problem!!!
I will want to hoard I'm sure!


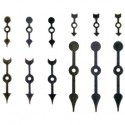
This awesome hanging


and clever acrylic clip board
backed with lace!

I don't know about you but I've had a wonderful day of unwrapping and oohing and aahing over all this loveliness.  Now off you go, go see Nery and say hello and subscribe to her YouTube channel while you are there.  Oh yes, you can also watch the reveal video below as I open the box.


Wednesday, November 19, 2014

Let's Make a Gift Box Set

Well no matter what you do to try to slow it down times a ticking and shortly we'll all need a few gifts to share with a Mother, Sister, Friend, Neighbor or another crafter perhaps.  How about a boxed set of cards?


I made a simple six inch square box with my Martha Stewart Score Board and added a spritzed up Heartfelt Creations flower to the middle (remember I made all those flowers a while back and now they're coming in handy!).


JustRite Stampers always has the best assortment of sentiment based stamps.  I used this one, Bokeh Time, for my set of eight cards today.  I love these stamps!!  I left all the A2 sized cards blank on the inside so they can be personalized for the occasion when the time is right.


I made one card for each sentiment in the set, eight in total and alternated the base cardstock between white and teal.  I sat and played with Lindy's sprays, Distress Inks, Bo Bunny Stencils and some texture paste. I let all that dry real good and then started assembling my cards and stamping the sentiments.


This is such a fun project and I find so often when I buy stamps sets I purchase them because I like a particular sentiment or script within the group.  More often than not I'll use one or two of my favorite stamps and then file them away.  This is the perfect way to challenge yourself to use the entire stamp collection. So go on!  Go find a stamp set and make cards using every single stamp.  I promise you once you see those cards accumulating it will be harder to stop making them than to continue!


This is just a smattering of what I made, come join me on the video and I'll show you each card and the gift box to give you a little inspiration to make your own gift box of love.


Supplies from Cut at Home


Sunday, November 16, 2014

Ang's File Folder Mini's

a Viewer's Project

I got an email from Angie Ramacher asking if I could help her make a file folder mini like the one I did using only 1 1/2 file folders.  I hunted the blog post up which was the Vintage Girls File Folder.  Luckily I had included a few links sharing where I got my inspiration and I shared them with Ang.

Well it was no time at all when I had these photos in my in box showing me what she'd done.  I tell you this crafting business is super addictive and fun.  Just like Ang once you start it's hard to stop.

Let's see what she made - 


Ang says " The first one made with the Prima Papers… Something Blue, I kept dreaming about….. 
because of the peach/pink roses and of course the bike"


Ang shared "the papers used in the Christmas book were Handmade Holiday by simplestories.com"


So see it doesn't matter if you've never tried something before because YOU CAN do it and have fun in the process.  Have you watched a video or ran across a blog post where you really like what the crafter has made but you're not sure 'how' to start or 'what' to? Ang's email was that way, it was so funny in the subject line it said "Trying to reach NWLady1949 looking for measurements/instructions.... thanks!!!"  She had seen my video and tracked down an email address but hadn't seen my blog yet. 

Why don't you shoot off an email and ask for help?  Tell them you're new to this and would like to know if they'd answer a few questions.  Nine times out of ten you'll get a lovely response back with a great offer of help.  Now mind you, I said nine times out of ten, there's always one in every bunch that doesn't have time or just doesn't want to do it - This is rarer I believe amongst crafters, I find the majority are a pretty nice bunch of people, most often than not, ready to share what they've learned with you.

But most important of all, don't say 'I can't do that' sure you can, and you'll be so glad you tried.  Have fun everyone.  And just a note, if you're an experienced crafter reading this, PLEASE if someone asks for help take a moment and see what you can do.  We all started at the beginning and had to learn a lot along the way, so pass it on, you'll feel so good when you do!

On a side note, Ang doesn't have a blog or YouTube presence so if you'd like to leave her some praise please do so here and I'll be sure she sees it.

Thursday, November 13, 2014

an intro to Kaisercraft Dies

 a Cut at Home Design Team Project


Kaisercraft has released new additions to their product line, wafer thin metal dies.  This one is the film strip with the words Smile and Love and a little heart included.  I love this die and can see myself using it in lots of projects.


The dies come in a protector outer sleeve of plastic, just like lots of dies do.  Inside you get a folder with a full size photo of the die on the back cover and the die on the front cover, notice in the photo above how the die stands in place even though my folder is vertical?  That's because inside is a magnetic sheet the size of the dies which hold them in place easily while you're working with them on your craft table or have them stored away waiting for the next project.


Check out my video today as I show you a more in depth look at the dies I tried out from Kaisercraft and of course a few more photos of the card I made with the film strip die pieces I cut.


Supplies from the Cut at Home Store


Wednesday, November 12, 2014

Sherlock's Travel Journal

a Meg's Garden Design Team Project

I have found I really love doing stitched binding for my journals.  This time I'm using the Daisy Loop Chain which I found on YouTube from Pocket Full of Vintage.  This creates a really strong binding method.  I also used Tyvek between the two layers of decorative paper for the journal cover.  Adding a layer or two of Collage Podge from Aleene's really strengthens the cover which is what you need if you're going to be stitching.


The letters were cut from a sheet of paper I had in my stash, covered with Glossy Accents and then sprayed with Lindy's which really gave them that old world look. I cut strips from cardstock, inked them with Distress inks, strengthened them with Collage Podge and then bound the outer edges, I really like the look.


Adding corner edges also adds support to the cover and the distressed paper edges continue along with the old look.  This Collection kit can either be purchased in paper or downloaded in Digital, both options are available in the store.


The closure is a white piece of crocheted lace which I used Aged Mahogany and Gathered Twigs inks to match the papers and the binding strips. The lace is glued to the back of the book with Beacon's Fabri-Tac and loops around this funky closure (from Meg's store) on the front.  Depending on which loop you use will depend on how wide the book can become. 


Each two page spread of pages allows for lots of photo spots and journaling to save and share all those memories.  See how I incorporated just a torn piece of cardboard packing material to form the pocket on the right?

I hope you'll come join me on the video where I'll walk you through each page, share my assembly techniques and offer many more photos to inspire you to create your own Sherlock Travel Journal.  


Please visit Meg's Garden at
Shop - http://megsgarden.com/  
Blog -  http://megsgardenblog.blogspot.com/


Sunday, November 9, 2014

Paula's Triple Flip Mini

Viewer's Project

I think one of the most enjoyable things I get out of creating and sharing with all of you is having one of you share something you've made inspired by something I've made.  If you follow my blog and YouTube channel you know I shared a series on how to create a Triple Flip Mini Album including step by step instructions across several videos.  I had a lot of very positive feedback from that, it makes all the struggles of trying to get what I'm thinking into verbal info you can understand worthwhile.

Paula sent me an email while we were away visiting with my family in Washington state. Well you know how that is, you're in a rush rush situation trying to cram half a year into a couple of weeks. I had great intentions of posting this as soon as we got back, but (hanging head in shame) I forgot.  BUT, I have found the older I get the more lists I'm making and I did have it on a list of to do's so not all is lost.

So without further chit chat from me I'd like to share what Paula made, it's such a darling darling album and will certainly give you food for thought of how changing up the pattern line will certainly change up the look of a mini!


Fabtabulous don't you think????  Paula doesn't have an active blog or YouTube so if you'd care to leave your comments here I'll be sure and share them with her.  (We all  might giv her encouragement to start blogging and posting again!!!!!) If you would like to see my original blog post and photos, my Triple Flip Mini is here.  

Thank you Paula for sharing your creativity with me and allowing me to share it with others. To all my other crafty friends on the other side of this screen thank you for sharing your emails, comments and for spending time away from your busy lives watching and commenting on what I do.  I appreciate it more than you could ever imagine!