Sunday, March 30, 2014

Mother Goose Series - Mini 3

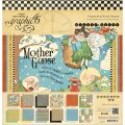
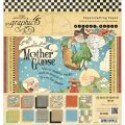
Mother Goose Series - Project 3 Not a Scrap Left


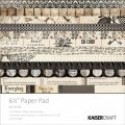
I'm calling this 3rd mini in the series, Triple Flip, because there are '3' sections each with '3' sections which flip out when opened.  I designed this mini with the Cut-apart page that's in most Graphic  45 paper collection.   On these pages you get six cut aparts each 4" x 6" and I wanted some way to utilitze those images in a book and create an area for 4" x 6" photos.


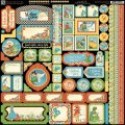
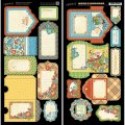
On each of the 3 sections there is a section for an image mat like the one above.  If you're like me you find it hard to cut into these and ruin the image.  My pocket is actually cut into the image allowing for a mat to slip behind the image into cut area.  I love using this technique.


The middle section houses a plain mat which is large enough for a 4" x 6" photo.  On this particular one I added a pocket as well so you not only can mat a photo to the background but also stick extra photos in the pocket. (in this mini I've used two Spellbinders Embossing folders on each of the large, solid colored mats, to give them a little zing, the Quiltworks and Awesome Blossoms). 


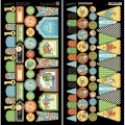
In the photo above you can see how each section unfolds, with the image pocket on the left, the plain photo mat in the middle and a journaling card on the right.


The reverse side houses the image pocket, the journaling mat and a pocket to tuck in photos or memorabilia. 

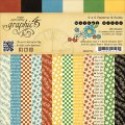
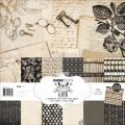
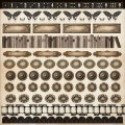
This was a great way to use just 2 of the papers from the collection along with the solid primary colored cardstock.  I hope you'll join me on the video as I walk you through each page.  And keep a watch out for a tutorial coming to show you the construction of the book.  Now remember I'm using up what I have in the Mother Goose line so I don't have duplicates of these pages to recreate another book for you exactly like this one.  Better still I'm doing a follow up video to the tutorial which will show you how to use the Cut-aparts from Graphic 45's Botanical Tea Collection to recreate the style of this book.  In my mind this is even better because you'll end up with two examples to spur your own creative side into making one of your own with your favorite Graphic 45 collection or any other that you have that you're wanting to cut in to. 
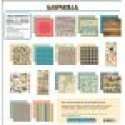

Supplies

Wednesday, March 26, 2014

Spellbinders Filigree Egg Cards

a Cut at Home Design Team Project


How would you like to give a really beautiful 'wow' Easter card that will take you very little time and supplies to make?  I've got one for you today using Spellbinders Die D-Lites Filigree Egg Die.  The base of the card is made with Spellbinders Majestic Labels One die.  You cut two of the labels and use one for the front and score the other 3/4" from the edge to form the back.  Glue the two together along the scored area and you have a hinged card.


I cut the egg twice and sprayed one with Lindy's Stamp Gang Starburst in Love at First Sight Lavender and then popped the white one atop the lavender and centered it on the front of the card.  By adding a tulle bow and the flower with bling it just finishes off the card.


Now, to step up my card a tad I used Joy! Crafts Elegant Card Stand (thank you Marie-Louise for sharing about this stand with me!)  I used 100# card stock and and cut two stands, glued them together and lightly colored the edges with Tim Holtz Distress ink in Milled Lavender (I also used this ink to go around my card base).  The card stand just adds that extra touch and I know whomever I give the cards to is going to love that they can display it this way.  I know this is something I'm going to use and give often with my cards!

Now, hmmmm, did you notice there are two stands above?  And one is not lavender??? Well I guess you'd better check out my video below not only for a step-by-step on how to make the card but also for another idea of how to use these dies!   Have fun crafting everyone!

Supplies:

Tuesday, March 25, 2014

Yee Haw Little Cowboy Mini

October Afternoon has an older paper collection called Sarsaparilla which I always considered cute but never could see myself using, let alone as the basis for a baby album.  Well count me wrong!!!  It was just perfect for this special little cowboy due to arrive next month.  I wanted something Grandma would just love and since she's super into Cowboy this just fits!


I used some paper string from Tim Holtz on the outside for the lariat and horse halter.  Placed the new little cowboy's name inside and covered it all with 3D Crystal Lacquer.  Adding the red handkerchief paper for the spine just made the cowboy look pop.


So many cute images in the paper, these guys are just cut from one of the sheets and bumped up by rematting and cutting again.  The Howdy was a sticker which I matted on brown and then covered with Glossy Accents.


There's oodles of room for photos, on these two pages I have a waterfall on the right that will hold 13 4" x 6" photos and on the left there's two folders that each hold 4 photos, besides the mats in the middle.  Amazing how many you can get into albums like this.


The little grey circles on the right, they were the holes left from stickers so I cut the negative space from the sticker sheet out, mounted it on paper and then popped a velcro dot in the middle and one on the back of  each grey circle.  They can be popped off, used as a template to cut the photo, matted and popped back on.  Fun fun fun!


The paper is adorable, the images super cute and I had so much fun making this.   I can't wait to give it to them next month.  Check out the video, it'll have a page by page walk through and lots more photos.


Supplies:


Wednesday, March 19, 2014

Kaisercraft Art of Life Mini

A Cut at Home Design Team Project


I used this little naked Kraft and Chipboard book I found at JoAnns to create this fun little mini for memories and memorabilia.  Using Kaisercraft's Art of Life collection I matted each of the pages and envelopes and then distressed all the edges with Tim Holtz Distress Ink in Gathered Twigs.  


The addition of the gusseted envelopes is a nice touch in a mini of this size, they allow expandable room for little bits and pieces and of course the rest of the photos you aren't showcasing on a page.  I cut all the mats from the Spellbinders Nestabilities Superellipse die.  I thought whomever gets the mini could either use them as templates or glue the photo on one side and journal on the other.  


If you're not familiar with Kaisercrafts smaller pads they always have a few sheets of punchouts in the back a great addition.  I used them on the pages above to not only create focal points but also to keep the photos from falling out. 


Check out my video below, I'll show you the naked book I started with, a glimpse of how I do my pages, a walk through page-by-page of the book and still photos.


Supplies: