
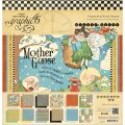
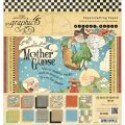
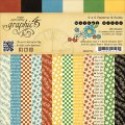
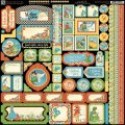
Hi everyone, I am so excited about this series I'm going to be sharing with all of you. I had purchased Graphic 45's Mother Goose Collection. (Check out my video below to see what I started with.) As I made the first, then second mini I thought, hmmm I wonder how many projects I could really end up from one paper collection. So as I finish up each project (I am working on mini #3!) I'll do a video and post it her to help inspire you to use it all up.
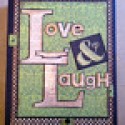
My first mini was fashioned after Clare's (My Creative Spirit on YouTube). Clare has been a good friend and a supporter to my craftiness since we were first posting on YouTube. She passed along her latest tutorial for her Love & Laugh mini for me to give a go. I love her thinking process and since I'd just purchased the Mother Goose and was dying to play with it it was a perfect match.
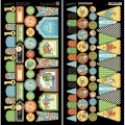
Here's a few glimpses of what I made

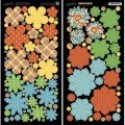
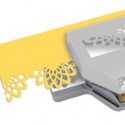
OK here's what I did, I took some fabric quilting fat quarters I had purchased eons ago for another project, they were primary colored so I cut them using Tim Holtz Tattered Floral die and made these flowers for the front of my book. Perfect colors to compliment the colors of the papers. I hung a stork charm from the green one and stuck a moon and star in the other two large flowers. Mother Goose was fussy cut from the paper and attached to chipboard to pop her up. The outside spine and back were covered with the outer wrapper of the paper collection. This is a sturdier cardboard but glossy. I didn't want the glossy look on the outside so an easy fix is to use a coat or two of Aleene's Collage Podge over top. This will also provide another layer of protection from all those hands that are going to be looking it over.

There are 8 pages in this book four of which are smaller foldouts, you'll see as you watch the video. I tried to follow Clare's tutorial but you know how it is, you always want to try it this way or that, so there are a few change-ups in mine but basically the style is hers. So so fun and amazing how doing the same style can look so totally different with different papers and different hands creating.

Here's the first page, you can see how I added a pocket on the inside front cover on the left
and the first full size page (with a flip up) on the right.

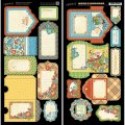
Here's the second page (I call it a pocket page) on the right,
Here's how the smaller pocket pages work.

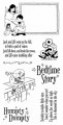
Here's the pocket, closed. The round Humpty on the left has a magnet underneath to keep the flaps together. He's been fussy cut and Glossy Accented and mounted on a die cut from the Sizzix Framelets I Love You die set. I used some Martha Stewart glitter glue on the pointy edges.

Here you can see how it pops open (the 5 cent covers the inside magnet)

Here are the flaps opened. On the right you have a pocket with a lollypop stick inside, big enough for some journaling words. The center pocket has two mats that I've stamped with Stamp set 3 from the collection and the left, even though a little isn't showing, is another pocket with room for full size mats.

Each of the four sections consist of the same format, a large page, and a small pocket page. Here's the back of the first pocket on the left and the second full page on the right. This flips open to reveal other hidden pockets and mats behind the boy in the bed.
There's a tremendous amount to the book, too much to be able to share properly here. Check out the video below, I'll walk you through each page and give you ideas as to what and how I did it. I hope you'll check out Clare's tutorials (the one I used is listed in the supply list below with a link directly to it) and her YouTube channel, My Creative Spirit.
Thanks for joining me, I hope you follow my blog and leave me a comment telling me how you like this idea for a series.
Patti
The Intro Video showing what I'll be using in this series
Project One - Mini Album
Supplies:

5 comments:
So clever again, Patti. This is really cute and so colorful.
Wow Patti this is fantastic. Such a great project - but so much work.
Hello! You make the most darling minis with all their secret touches! I haven't made a mini in quite awhile but I am inspired to do one again. Thank you!
Hello! I love your wonderful mini with all it's secret touches! I haven't made a mini in quite awhile but I am inspired to do one again! Thank you!
Patti, what a great album. Love your idea abt using the entire collection so nothing goes to waste. Thanks as well for the link to Clare's Esty as I had thought abt taking one of her online UK workshops but haven't gotten around to it. Can't wait to see your other "not a scrap left" creations.
Post a Comment