a SaCrafters Guest Design Team Project
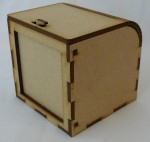
Today I'm sharing SaCrafters wooden Lock Box that I've altered with Prima's Devine papers, elements from Sa's store and a few items from my stash. This is the most darling little box that slides open on the top and allows you to hide a secret collection of goodies inside for the recipient.

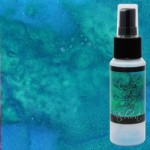
The box has been painted with Martha Stewart Acrylic Wedding Note paint and then I tried, catch that word tried, to spray my Lindy's Starburst in Shabby Turbine Teal over the top. It just didn't want to nicely cover that acrylic paint. I was so disappointed and upset, I thought for sure this project was a goner. After stressing for over a day a friend said, 'Step Away'. I did just that, left it alone and tried not to think about it. When I came back sure enough it just came together, not how I had originally thought but perhaps even better!
I lightly sanded through the Lindy's and revealed more of the white, I loved the Shabby effect it gave, even leaving a little of the raw wood showing here and there. I added a cut out from the paper for the top trimming it with Sa's flat back pearls and covering it with a heavy coat of 3D Crystal Lacquer by Sakura. HINT: Do not touch it after applying the lacquer, set it aside and go watch tv or read a book for a few hours, just the voice of experience speaking!!
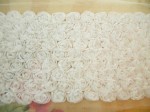
I added some of Sa's 9 row roses that I'd misted lightly with the Teal and a couple of Webster's flowers that were almost the same shade. The peachy flower in the middle is a snippet of a flower swag I'd bought on super super super clearance and salvaged all the good stuff off of it. I tucked one of my heart charms (thank you Kathie) under the flower.
To finish the front I glued the dyed flowers around the cut out frame and adhered the little girls from the paper to the middle, leaving some of the netting (which is the flower backing) show around the edges of the little girls. I then added a coat of the 3D Crystal Lacquer and set it aside overnite to dry. The next day I added the altered Bliss arrow from Sa's store and the little Believe charm and key that dangles (you can see it in the photo below on the left hand side under my thumb) - these were gifts from Bunny Bow - thank you Manuela!
I'm a horrible 'Just do it for the fun of it' type of person. I always need a purpose or a reason or a thought of whom I might give it to and what they'd use it for. That's why I created the little note cards for the inside. They are 5" x 2 1/2" strips cut from the paper and scored in the middle.
I made envelopes for probably a third of them even using my new scallop Corner Chomper. This was a fun project and will make a lovely gift for someone. I hope you'll take a look at my video, I'll share a lot of the assembly process as well as some more still photos. Please check out Sa's store and use my personal discount code for you PATTIFANS - that will get you a 5% discount on a $30 purchase.
Please visit Sa Crafters
Zibbet Store - https://www.zibbet.com/SaCrafters
YouTube - https://www.youtube.com/user/SaCrafters
Blog - http://sacrafters.blogspot.com/
Facebook - https://www.facebook.com/pages/Sa-crafters
~~~ Supplies ~~~


No comments:
Post a Comment