
a Cut at Home Design Team Project
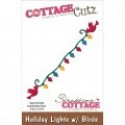
I'm always on the lookout for Christmas dies and stamps I can add to my collection. Even though you only use them once a year it's so nice to have a variety on hand. When I saw this die set from Cottage Cutz called Holiday Lights I knew I wanted to add it to my Christmas crafty supplies.

Today's video will feature the whole process start to finish along with a few goobers and the steps I took to fix them all. A normal thing in my craft room, making mistakes and then figuring out how to work around them! I think most of us that craft do that very thing.
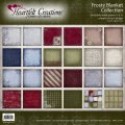
I used one front panel piece on my A2 card base (4 1/4" x 5 1/2"). This is from an older collection of Heartfelt Creations called Frosty Blanket but most collections have a focal panel either in the form of cut aparts or an element on a single paper sheet than can be used in much the same way as I've done here today.

The Holiday Lights and the little birds nestled perfectly over the top of my door and once you added the glitter snow it made it all work together beautifully.
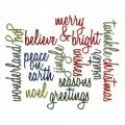
I hope you'll join me on the video as I show you the whole process, warts and all. I'll also include a slick trick on how I got the glitter on the script sentiment for the inside and how I get it to stay!


1 comment:
Patti, this is so pretty. You have used some of my favorite products here. And I totally agree about the Christmas stamps and dies, I have added quite a few things to my collection this year. Have I used them all yet? No, but I have lots of great ideas for them all, and plan on doing some Christmas projects all through this coming year. The video is greats in all it's honesty. There are no mistakes in our craft, just opportunities to embellish.
Post a Comment