Wednesday, November 5, 2014

Retro Moments

a SaCrafters Guest Design Team Project

This project had been put on hold while we took a short vacation to visit my family but I've been dying to get my hands into it ever since I saw it previewed in Sa's shop!  I LOVE this Retro TV and knew immediately I had to make it for my middle child, Angi. She and her husband Luke would have been perfectly happy living in the 50's!  This past year they had a family photo shoot done at their house all with a retro theme!  Perfect for this project.  So while home I told her I wanted a copy of all the photos so I could play with them!  This is the result - 


Seldom do I have the pleasure of playing with photos and actually finishing up and album I've made.  This was super fun for me. I hope you'll enjoy following along.


I moved outside on the patio to paint the inside and out of the tv after I'd glued it together. I used a black Krylon paint for the outside and Martha Stewarts acrylic in red for the inside.  I wasn't happy with the black, I'd use something else next time.


Next step was to Mod Podge the box, inside and out and then adhere my paper and cut outs (from Crafty Secrets).  See I really am a 'messy Marvin' when I craft :-)


I die cut from the papers I'd be using to make flowers, at this point I wasn't sure whether they'd be going on the box or the mini but I knew I'd use them somewhere, I've moved to the living room so I can watch tv and make my flowers at the same time.


I found that if I used my magnetic mat and ruler I could line up the chipboard across the bottom to create a straight end as I put the cardstock to the chipboard.


Last step before the fun stuff was to add several coats of Collage Podge (from Aleene's) to the outside of the cover.  This is the first time I've done it before folding to the inside and gluing down.  It worked great and anytime you can accomplish something with the paper lying flat it's a lot easier!
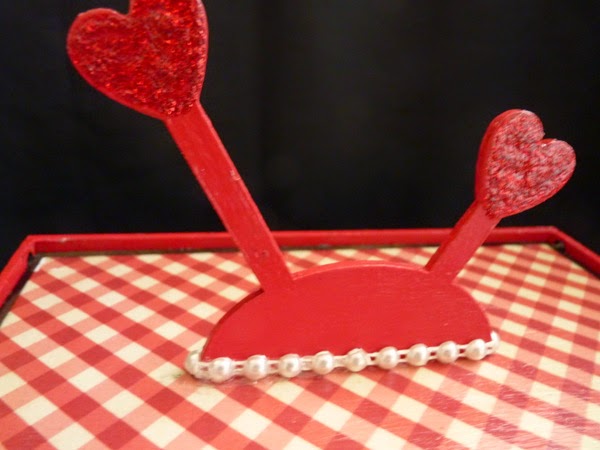

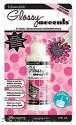
Since I wanted the box to retain it's 'TV' look I shied away from too much bling and left the flowers for the book.  The 50's look always had pearls and I'm sorry how can you make a project with out stickles??????


This sentiment arrow from Sa's store was perfect.  I painted it red, masked off on both sides of the arrow with some washi tape and then painted the arrow black.


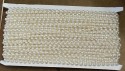
A couple of fussy cut aprons from Crafty Secrets, a wooden message and flatback pearls from Sa's store and the back is done!


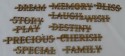
These Retro people and sayings were just too cute, I had to add a couple to the inside of the top of the box!


And here's the mini front, I added the key and the date (thank you Bunny Bow) and the Heart that says Made With Love (thank you Kathie) on a Tim Holtz chain, tucked in an oval framed photo and used my flowers I'd made earlier to adorn the front cover.


The mini measures 5" x 7" outside dimensions so some spots can house 4' x 6" photos. There are seven pages and each has a side pocket with a mat that tucks in.  I'm sure I could get every photo from their shoot in this little book!


To add interest and appeal I fussy cut the shapes of several of the photos, this one creates a pocket to put photos behind.


So this is my Retro TV filled with a book of memories.  Such a super fun project to make, thank you Sa for allowing me to play with your fun products.  Please check out Sa's store today and come join me on the video for a more in depth view of TV and mini.

Please visit Sa Crafters
Store -  www.sacrafters.com
YouTube -  https://www.youtube.com/user/SaCrafters
Blog -  http://sacrafters.blogspot.com/
Facebook -   https://www.facebook.com/pages/Sa-crafters


In addition to these products I also used Krylon Black spray paint, black cardstock and chipboard, Mod Retro and Lady Coutour Papers from DCWV, Martha Stewarts acrylic paint in red and cut outs from Crafty Secrets.
Wednesday, October 29, 2014

Combining Bo Bunny Stencils and Penny Black Penquins

a Cut at Home Design Team Project

Don't you love trying new things?  I sure do!  Bo Bunny introduced a new product to their line which Cut at Home is now stocking, Stickable Stencils.  That's right stencils that you can stick down and pull up.

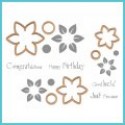

Cool huh!  There are four 12x12 sets one of which is shown above.  I got all but the alphas and so far am extremely happy with them.  I'll share lots on the video below showing how they come packaged, how to remove and clean them, and of course ideas using different mediums with them.


Now here I had these great examples and knew I had to get creative so I married the stencils with Penny Black's Let's Chill Stamps and the cards above are the result.  Yes, I had a ball with these and so can you.  Check the store out today and get some new stencils and stamps to have fun in your crafty space too.  


Supplies I used


Wednesday, October 22, 2014

Step-Ups, Cards Made with Sizzix Framelits

a Cut at Home Design Team Project


Do you enjoy making cards with different types of folds?
Why not try Sizzix Step-Ups Card
You can download the Instructional PDF to make this card


I had so much fun making these cards, see how different
a change of paper makes?  I used Prima's Lyric collection
for this card.


Do you have some special Gouls and Goblins
you like to send cards to?
How about trying something like this.
I left the Zombie on the far left open to form a pocket
perhaps this Spooky Grandma will stick a few
treats inside!

Join me in the video and I'll walk you through how to make these
darling Step-Ups cards


Supplies from the Cut at Home Store


Reused and Revamped

a Design Team Project for The Piece by Piece

You know it's sad when you can't even go to Costco anymore without that little crafty devil whispering in your ear 'you could alter that cheese box, go ahead buy it and see what happens'!  Yep you know the feeling, you're moving along nicely and then wham you spot this darling little round container of Brie cheese and what does your crafty mind think, mmm that cheese looks good, nope, wow I could turn that round little balsa box into something, I'm sure I could!  


Yes my crafty friends this darling round gift box started out as a lowly cheese container. Hmm I wonder how many boxes of cheese one person can eat :-)  You can see the original container in the video below, as well as a process video showing you how I altered it to look like the one above and of course more photos to inspire you to first make your shopping list out and then go buying at The Piece by Piece you might also want to stop by your local grocer to pick up a cute little cheese box to alter yourself.


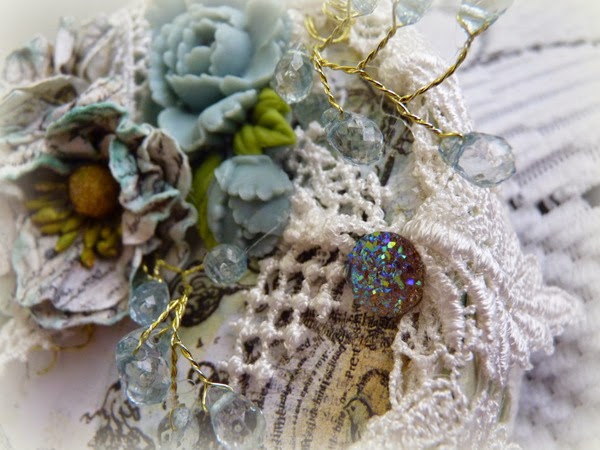
I used Prima's Epiphany collection to help revamp the box and of course these gorgeous laces and trims from the store.  I just love the teal!


If you watch my videos you know I've been trying to convince you (and myself) that I'm not a hoarder, but I have a hard time throwing away the left over bits of Bev's laces and trims so I tuck them in a little plastic bag and pull them out when I need some fillers. That's what I've used here, scrunched and tucked they resemble leaves and give the embellishments just the touch of elegance they need to finish the project. 


My intention is to fill the box with silk flowers made from the silk ribbons Bev sent me (like the streamer shown under the resin flower on the top of the box).  Time didn't seem to be on my side right now so I added some colored Hug Snug to the inside just to give you an idea.  I thought this Revamped box, filled with silk flowers, would make a lovely gift for a crafty friend, what do you think?


About The Piece by Piece
The Piece by Piece is an art and craft supply store that initially started on Etsy, but has grown and now also exists as a brick & mortar establishment in the Niles district of Fremont, California.  Beverly Ybarra, store owner sources her unique laces, trims and ribbons from all over the world, including France, one of her favorite supply sources.  Some of Beverly's favorite local suppliers include Graphic 45 and Prima, so you are sure to find their products on the shelves at TPBP.  For those close to TPBP store in Fremont, each week there is a full list of classes to choose from. 

Shop and Stay in Touch 
Shop online:  https://www.etsy.com/shop/thepiecebypiece
Shop in Fremont, CA:  37485 Niles Blvd, Fremont CA
Phone:  510 894-2488
Email:  thepiecebypiece@gmail.com
Sign-up for our newsletter:  Send your email address to thepiecebypiece@gmail.com
Follow us on Facebook:  https://www.facebook.com/pages/The-Piece-By-Piece/333109658870
Class list:  http://thepiecebypiece.blogspot.com/p/workshops.html

Thursday, October 9, 2014

Vacation Time

Hi Everyone -
I just wanted to let you all know I won't be posting this week.  We've been on vacation seeing my kids and Grandkids in Washington State and extended our time so I'm not home to share something crafty with you.  I can share my family though!  


Here they are!  Left to right, Eddie (my youngest Grandson), his brother Derik (my oldest Grandchild)  
Luke and Angie (my Daughter and Son in Law) 
Mitch (my eldest) Amber (my youngest)
 and seated my three lovely Granddaughters
Zoie, Pyper and Brynnie.

It's been a real long time since I've had all my family together at one time. Derik has been in the Marine Corp for the past four years and just ended his time this past July.  With one deployment to Afghanistan and one 8 month deployment with the Marine division aboard and abroad on a Navy vessel it's nice to have him home safe and sound on American soil! It made me so happy to have them all together in one spot!  

So I'll be back later this month with more crafty ideas for you.  In the mean time leave me a comment and let me know what you're working on or have just finished.

Thursday, October 2, 2014

Spellbinders Doily Magic Cards

a Cut at Home Design Team Project

I'm sharing a little nostalgia with you today as I think back on childhood hours spent watching my Grandmother crochet and tat. Perhaps that's why I was so drawn to Spellbinders Doily Art and Doily Fun Embossing folder and Stamp.


I've created five examples to show you how you can do many cards in a short amount of time changing each up to match your mood or whim. You can make them as simple as you like or much more intricate just by the added dies, flowers and embellishments you choose to use.  You might remember a short while back when I shared with you an assortment of flowers I'd made using Heartfelt Creations Arianna Blooms.  I pulled some of those ready made flowers out to adorn my cards today.  See it pays to make a lot when you're at your crafty table because then you have them all ready to go when you need just that perfect flower to make the card zing.


I hope you'll join me on the video today, I'll walk you  through the process of each card and share the things I've pulled from my crafty closets to complete them.  I'll also give you a few simple tips on creating multiples of your cards when you have your supplies out in front of you.

Thanks for stopping by if you haven't become a blog follower I hope  you do today!


Supplies I used: