Wednesday, April 23, 2014

Spellbinders Curved Border Cards

a Cut at Home Design Team Project


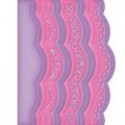
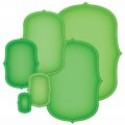
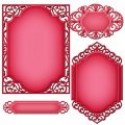
Spellbinders has a fantastic collection of dies called Borderabilities Card Creator - Curved Border. They add that extra decorative edge to a plain card base.  There's lots of sets to choose from and you can combine any number of dies to create you own decorative design.  This set includes 7 dies in the set.


On the inside I continued the look of Tim Holtz idea-ology paper collection Wallflower.  By slicing the paper along the edge of the flowers you can create a pocket to house a tag, I added colored seam binding and a charm to the one shown here.


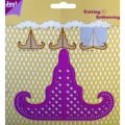
This is the card we'll create step-by-step in the video below.  You can see how different the edge looks by changing up the dies.  I fussy cut the butterflies from the Wallflower papers, added some Wink of Stella glitter, Glossy Accents on the body and hand drawn antenna.  Joy!Crafts, creates this wonderful card stand die.


On the inside of this card I used an acrylic sentiment from Cloud 9, a gift from Papercrafter45.  Using EK Success's Deco Scallop Edger on both sides of a think strip of Core'dinations Aegean cardstock creates this little border strip across the Webster's Pages lace trim.


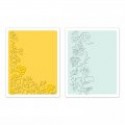
On this card I've combined 3 of the 7 dies to create this beautiful border edge.   I also fussy cut sections of  Sizzix's Floral Vine with Bird embossed mat.  By using just a smidge of Tim Holtz Distress ink in Victorian Velvet I was able to bring the embossing to the forefront and match the paper behind.  The flower is cut from Spellbinder's Die D-Lites Blooms Two.  


Using just a piece of the border this becomes the mat for my inside sentiment.


Supplies:

Wednesday, April 16, 2014

Kaisercraft Art of Life Masculine Card


I wanted to make a birthday card, a manly birthday card, lol, for my other half.  You know the kind, the ones with no bling, no ribbon, no glitter, no flowers.  The masculine kind, sometimes, if you're not careful, the boring kind.  So I tried to come up with an idea for a 'manly' card that still had some zip and punch to it.  I used Spellbinders Labels Thirty-one die to cut the card base.  You do this by folding your cardstock and placing the long edge of the die slightly beyond the edge of the fold.  When cut you'll have 3 decorative edges and one folded edge to form your card base.


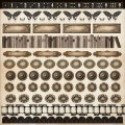
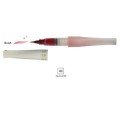
I used a combination of the Kaisercraft Art of Life 6x6 paper pad and 12x12 collection.  I cut the filmstrip from the paper and adhered it atop the decorative mat I cut with the labels die.  Then I used two of the domino numbers backed with medium weight chipboard.  I also used my Wink of Stella glitter brush pen to add a little sparkle to the numbers, you gotta have just a little sparkle don't you???  

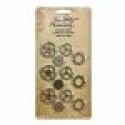
 I finished the card off with some Tim Holtz gears and sprockets


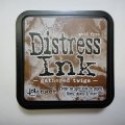
For my inside I cut another decorative mat with the labels die and trimmed the top portion that will nudge up to the fold.  I used a white gel pen to paint faux stitching around the outside edge.  On the Tim Holtz Journaling Tickets I stamped my sentiment with a extra small stamp that was included in a prize package I won from Tracy (Tracy's Treasures).  I joined the two tickets together with a teeny tiny paper clip (also Tim Holtz idea-ology). Everything was inked using Gathered Twig Distress Ink.

Join me in the video for a complete
walk through of how to make the card


Wednesday, April 9, 2014

Spellbinders Create-a-Lily Cards

a Cut at Home Design Team Project


This week I'm back with another flower card made with Spellbinders Die D-Lites Create-a-Lily dies.  I used Tim Holtz Wallflower paper collection for the base and inside of the card.  I wasn't sure how to do the centers so I pulled up Google Images and searched for Lilies, great inspiration.  Adding just a few metal pieces a stickpin and some lace finishes off the front of the card with room inside to write a personal message to the recipient.


Changing the color of the flower certainly changes the total look.  This time I cut the petals from pink cardstock, used a dark brown for the dots marking the petals and inking the edges with white pigment ink.  I used Spellbinders French Harmony die for the mat under the flower.  Dying white seam binding with pink distress ink gives just the right finish to the stem of the flower with room behind to tuck in a flower spray and stick pin from my stash.


These aren't something you'd want to make in mass production but the time you spend creating will be well worth it once you hold the finished embellishment in your hand.  Perfect for your cards, as I show here, or on any other project you might be creating.

Check out my video below to see how to make a yellow lily step-by-step.


Supplies:

Friday, April 4, 2014

Winner Winner

I just won a new set of  Majestic Spellbinders from Molly's Square just for liking her on Facebook!  So hop on over and check her out, sign up for the notifications of her daily deals and see what's what.


I've told you before it pays to enter because you just might become a winner!!  
Be sure and check out Molly's Square on Facebook as well!


Thanks so much Molly's Square for picking me as your Facebook Winner!!


.

Wednesday, April 2, 2014

Spellbinders 'Create-a-Gerber Daisy' Cards

A Cut at Home Design Team Project


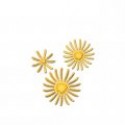
Spellbinders has these marvelous Die D-Lite dies to 'Create' a flower, I used the Gerber Daisy dies on the card above.  So fun to do and really very simple you just need to cut the dies multiple times to get all the petals and leaves you need to make the flower.


Using Tim Holtz Distress inks in Spiced Marmalade and Dried Marigold I inked about half of each petal leaving the tips the natural cream of the cardstock.  


The card base is created with Spellbinders Divine Eloquence dies many cut several times and layered with solid Latte colored Core'dinations cardstock.  I used dimensional foam between several layers so the filigree on the cuts would be more pronounced.


Be sure and check out my video for a complete step by step on how to make the flower and also the card start to finish.  You'll also see another example of the flower and a card in pink tones.

Supplies -