Thursday, May 31, 2018

Authentique Accolade Collection - Scraps to Masculine Cards

a Country Craft Creations Design Team share

Well my friends I think this just about does it for the scraps from Authentique's Accolade collection  I have some stickers left and a few papers I'm saving for other masculine/graduation projects as time goes on.  I did want to leave you with a little inspiration for some guy cards since I know many of you struggle for ideas, as I do, for the guys in your life.


I made a total of 7 cards for you using up the scraps and stickers from the collection.  All cards are on a Kraft card base, 4" x 5 1/2".  Here I've fussy cut the hot air balloon and added some accents with thin black twine.  I used a sentiment stamp to tie it all together.


Inside was left pretty simple with just the fussy cut camera and some lined paper to write my greeting on.  I did ink all around the edges, inside and out with an espresso colored ink.


I wanted to give you some food for thought on the video (link at the bottom of the blog post).  I used two Distress Oxide inks and one regular Distress ink to color up the Accolade paper.  I moved the inks around using Tattered Angels Glimmermist in Dazzling Diamonds. 


Keep in mind when you're working with your papers you can always change up the colors by the use of mists and inks.  I love how these papers took to the blues.  A great guy card.  The stickers were from my stash.  They've been hanging around for eons just waiting for me to pluck them out and glue them down.  I'm not much of a packaged sticker person but after seeing how cute these cards turned out I'm thinking I may look at them a little closer when I see them in the close out bins.


I wanted to share one more card on the blog post and you can check out the video for the other four examples of using your scraps. In the 12x12" papers I had two of these flying pigs.  OMG aren't they adorable?  There's just something about a flying pig.  I knew I had to do a couple 'over the hill' cards for a birthday I'm belated on and one that's just around the corner.  I know both of the guy recipients are going to get a laugh out of them.  


I used those super cheap alpha stamps that you can get in the close out bins, I have several of them in my crafty stamp drawers.  The fonts are funky and fit perfectly with the little pig.  

Check out the video for a short how I did it with the Oxide inks and other examples to spur your imagination creating your own masculine cards from scraps.  Happy crafting and thanks so much for joining me today.  I know time is precious and you just don't realize how much I appreciate you all for sharing a little of your time with me!


Please visit Country Craft Creations here -
you can also join the Facebook groups

Visit me at A Soul's Heartbeat on


Friday, May 25, 2018

Authentique Accolade - Scraps to Tiny Boxes

A Country Craft Creations Design Team Project Share

I'm back again with another share using the Authentique Accolade collection. I'm still using up my scraps.  I was sending out some Happy Mail to a friend and ran across a box another crafty friend had sent me years ago.  In it she'd included all these fun Tiny Boxes.  I wrote and asked if I could make a pattern and share what she'd sent me using my scraps.  Well being the sweetheart she is she said yes of course.  These original boxes were from Manuela, you probably know her on YouTube as Bunny Bow, please check her channel out and say hello.


You could use up any scraps of paper you had left as long at they were close to 8" in length.  The possibilities are endless.  Here's one I used with the Autograph paper and a buckle closure.  The ones I received had some great brad closures with an easy elastic band but for the life of me I can't find where I put my elastic cording, it's here very safely tucked away, so safely I can't find it, please tell me you have the same problem?? 


This is a super quick project, you can whip these little boxes out in no time.  This one closes with magnets.  I had wanted to use small velcro circles but I'm thinking I used them all up because they were no where to be found either.


Because they have a gusseted side they expand to hold a lot of little surprises inside.  

Check out my video for a step-by-step walk through tutorial of how to put these little guys together using up lots of your scraps.  Thanks for stopping by!


Please visit Country Craft Creations here -
you can also join the Facebook groups

Visit me at A Soul's Heartbeat on

Thursday, May 24, 2018

Spritzing and Spraying with Tattered Angels Glimmermists

a Canvas Corp Brands CREW project

My project is being featured on the Canvas Corp Brands - The Creative Studio Blog today.  I'd so love it if you'd pop on over there and give me some love.  I had so much fun just playing and creating with the Tattered Angels Glimmermists.  Do you have some of them sitting on your shelves just crying for attention?  If so find them and start creating today, you'll be so glad you did!


Since I was really running low on Sympathy cards I choose to do a lot of those, you'll see them all on Video 2.  If you love watching the process check out Video 1 (links below) where I'll share step-by-step the whole process of making gorgeous backgrounds for your cards.  I also tried very hard to have one layer cards so they easily could go through the mail with no additional postage or worry of being snagged before arriving at their destination.  This is a much harder process for me than you might think.  I guess I like textures and bumps and bows and whatnot, but I succeeded on the majority.

Join me on the Canvas Corp Blog for the whole story and on the videos for the how to's and end results.  Thanks everyone, I so appreciate you all stopping by to see what I've made.


Supplies include Tattered Angels – Glimmer Mists;  Glimmer Glam in Twinkle Toes and Rustic Canvas Home Basics – Cards/Envelopes- Note Cards in WhiteShip to Shore – Signs on Ivory  Ken Oliver Water-Media Greeting Cards
Supplies from my stash include Canson Cold Press Watercolor paper,  embossing powders, embossing folders, dies, stamps, Big Shot, Score Board, bone folder
Follow Canvas Corp Brands StoreBlog and Facebook Collective Group (this is a group you must request to join, but boy is it worth it!!!)Canvas Home Basics at Facebook and Instagram.
7gypsies at Facebook and Instagram.Tattered Angels on Facebook and Instagram.
Visit me at A Soul’s Heartbeat on BloggerFacebookYouTubePinterest and Instagram.

Friday, May 18, 2018

Authentique's Accolade Masculine Mini

A Country Craft Creations Design Team Project

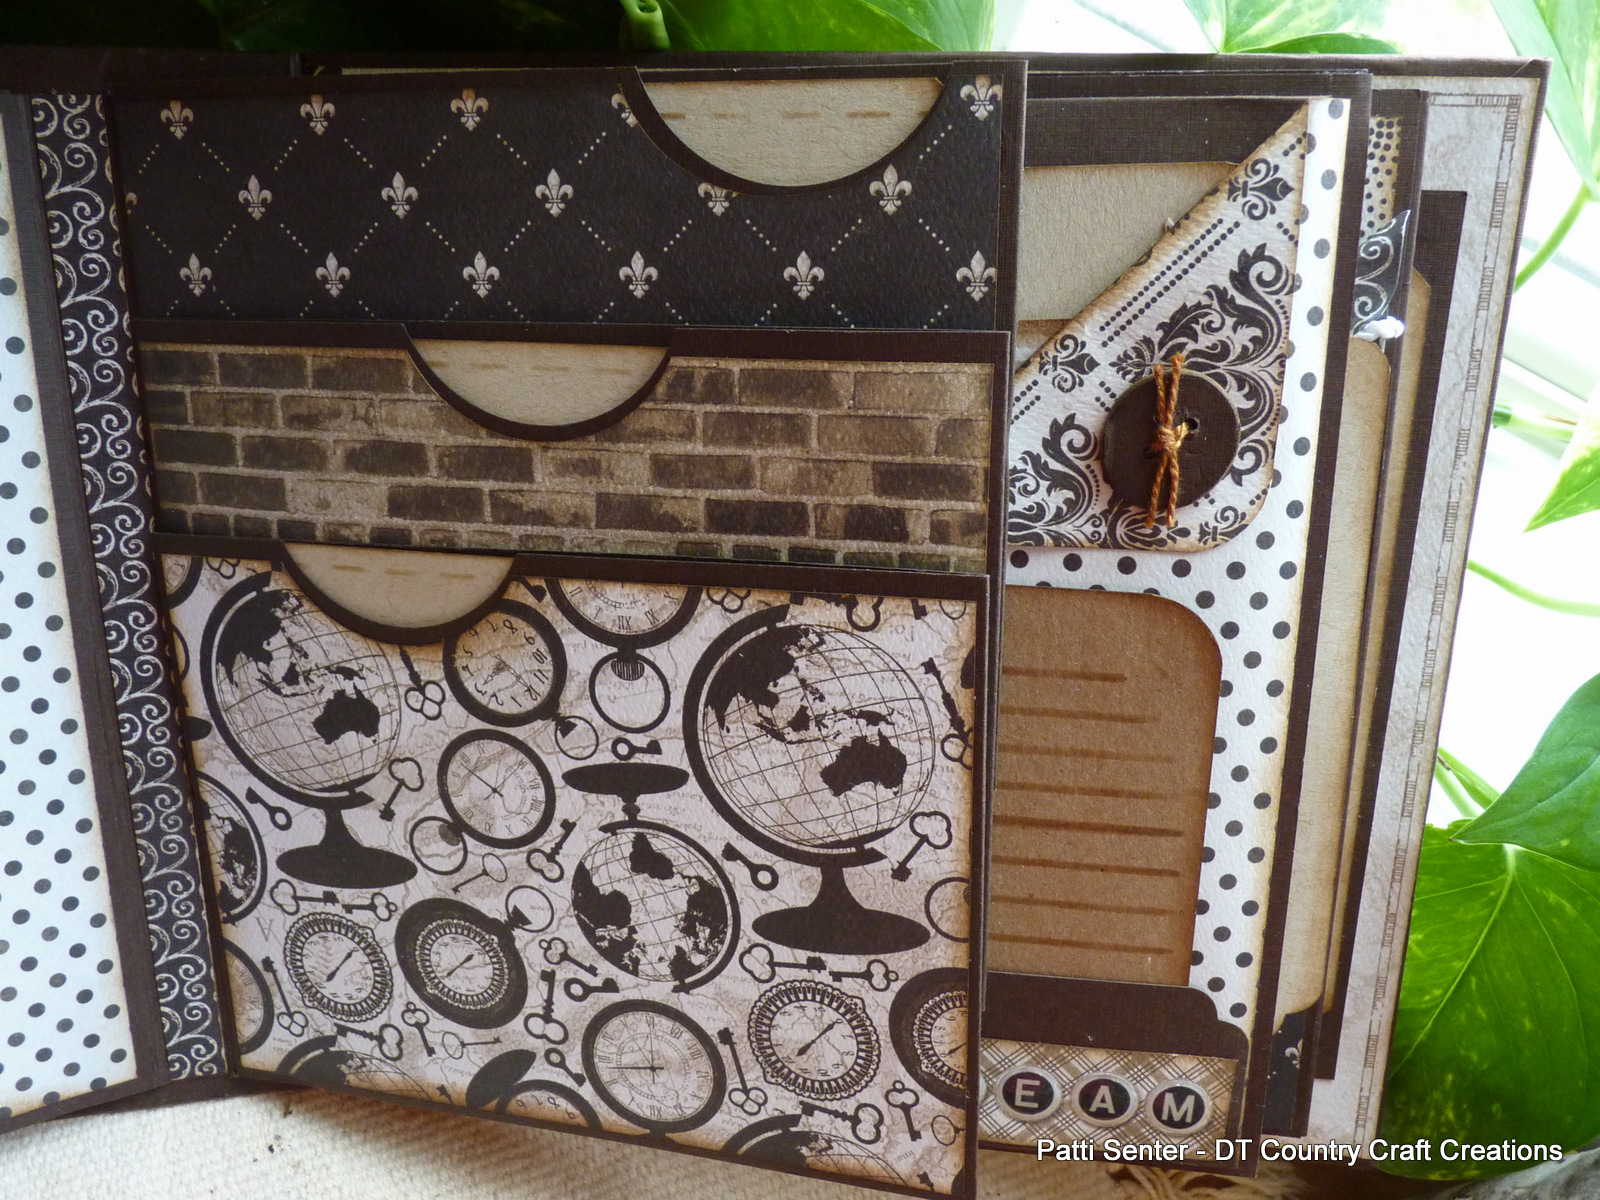
Oh I have a fun project to share with you today.  I've spoken often about how much harder it is for me, and many of you, to make masculine projects.  Part of the problem is finding nice masculine type collections to work with.  Well today I've flipped Authentique's Accolade collection from the normal 'A' side designs we usually pick first to work with to the 'B' sides.  This is the side that normally compliments the primary designs.  The flip side of the Authentique Accolade collection is a wonderful collection of brown and beige very masculine looking papers.  I loved them and that's what I've used today for my mini.  


My mini is 8" square with a 3" spine allowing for 7 1/2" square pages, of which there are 5 full pages with the 6th split into 3 smaller flips, which I'll share in just a bit.  I've used 1/2" gussets between the pages which allows the book to lay nicely (see the photo below). 


I opted not to do a full blown tutorial for this mini since the main construction is so similar to many of my other tutorials you can check them out on my YouTube Playlists Page.  You might want to start with the How Do I Do That Playlist and branch out from there.  But as always, with anything I create, I'm always here to answer any questions or help solve any snags you may have in your creative process.  Never hesitate to drop me an email with questions, comments or concerns. And on that same line I love it when you share what you've made tailored after something I've shared!


I supplemented the main collection papers with Authentique Spectrum II and Artisan in Brown and Kraft.  Here's a two page spread with two different closures.  I was hoping to get the look of a belt on the right hand side.


Something I do often and really love the look is to cluster groupings of stickers and cut outs from the paper to create tuck in areas for photos or tags. 


This is where I split the hinge to make 3 small flaps.  This gives lot more movement and interest to your mini's.  I used a 2" circle punch to make the finger pulls for the inside mats.


A smaller pocket left open at the side creates a great slip in for the narrower mats and a huge area for a large mat or photo.  Since the pages measure 7.5" square there is lots of space for photos up to 7" square.  I only allowed for three of the pages to have large side pockets.  Since there is ample room within the page design to save lots of large photos I thought three kept the bulk down.


The keys on the tag shown here are also the keys I used to decorate the spine.  By fussy cutting these two keys and adding the one from the sticker sheet I have a fun element for the outside.  Snipping the top part of the keys and interlacing and gluing them gives the appearance of keys together.  I added a good layer of Glossy Accents.  The hanger is simply a very thin piece of Artisan brown paper twisted in the middle, looped around the keys and tucked under the canvas.  The secret is making sure you securely glue everything down.  I use my trusty Art Glitter glue, available in the store.


The spine is sticky back canvas Glimmermisted in browns.  I haven't used this before so was unsure how strong the sticky back was so chose to add a good layer of Art Glitter glue.


There's lots more to share with you so please pop on over to my video and watch the walk through of each page.  Thanks for joining me and have fun crafty day.  Be sure and check out the Authentique paper collections at Country Craft Creations.


Here's some ideas using the scraps for Graduation cards - 


Please visit Country Craft Creations here -
you can also join the Facebook groups

Visit me at A Soul's Heartbeat on


Monday, April 23, 2018

Sweet Baby Girl Accordion Mini with a Box

Hello everyone, there sure isn't anything sweeter than a new baby.  One of my closest friends just became a Great Grandmother for the first time and I wanted something special for the baby to celebrate her entrance into our world.  I opted to use Echo Park's Sweet Baby Girl collection and it is that, just the sweetest bits of pink and teal and everything available to make whatever project you'd want.  I also want to give a big shout out to my crafty friend Cheryl Wells who sent me a Country Craft Creations Gift Card at Christmas time.  Yes, I know, I've been hoarding it, but I was so glad I had so I could purchase this fantastic collection.  If you're ever on the fence about what to get another crafter you can't go wrong with a Gift Card!


 I decided to make an accordion mini, one of the fastest and easiest around.  You simply determine the height of your mini, mine is 6", determine the number of pages you're going to want, I choose 12 and then cut, score, adhere and fold.


My supplies all came from the Country Craft Creations store.  I used white Artisan cardstock for my base.  Since the sheets come 12" square I simply cut them in half creating 2 6"x12" strips and scored each strip in half at the 6" mark.  I made hinges and attached three strips together creating six 6" spots on each side.  Once attached it's just a matter of decorating with your favorite papers and folding the pages back on one another to create the accordion.


I primarily used the 6x6" pad from the collection but I did use the whole cut apart sheet that had the 12 months on them.  These became the magnetized flaps for each folded section and will represent the baby's first year in photos and notes.


Side one shows the first six months and


Side two shows the rest of the year up to baby's first birthday.


Adding the magnetized flaps allows a small photo to be put on the back and numerous photos to be held loose between the magnets.  Please join me on the video as we walk through the whole books process and completion.  As I said this is a super simple idea any one can make for any occasion.  Thanks so much for stopping by!


This video will show you how to construct the basic box to house a 6x6" mini


I've entered my mini into the Crafter's Castle Challenge, I don't normally enter challenges, I used to but have just gotten out of the habit but Janie gave me the head's up and I couldn't resist.

I got all of my supplies from Country Craft Creations
you can check them out at the links below -

Store - http://countrycraftcreations.com/
YouTube - http://tinyurl.com/jkw6ptz
Pinterest - http://tinyurl.com/z49ueuc
Facebook - http://tinyurl.com/zbj7eu8
you can also join the Facebook group
Scrapbookers of Country Craft Creations here - http://tinyurl.com/zhess6s
Or Coffee Talk page here - http://tinyurl.com/y8byhnel

Visit me at A Soul’s Heartbeat on BloggerFacebookYouTubePinterest and Instagram

Thursday, April 12, 2018

Life Composed in Mini Album form

a Canvas Corp Brands CREW project

I think you're all going to want to pop on over to the Canvas Corp Brands Blog today and see this mini I've created.  Wow, oh wow have I fallen in love with Aga Baraniak's new collection Compose Your Life. This is such a different collection printed on many different weights and textures of papers, some of which is printed heavy mixed media paper.  While some of the coloring has been done for you there's still a large assortment of papers just waiting for your personal coloring touches and techniques.  A great assortment for any crafter. Click here or on the photo for the Canvas Corp Blog Post.


I have a complete video walk through of this mini here 


And as an extra bonus this was created using my Loose Spine Mini tutorial series.  So if you're interested in making a mini with a similar design check out my playlist here


SUPPLIES FROM THE CANVAS CORP STORE


Aga Baraniak Collection 
Tattered Angels
Canvas Corp
Supplies from my Stash:Country Craft Creations Artisan Cardstock in White and Red; Core’dinations cardstock in green;  Art Glitter liquid glue; Magnets; brads; Dies – Spellbinders Arched Elegance Pocket, Creative Expressions by Sue Wilson Dorado, Spellbinders Divine Eloquence, Spellbinders Superellipse, Sizzix Framelits Tags, Marianne Designs Envelope,  Spellbinders Pierced Rectangles; Tim Holtz Distress inks in Worn Lipstick and Vintage Photo
Tools: Big Shot, Scan -n- Cut, Martha Stewart Score board, bone folder, scissors, kraft knife, corner punches,

Follow Canvas Corp Brands StoreBlog and Facebook Collective Group (this is a group you must request to join, but boy is it worth it!!!)
Canvas Home Basics at Facebook and Instagram.
7gypsies at Facebook and Instagram.
Tattered Angels on Facebook and Instagram.
Visit me at A Soul’s Heartbeat on BloggerFacebookYouTubePinterest and Instagram


Monday, April 9, 2018

Authentique's Stitches Leftovers to Cards

A Country Craft Creations design team share

Recently I share a new mini using Authentique's Stitches Collection.  Well as with most projects there are always leftover bits and pieces.  I like to make mine into cards or tags instead of storing the leftovers away.  I know once I have packaged them up and tucked them into a nice little storage nook rarely are they brought back out to be made into something new.  It's better for me to finish up the odds and ends into leftovers while my desk is still covered in the remains of the main project.


So today I'm sharing a few photos here but I have the complete process for all ten cards on the video below.  Granted I am working in high speed but you'll get the jist of what I'm doing and perhaps give you food for thought of ways to incorporate your scraps into cards. (Don't forget with YouTube videos you can click on the cog in the lower right and change the speed if there's some part that you're wanting to see in greater detail.)


Along with cardstock I also incorporated some canvas in several spots.  You can die cut canvas and you can also stamp on it, both of which are shown in the cards I'm sharing.  It's nice to use other textures when you create.


It's always fun to pull in everything in your crafty area that might enhance the bits and pieces of decorative paper you have left.  I have this set of Paper Dolls from Tim Holtz that just crack me up.  I used one on the card above.  Nothing is better than adding a few unclaimed relative's photos to your cards.  Since I have a humongous supply of my own ancestors photos in my photo drawers here I always look at these people in the Tim Holtz packages and can't help but wonder who they were.  Anyway they sure add life to my cards and a fun twist.


I used some older stamp and die sets I had in my stash to embellish the ins and outs of the cards.  I hope what I share today will inspire you to turn your scraps into cards or tags.  Once you do pop them in the mail and share them with a few of your friends, I know it will brighten up their day.


Please visit Country Craft Creations here -
you can also join the Facebook group
Scrapbookers of Country Craft Creations here - http://tinyurl.com/zhess6s
Or Coffee Talk page here - http://tinyurl.com/y8byhnel

Visit me at A Soul's Heartbeat on

Friday, March 30, 2018

Authentique's Stitches Loose Spine Mini

a Country Crafts Creations Design Team Project

Many of you faithful followers will have already seen a condensed version of this mini if you've been following along on my YouTube video tutorial series Loose Spine Mini.  This series consists of 9 process videos walking you through the complete process, step-by-step, page-by-page, of how to make this mini.  Today I'm here with the blog post and video presentation of the finished Mini Album.

Tammy Merrill of Country Craft Creations sent Authentique's Stitches collection to me to play with and it has been fun and a tad nostalgic along the way.  I'm an oldie that learned to sew on my Momma's Singer Treadle machine, that's right the non-electric version.  It was a fantastic way to learn because you had so much control over the speed.  Of course all the fancy-dancy stitches weren't available.  Forward and reverse, just right for a youngster learning.  The Stitches collections brings forward so many of those old memories.  I hope you'll find some great nostalgia in my book as well.


The construction of the mini is with a loose spine and no gussets between the pages.  Unique, easy and fun to make.  I tended to add a few extra pockets and flaps, something that's so easy to do when you are creating but also can leave an alligator mouth on your mini.  I solved that problem by creating this gorgeous belly band to allow for photos and what nots as the mini expands even further.


The mini is six pages total and uses Country Craft Creations Artisan cardstock for the base, belly band and spine.  I did use three coats of Collage Podge (a Mod Podge) on the spine for extra stability. There are six tuck in top mats that measure 4"x5"


You'll find as with most of my minis that there are a lot of options for photos with with tuck in expandable booklets or flips and flaps.  I used Tim Holtz Distress Ink in Vintage Photo on all the edges.  Most of the tag ties and bows are made with colored Seam Binding from the store.


I did have fun designing a decorative envelope and adding a touch of lace gifted from my talented friend Manuela in Switzerland, you may know her as Bunny Bow on YouTube.  Manuela has sent me so many gorgeous lace items shes crafted with her embroidery machine and I hoard them, I know I'm bad but I do I hoard them.  This time I just had to include this little rosette of lace and yes, I promise Manuela I'll be better going forward, but it's so hard, I love them all.  We crafters are such silly ducks!


I went through my stash of dies and used quite a few throughout the book along with a lot of the stickers and cut aparts from the Stitches collection.


The graphics within this collection are so stunning they lend themselves to being left free to enhance the viewers perspective.  Here you can see I simply cut along the papers image line to create a pocket and continued the paper from left to right on both pages.  Simply stunning images.


I hope you'll walk through the finished book on the video with me.  And if you want to create a mini like this for yourself be sure and check out the video tutorial series as well


Please visit Country Craft Creations here -
you can also join the Facebook group
Scrapbookers of Country Craft Creations here - http://tinyurl.com/zhess6s
Or Coffee Talk page here - http://tinyurl.com/y8byhnel

Visit me at A Soul's Heartbeat on

Monday, March 19, 2018

Tutorial Series, Loose Spine Mini

Hi everyone, I'm starting a video tutorial series on how to create the spine and framework for the mini I did with Carta Bella's Country Cowboy.  This will be a playlist series on my personal YouTube channel called Loose Spine Mini Tutorial Series.  The first video is the spine construction, the following videos will show ideas to do each page and the final video will be the outer covers and decorations.  I hope I share something new for you to take away and try yourself.  Please subscribe to my YouTube channel so you'll be notified when the next video is live.


Visit me at A Soul's Heartbeat on


Tuesday, February 27, 2018

Cowboy Country Mini Album for Country Craft Creation

a Country Craft Creations design team project

Hello everyone, I've a fun mini album to share with you straight from the days of my youth.  Steve Duncan has designed this fabulous collection for Cata Bella called Cowboy Country.  This mini would be perfect for any age Cowboy or Cowgirl in your family.  A great mini to house those family photos you have tucked away.  So let's get started and see what you think.


This mini sports six pages accordion pleated and directly glued to the hinges with no gussets (you'll get a great description of this process on the video).  The spine is free to move and be flexible.  I love this look and I love how the mini lies almost flat as you're thumbing through it.


I opted not to have any type of closure on it and even though it looks very open mouthed here it really isn't.  Adding a belly band closure or a knotted tie closure would be super simple if the mini were too grow to wide once the photos were added. 


 I did include six large top slip in tags for some fairly good sized photos.


Throughout the mini I've used a lot of magnets to keep things neat and tidy and each page has some sort of sisal rope on it.  I love that rope/twine, it has that definite country feel to it.  There are lots of pockets and slips to hold an abundance of of mats and tags.


I discovered that if I used my clear Wink of Stella glitter pen on different wordings (like the Yee Haw above) and then once dry went over it with Glossy Accents I had just a hint of sparkle show through and a nice raised effect from the Glossy Accents.  Perfect for a cowboy mini with not too much glitz and glam.


As I said above this mini has six two-page spreads which gives lots of area to showcase this great collection of Western themed papers.

I hope you'll join me on the video for a complete walk through of the mini.


From Country Craft Creations Store
Art Glitter Glue


Please visit Country Craft Creations here -
you can also join the Facebook group
Scrapbookers of Country Craft Creations here - http://tinyurl.com/zhess6s
Or Coffee Talk page here - http://tinyurl.com/y8byhnel

Visit me at A Soul's Heartbeat on