Showing posts with label Baby. Show all posts

Monday, April 23, 2018

Sweet Baby Girl Accordion Mini with a Box

Hello everyone, there sure isn't anything sweeter than a new baby.  One of my closest friends just became a Great Grandmother for the first time and I wanted something special for the baby to celebrate her entrance into our world.  I opted to use Echo Park's Sweet Baby Girl collection and it is that, just the sweetest bits of pink and teal and everything available to make whatever project you'd want.  I also want to give a big shout out to my crafty friend Cheryl Wells who sent me a Country Craft Creations Gift Card at Christmas time.  Yes, I know, I've been hoarding it, but I was so glad I had so I could purchase this fantastic collection.  If you're ever on the fence about what to get another crafter you can't go wrong with a Gift Card!


 I decided to make an accordion mini, one of the fastest and easiest around.  You simply determine the height of your mini, mine is 6", determine the number of pages you're going to want, I choose 12 and then cut, score, adhere and fold.


My supplies all came from the Country Craft Creations store.  I used white Artisan cardstock for my base.  Since the sheets come 12" square I simply cut them in half creating 2 6"x12" strips and scored each strip in half at the 6" mark.  I made hinges and attached three strips together creating six 6" spots on each side.  Once attached it's just a matter of decorating with your favorite papers and folding the pages back on one another to create the accordion.


I primarily used the 6x6" pad from the collection but I did use the whole cut apart sheet that had the 12 months on them.  These became the magnetized flaps for each folded section and will represent the baby's first year in photos and notes.


Side one shows the first six months and


Side two shows the rest of the year up to baby's first birthday.


Adding the magnetized flaps allows a small photo to be put on the back and numerous photos to be held loose between the magnets.  Please join me on the video as we walk through the whole books process and completion.  As I said this is a super simple idea any one can make for any occasion.  Thanks so much for stopping by!


This video will show you how to construct the basic box to house a 6x6" mini


I've entered my mini into the Crafter's Castle Challenge, I don't normally enter challenges, I used to but have just gotten out of the habit but Janie gave me the head's up and I couldn't resist.

I got all of my supplies from Country Craft Creations
you can check them out at the links below -

Store - http://countrycraftcreations.com/
YouTube - http://tinyurl.com/jkw6ptz
Pinterest - http://tinyurl.com/z49ueuc
Facebook - http://tinyurl.com/zbj7eu8
you can also join the Facebook group
Scrapbookers of Country Craft Creations here - http://tinyurl.com/zhess6s
Or Coffee Talk page here - http://tinyurl.com/y8byhnel

Visit me at A Soul’s Heartbeat on BloggerFacebookYouTubePinterest and Instagram

Monday, October 16, 2017

Overall Album for that Little Guy

a Sa Crafters Design Team Project

Please check out the complete blog post over on Sa Crafters blog here .  I absolutely loved creating this shaped little boy overall mini.  It's always so fun, and different, to do a shaped mini opposed to one I've created with front, back and hinges.  It's just a whole different animal and so much fun.  I loved decorating each of the 10 overall pages.  In fact it was kind of hard to go back and add the photo spots and tuck ins because the overalls and shirts were just so darn adorable.  But, a mini needs room to add all those favorite photos of your little guy and this one certainly doesn't disappoint.  It always is amazing how many photos a mini like this can hold and this one is no exception, with room for lots of 4"x6" photos.


Because this mini isn't bound it uses rings to hold it together at the tops of each page.  I use round rings to begin with but switched them out for larger D rings that were much stronger and allowed the pages to turn easier.  I adorned the rings with ribbons I'd used on the pages.


There are lots of tuck spots, pockets and areas to house tags, mats and photos.  After all a new baby needs all the room in the world to be shared and shown off.


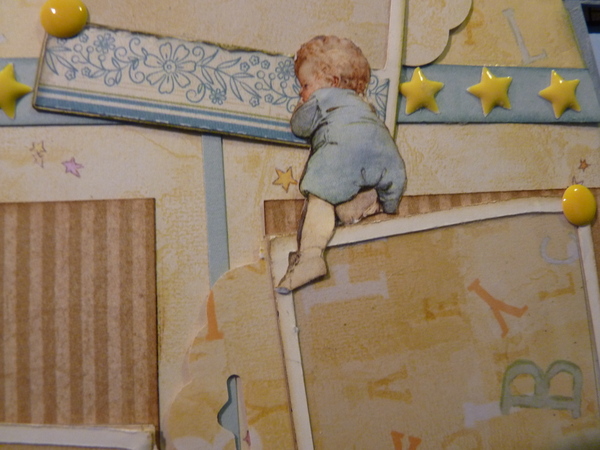
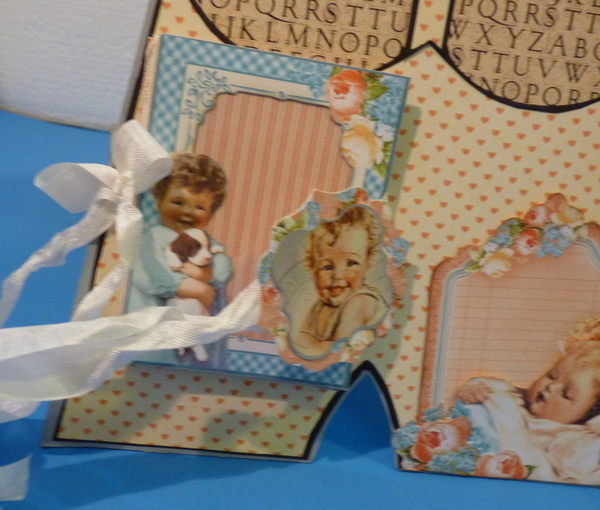
As always I'm notorious for using fussy cut images and I just couldn't help myself with all these adorable little ones.  So you'll find them climbing up edges or sleeping on ledges, anywhere I could find to put them there they are and they make me smile every time I look at them.


I like to add booklets or waterfalls whenever possible because it just adds to the amount of photos you can place.  Here I have a little booklet that hold photos behind acetate spots as well as on the mats.  This little ones hold 6 photos plus a generous area for jotting down some memories to preserve.


There's lots to see that I won't show here or on Sa's blogpost but you'll find it all on the video below.  I'll also share how I prepped the pages and the supplies I used.  I have an older post that uses the little Girl Dress Shaped Mini that I'd love for you to revisit as well.


From Sa Crafters Store

Visit Sa Crafters at -

Saturday, July 15, 2017

It's a Canvas Corp Girl - Mini Album that is!

A Canvas Corp Crew Project

Today I'm using another Mix and Match pad from Canvas Corp called Sugar and Spice.  We don't have any little girls on the horizon that I'm aware of but I've loved this collection of papers for so long I decided it was time to just play and have fun.


I'm just give you a tiny glimpse here but you can catch the full blog post over on the Canvas Corp Blog and don't forget to check out the video here - 


Supplies
Canvas Corp Basics -
Tattered Angels -

Follow Canvas Corp Brands here
(this is a group you must request to join, but boy is it worth it!!!)

Tattered Angels at

Canvas Home Basics at

7Gypsies at

Visit me at A Soul's Heartbeat on


Wednesday, February 10, 2016

A New Arrival

a Cut at Home Design Team Project


Today I'm sharing a darling little new arrival card made with Marianne Design dies and Graphic 45's Precious Memories Collection.  This is a 6" square card made with Spellbinders Celebra'tions Cuddle Cream cardstock.  This is my favorite cardstock for the bases of my cards.


The inside of the card hosts this vellum greeting I had in my stash along with a few surprises I'll leave you to see on the video.  I'll be doing this card start to finish and as always will include additional photos for you.

Thanks for sharing your time with me, be sure and check out the Cut at Home store not only for todays card's supplies but also for the complete line of Marianne Design dies, they are certainly one of my favorites.


Supplies from Cut at Home
COL1384: Marianne Design Eline’s Elephant dies
COL1381: Marianne Design Stamp Stork dies
SCP-014: Spellbinders Celebra’tions Cuddle Cream Cardstock
4501092: Graphic 45 Precious Memories 8″ x 8″ paper pad
4501091: Graphic 45 Precious Memories 6″ x 6″ patterns and solids pad
SCI-001: Spellbinders Celebra’tions Berry Black ink
Angel Craft Tape double sided adhesive tapes available at Amazon in 1/8″ – 1/4″ – 1/2″

Thursday, May 21, 2015

Prima Bedtime Story Baby Cards


After finishing up my mini from Prima's Bedtime Story (blog post is here) I had scraps laying on my desk, isn't that usually the way?  Instead of scooping them up with the full sheets I thought why not make a few baby cards, one to go with the mini and the others for backup.  


This is the one I made to accompany the mini.  I had just enough ribbon left for this eye popping bow.


Here's the second one, with the baby banner swinging across the top from all the little baby words fussy cut from one of the mats.


The last one has these clouds that were in my baby bin (I have one bin where I put all things baby as I run across them).  The ribbon and star also from the baby bin.  You'll see how well the Prima paper pieced to form the mat and the perfect colors to go with what I already had on hand.


Love making envelopes to go with the cards, here's these three.
There's lots more photos on this short video -


Sunday, May 10, 2015

Prima Folding Accordion Baby Brag Book

First off I must start this blog post with a couple of thank you's.  To Prima for this wonderful gift of Bed Time Story products.  I won their giveaway after CHA for a selection of goodies (you can see the whole blog post HERE if you missed it).  I had intended to have this little book done zippidy doo daa fast but you know how real life kicks in and alters your crafty time don't you!  The little one has yet to arrive so I'm still ahead of the game.

Secondly I want to thank Anna Komenda for her video tutorial How to Create a Folding Mini Album.  Anna is from Europe and her video is not in English but it's still easy enough to figure out.  A viewer, Doris Cote offered the conversion to inches for us and I'll post that below the video for any of you wanting to make a mini like this for yourself.

So without further ado let me share my little mini and little it is, it measures 4 1/4" x 3 1/4" with 8 folding pages.


I used several Martha Stewart border die punches for the front, a fussy cut element from the outside cover of the 6x6" paper pad (I liked this because the cover is glossy and thicker and will stand up well on the outside), a covered button element I found in my stash (perfect color match) and tied with a satin ribbon from The Piece by Piece.


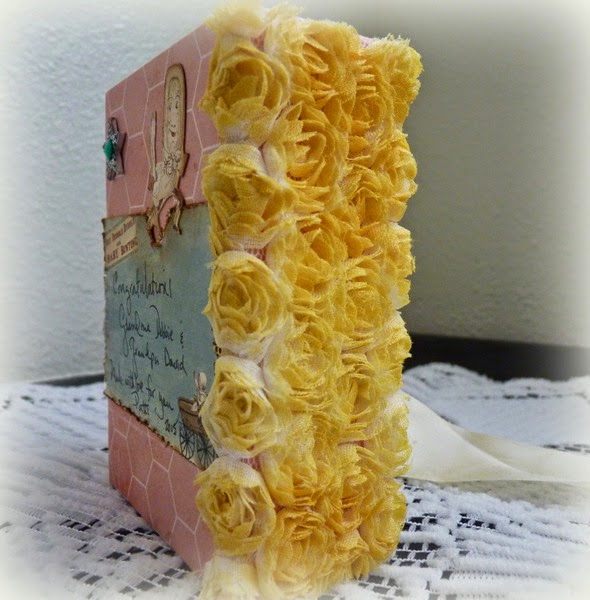
The spine is covered with a mini rose trim from Sa Crafters (she no longer carries this, sorry).  The trim was white but I used the Color Bloom Mist in Yellow Mustard Prima had sent in my package.  I lightly misted it so parts of the white still show, I liked this look instead of heavily saturated.  This is my first experience with the Color Bloom sprays and I really liked how the mist bottle worked, often times mists are wonky and I like when you have control and it goes where you want it to!


Here's where I used 3 of my Martha Stewart edge punches, Vintage Floral - Doily Lace - Beaded Arches.  I used tape on the backs and glued one to the other over the top.  It wasn't until I had finished gluing that I thought oops that wasn't too smart, the glue strip popped out between all the delicate cuts from the punches so of course the top was now sticky. Isn't it wonderful how often times mistakes make the best finishes?  I sprinkled on some of the fine Dazzling Diamond dust from Stampin' Up and my problem was solved and a nice sparkly effect now enhances the front of the mini.


To secure the book I ran a piece of Satin Ribbon from The Piece by Piece around my book first, all other elements were placed over the top of the ribbon  To secure just run a strip of wide sticky tape such as Angel Craft, Scor-Tape, Redline or Miracle tape around the book first, place your ribbon over top to hold in place while you position the rest of your outside book elements.


Here's one side of the book unfolded,   There are 4 folds on each side, eight pages, sixteen total counting both sides.  Even though the photos will be smaller there is load of room to put them in this book. Since the book closes with the tie you have a lot of room for expansion.


I doubt the Grandparents I made this little brag book for have ever seen anything like this. So to help them place the photos and cut them out I took the dies I used for the oval and square mats and traced on the inside of the die, cut it out and then wrote with felt pen on the front so they realize these are the photo templates.  When you trace and cut on the inside edge of your die then you are creating a 1/4" border around your photos when they are glued to the mats.


I like that there is a 1/4" gusset on each fold to allow room for not only the glued down photos and mats but lots of small photos or keepsakes to be tucked into the pockets.

OK that's all the peeks I'm showing, you'll need to join me on the video to see each of the pages and all the products I used.  Thanks so much for stopping by, I'd be honored if you subbed to my blog and YouTube channels!  Oh yes, I also have a Facebook Page, geez I'm just all over the place aren't I, lol.


Conversion of meters to inches courtesy of Doris Cote 
American measurements: Cardboard = all from a 12x 6 1/2 inch strip. You will have a smidge left over. Cut the strip at 2 inches, 2 1/2 inches, 3 1/8 inches, 1 3/8 inches, 1 1/8 inch. Cover patterned paper (pp) cut 12x 61/2 inch. I also cut several 1/8 inch strips of cardboard to help me line up the actual cardboard pieces as spacers. Place the cardboard pieces in the following order: 2 1/2, 1 3/8, 3 1/8, 1 1/8, 2 inches.The pages are cut from double sided pp at 6 1/4 x 4 inches.

Thank you Doris for sharing your conversions!  

Tuesday, March 25, 2014

Yee Haw Little Cowboy Mini

October Afternoon has an older paper collection called Sarsaparilla which I always considered cute but never could see myself using, let alone as the basis for a baby album.  Well count me wrong!!!  It was just perfect for this special little cowboy due to arrive next month.  I wanted something Grandma would just love and since she's super into Cowboy this just fits!


I used some paper string from Tim Holtz on the outside for the lariat and horse halter.  Placed the new little cowboy's name inside and covered it all with 3D Crystal Lacquer.  Adding the red handkerchief paper for the spine just made the cowboy look pop.


So many cute images in the paper, these guys are just cut from one of the sheets and bumped up by rematting and cutting again.  The Howdy was a sticker which I matted on brown and then covered with Glossy Accents.


There's oodles of room for photos, on these two pages I have a waterfall on the right that will hold 13 4" x 6" photos and on the left there's two folders that each hold 4 photos, besides the mats in the middle.  Amazing how many you can get into albums like this.


The little grey circles on the right, they were the holes left from stickers so I cut the negative space from the sticker sheet out, mounted it on paper and then popped a velcro dot in the middle and one on the back of  each grey circle.  They can be popped off, used as a template to cut the photo, matted and popped back on.  Fun fun fun!


The paper is adorable, the images super cute and I had so much fun making this.   I can't wait to give it to them next month.  Check out the video, it'll have a page by page walk through and lots more photos.


Supplies:


Monday, October 8, 2012

Old MacDonald Mini Baby Book


If you'd rather watch the YouTube video
of my mini I've included it as well
 
 I wanted a mini for my new Great-Great Nephew 
wow, does that make me sound old or what?
He's due to arrive in November

I found this 8x8 paper pak, Old MacDonald's Farm and
knew it would be perfect for a little boy album

I had intended to leave the front plain, since I had made
the decorated belly band to hold it together.
But after second thoughts I added some rows of
rub ons and this verse and of course a few
stickles, you gotta have stickles!

The darling little caricatures are cut on my Cricut
from Everyday Paper Dolls, Old West and Create a Critter cartridges. 

I decided since the book was already a little puffy
I'd best add a tie to the side to keep it secure once
the baby's photos were added.

Most of the embelishments are fairly flat but it still takes
up a fair amount of room, especially when you're trying
to get it to fold into itself and become a box.

Loved the fence, made a perfect holder for the mat.
The sheep came from an old Debbie Mumm paper pak,
Noah's Ark and the little hanging sign was in a set of 4
I picked up at Tuesday Morning.

The tractor was too pristine when I cut it so I added
a good coat or two of clear embossing and when
cooled I cracked the embossing to give it that old look.

Yep, I know, his eyes are a little funky, but that's the fun
of making things they can be funky once in a while.

Added Glossy Accents and Stickles and a shot or two
of Lindy's to give it a glittery sheen.

Rub-ons look better with a little Stickles

This was cut on the Cricut and then several layers
of UTEE added, love how it looks like plastic now.

He's my favorite, I'd hung on to this one sheet of 6x6 paper
for eons and sure enough it made just the right texture
for the wool on this little fellow.

The little puffy cloud is from Martha Stewart, it came with the
stars and crescent moons that are on other pages.

Love the kitty, he'll hold the baby's photo real snug.

And doesn't this little puppy just make you smile?

Thanks to the talent of the Peachy Keen designers and their
wonderful face stamps!

And of course the farm had to have a pig...

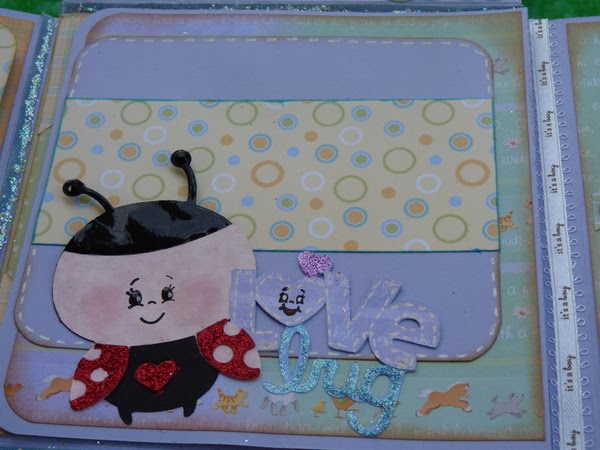
and a love bug...

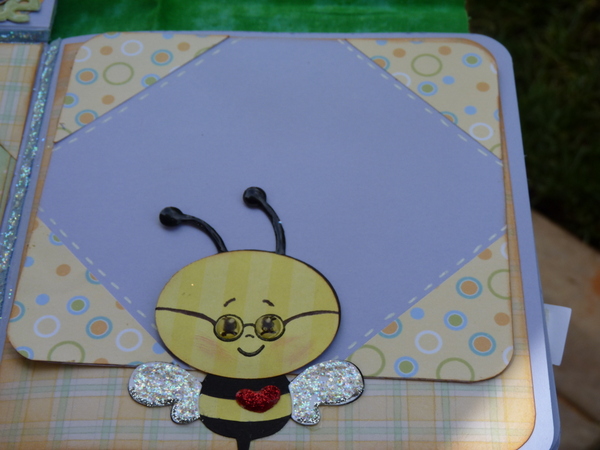
and a bee (with Ice Stickle wings!)

Thanks for stopping by and taking a look at my little boxed mini.