Monday, October 16, 2017

Overall Album for that Little Guy

a Sa Crafters Design Team Project

Please check out the complete blog post over on Sa Crafters blog here .  I absolutely loved creating this shaped little boy overall mini.  It's always so fun, and different, to do a shaped mini opposed to one I've created with front, back and hinges.  It's just a whole different animal and so much fun.  I loved decorating each of the 10 overall pages.  In fact it was kind of hard to go back and add the photo spots and tuck ins because the overalls and shirts were just so darn adorable.  But, a mini needs room to add all those favorite photos of your little guy and this one certainly doesn't disappoint.  It always is amazing how many photos a mini like this can hold and this one is no exception, with room for lots of 4"x6" photos.


Because this mini isn't bound it uses rings to hold it together at the tops of each page.  I use round rings to begin with but switched them out for larger D rings that were much stronger and allowed the pages to turn easier.  I adorned the rings with ribbons I'd used on the pages.


There are lots of tuck spots, pockets and areas to house tags, mats and photos.  After all a new baby needs all the room in the world to be shared and shown off.


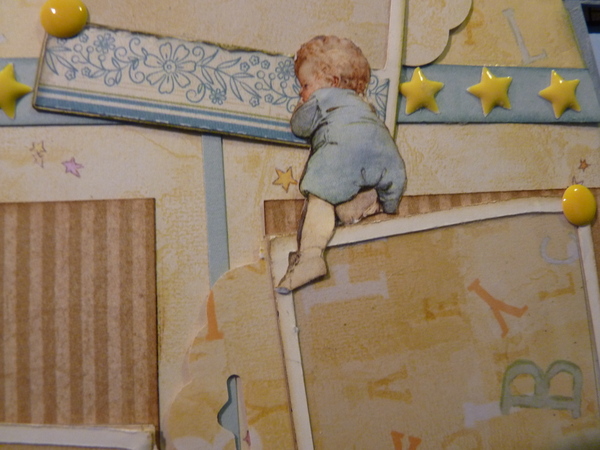
As always I'm notorious for using fussy cut images and I just couldn't help myself with all these adorable little ones.  So you'll find them climbing up edges or sleeping on ledges, anywhere I could find to put them there they are and they make me smile every time I look at them.


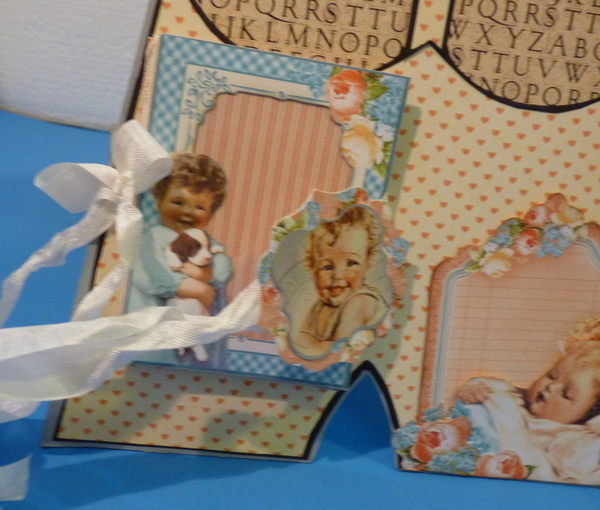
I like to add booklets or waterfalls whenever possible because it just adds to the amount of photos you can place.  Here I have a little booklet that hold photos behind acetate spots as well as on the mats.  This little ones hold 6 photos plus a generous area for jotting down some memories to preserve.


There's lots to see that I won't show here or on Sa's blogpost but you'll find it all on the video below.  I'll also share how I prepped the pages and the supplies I used.  I have an older post that uses the little Girl Dress Shaped Mini that I'd love for you to revisit as well.


From Sa Crafters Store

Visit Sa Crafters at -

Tuesday, October 3, 2017

Bo Bunny Dreams of Autumn Wide Spine Mini

a Country Craft Creations Design Team Project

Hello crafty friends!  Today I'm so happy to share not only my mini with you but the beginning of a brand new video tutorial series showing the construction and the decoration of the mini.  I'm doing these videos page by page.  It means more videos but it also allows you to only look for the video that shows the construction or decoration of a certain page.  That way you can easily skip the videos that aren't pertinent to what you want to know.  Also, as always, I'll have the complete walk through video so you can see all the how to's and just see what I made.  That's the video that will be listed at the bottom of this blog post.  I have the first four How-To videos uploaded and will turn those live as well all grouped together in a new Playlist called Wide Spine Mini Tutorial Series  Hopefully I've found something for all of you.  If you are a newbie then the videos are presented in such a way that they will be easy for you to follow along allowing you to make your very first mini.  Don't forget I'm only a message away if you get stuck!  So go for it, make your own mini today.  It's so much fun!


This mini measures 6"x7" with a 5" spine, thus the name Wide Spine Mini.  I like using a wide spine this way because the mini actually lays flat on the spine when open.  It allows for an enormous amount of bulky embellishment or hoards of photos to be added.


In order to expand and contract as the contents of the mini grow I choose to use a three-color braided and tied satin ribbon closure.  The three colors of fall just complement the colors of the mini so well.


There are 7 pages in this mini and each page has a 1/2" gusset to allow so much room for all your goodies.  I won't be able to share each page and all the special add ons, flip outs, tuck ins here but they all be shared on the video along with the video construction of the basic page and then a video showing the decoration of each page.  Don't feel you'll be tied to this fabulous paper line it can easily be adapted to any paper collection you're in love with at the moment.  I did this same style of mini, with 1/4" gussets and 14 pages for a wedding mini.  I loved it.  Because of the wide spine the pages still laid the same way.  Wonderful!  (so keep that in mind, by changing the width of the gussets you can easily add many more pages).


You'll find I used my trusty Cutter Bee scissors throughout this mini, fussy cutting lots of elements to use in different ways.  Here I took the bouquet of flowers in the pail and used them as a stopper for the flap.  I originally had intended the brad to act as a swivel to hold the flap closed but it just wasn't tight enough.  It was easily solved by added a magnet on back of the flowers and the including the belly band with a hidden magnet behind it.  There's always a way!


Included in my goodies from Tammy Merrill from Country Craft Creations was an Ephemera package which among many other things had a decorative mat with these gorgeous flowers on them.  I cut them out of the paper and used them throughout the book,  Here they adorn the flap on the left and act as a nice stopper to my cute foxy bookmark holder on the right.


Another of my favorite pages was again using parts from the Ephemera package.  This time I used the little banner for the flap on the left.  I added some leaves along the bottom.  Backing each section with a black Artisan paper from Country Craft Creations allows the elements, like the acorn, to pop.  I use a lot of the Artisan paper since it cuts and scores wonderfully and is the best paper for not cracking.  The mini was covered in the black and the pages are constructed with it.  It is my go to basic paper line.


I always like to look at paper and see what can I take out of it to use in a different way.  That's how the basket came to fruition.  I didn't think I'd be able to use the bicycle with the basket of fall goodies I was able to though as you'll see it became the inside front cover pocket.  I just loved the basket and fussy cut it from the bicycle, added a magnet behind and backed it with the black Artisan paper.  Later I found I could use the whole image on the front inside cover.  I took the part below the basket and attached it on three sides over the bottom paper.  Now I have a great pocket but I still have the whole image of this fall bicycle.  So always look at the images within your page and see what perhaps could be cut out and used somewhere else.  Sometimes the smallest of elements, when cut and backed, can create wonderful little embellishments elsewhere.


I also wanted to tell you to not discard the cover sheet, especially if it is the same weight paper as the cardstock.  Bo Bunny prints their name, the name of their collection and samples of all the papers included in the collection on a 12x12" flysheet for the front of the package.  It was wonderful, I cut it up and used it in numerous spots throughout the book.  Case in point, the little pocket stopper for the center section here is actually the Collection name from this front flysheet.  I'll share several other spots I used parts of this page.  It's like getting and extra sheet of decorative paper.  I wish all companies would use the same paper for this cover sheet often it's a shiny slick paper, this was perfect.


My friends there is just so much more to share with you but space prohibits me here.  Check out the video below for the walk through and if interested check out the Video Tutorial playlist.  I'll be adding the remainder of the videos over the next few days.  As always thank you for sharing your time with me!  I'll include links to Country Craft Creations and to all my social media site below the video.  I've also included my supply list with links to the store.  Don't forget relax, create and enjoy it will make your world such a happier place!


Supplies from Country Craft Creations

Please visit Country Craft Creations here -
you can also join the Facebook group
Scrapbookers of Country Craft Creations here - http://tinyurl.com/zhess6s
Or Coffee Talk page here - http://tinyurl.com/y8byhnel

Visit me at A Soul's Heartbeat on