Showing posts with label Paper Gifts. Show all posts

Saturday, February 15, 2020

Arteza's Sticky Notes

Years ago a fellow crafter, Ang, sent me the cutest little holder with a mini post a note pad in it.  I've had it always in my craft room.  When I saw the Arteza box of 3" Sticky Notes I knew exactly what I wanted to do with them.  I wanted to reproduce Ang's gift into the larger note size.  I chose the bright colored notes but they have them in several color schemes.  This box held 2 of 6 different colors.


Here are 3 of the ones I made.  I just searched my scraps for papers that matched the color of the pads inside.


Each pad is secured with an elastic closure and the pad of sticky notes sits snugly inside the little package.


Pop on over to the video and I'll share the whole process of how to make these little pad holders plus a walk - through to give you lots of food for thought to make your own.


I do have a 10% discount code for Arteza, which is good until February 27, 2020 - just put in the code ASoul`sHeartbeat10


Please visit Arteza online here -

UK Link* - https://arteza.co.uk/?a_aid=Youtube_Asoulsheartbeat

Blog - https://arteza.com/blogs/articles
Facebook - https://www.facebook.com/artezacolors
Pinterest - https://www.pinterest.com/artezacolors/
Instagram - https://www.instagram.com/artezaofficial/

*Please note! - I do receive a small stipend from Arteza for you clicking through and buying from my personal links.  This in no way affects the price you pay.

 Find Me on - A Soul’s Heartbeat - at


Thursday, January 15, 2015

Note Cards Tucked in a Gift Box

a Meg's Garden Design Team Project

Remember back not to long ago when I told you I wasn't a hoarder?  Well please keep that in mind when I share what today's project is.  A couple of years ago I bought Paul a watch and the outer box it came in was so neat, it had these super flaps that tucked in to close. Well I've moved that box here, there and most everywhere but always making sure it got kept, I knew one day (that's today by the way) I'd be so glad I had it!


The box transformed from the plain white into this lovely gift box I'll be happy to share with any of my family or friends.  I covered the box, inside and out with papers from the French Garden Collection, a paper line designed exclusively for Meg's Garden by designer Denise Boddy. Gorgeous papers filled with flowers and leaves and lovely design details. On the top, cascading down the front, are Open Paper Roses from Meg's Garden, aren't they lovely?   I tucked in a couple of lilies from the store I'd dabbed with a touch of Tim Holtz Victorian Velvet.


Inside is a set of eight 3 1/2" square note cards with envelopes.  I tied them with ribbon and lace to make a pretty little bundle when you lift the lid.  I purposely left the note cards blank and made sentiment cards that can be chosen at the time and glued to the inside.  I also made some round stickers from the paper using my Xyron sticker maker to close the envelopes when all done.

I hope you'll join me on the video, I'll walk through the box and cards, show you more of the naked box and envelopes and finish with lots of still photos to help inspire you to alter those boxes you've been hoarding too!


Supplies from Meg's Garden -

Monday, October 28, 2013

Bridal Matchbox

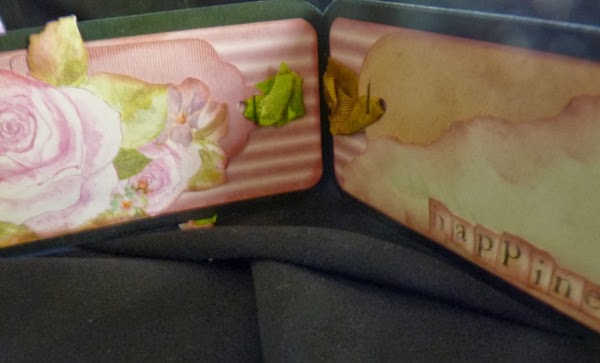
I wanted to share this other matchbox I made for a friend who's getting married.  I tucked a teeny tiny mini inside and thought I'd add a gift card to it for their big day.  Don't you think this is better than just giving them the gift card in an envelope??
I used Kaisercraft's True Romance, the pretty blossoms here
And the page with all the words on it, I cut the words and inked them
they were perfect to add to the tiny little pocket pages
By cutting small rectangles (4 /1/4"x 2 1/2") of black cardstock, rounding the corners and matting them with the paper I had the start to my little accordion mini.  I just cut a few of the rectangles a little longer and overlapped them one to the other, the paper will cover up the seams.
Look around your crafty area and see what bling and baubles you have that
could embellish the top of the box, ribbons for the mini or a little glitter
and glam here and there.


Supplies I used: