Friday, February 28, 2025
TIME Matters - a Steampunked Collage Series
Friday, March 22, 2024
Little Chapel Sympathy Cards in 3 Layout Forms
I am so in love with Bontik Vintage Designs on ETSY. Anton, the owner asked if I'd be interested in doing a collaboration with him using his designs to make whatever. I was really drawn to his Little Chapel collection and instantly saw an opportunity to turn the designs into Sympathy cards, something that is usually quite difficult for me.
I hope you'll check out my video and then wander over to his ETSY to check out what he has to offer, and trust me, grab a cup of coffee because you'll be there a while!
Friday, September 1, 2023
Your Creative Studio April 2023 projects
Tuesday, August 22, 2023
Let's Make some Quirky, Wonky, Off the Wall Cards
Saturday, August 12, 2023
Sunday, July 2, 2023
Junk Journal July 2023
Saturday, May 6, 2023
Your Creative Studio January Travel Box
Here's the latest Your Creative Studio Box sharing a large assortment of travel related stickers, papers and bits and bobs. It's the perfect accompaniment to some long treasured memorabilia I've been hoarding.
and here's what I made from the goodies in the box
Friday, April 21, 2023
Wonky hand drawn bird Cards
I've found I do like to draw, well sort of. I love drawing whimsical wonky birds and things that don't require lots of finesse. I can just loosely sketch and then color them in and smile when I'm done.
Check out my video to have a look at what I've made
Sunday, April 2, 2023
Just Playin Around Making Some Whimsical Bird Cards
Tuesday, January 17, 2023
Journal Recipe page from Your Creative Studio box
Monday, January 16, 2023
Bake Box for Your Creative Studio
Tuesday, April 27, 2021
Rolodex Cards
Here's a fun little project I've been working on using the Heidi Swapp Rolodex and cards (they were a gift from my friend Cheryl Wells, thank you Cheryl!) I wasn't sure when I got them what my plans were to be. Artymaze, on YouTube, started a series on Rolodex cards, perfect timing. She so inspired me I thought I'd give it a go.
So far I have 10 on my Rolodex and each one was super fun to make. I love this quote, it's really me! I have always Overthought Everything! Everytime my Rolodex swings around to this card it's going to make me smile.
I love gathering quote books, this one is from the Dylusions Colouring sheets, lots of great snarky thoughts in there. Don't you just love this one, again, me to a T! Don't know the couple, they are one of Tim Holtz photo booth people but they were perfect for my card!
I did one dangle one to see how it would swing on the Rolodex. As long as I don't make anything that dangles lower I'm good to go. I just thought this quote needed a metal key to be complete.
OK that's just a taste of what I made. You'll have to hop on over to my YouTube channel to see the others.
Have a great crafty day everyone, hopefully I'll see you on my YouTube channel.
Thursday, April 8, 2021
Ephemera Notebook Holder
Hello Crafty Friends! I'm sharing today a digital downloadable kit my friend Manuela (Bunny Bow) designed to house your bits and pieces of Ephemera. Oh I'm loving the design. When you're done you simply put them on your shelf, like a book, for storage. Super cool and they house so many pieces I had floating all around my craft room. I need about 10 more I think.
This is the second book I made. Since I planned on housing my Tim Holtz paper dolls and such it was the perfect choice of paper and fabric (thank you Whitney Kosters for the fabric strips they were just what I needed!)
Monday, March 22, 2021
Hortensia Perpetual Mini Album
Hi Crafty Friends I'm here today to share a project for Clare at My Creative Spirit using Stamperia's Hortensia Collection. If you aren't familiar with it please check out the links at the bottom of this post. If you love flowers, especially hydrangeas then this is truly the collection for you. Hydrangeas have always been a favorite for me. Growing up Momma had huge ones growing outside our dining room window. I remember one year she picked a large bouquet and dried them for a centerpiece. My goodness they lasted forever. So pretty, so many memories....
Isn't she beautiful? She's dreaming of peace and contentment and a world free of Pandemics, less stress and turmoil, oh wait, I think that's what I'm dreaming of.
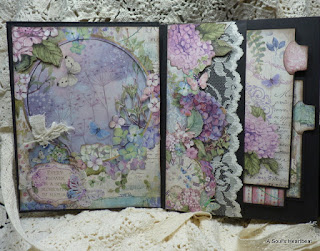
This book has a hard front and back with accordian pages that open to the right and left. A fabulous design Clare made! It allows you to view the complete front or back all at one time.
Your best look at the mini is through my YouTube walk through video. In it I will share each page and all the tuck ins, pockets, hidden treasures etc. The link is at the bottom of this post.
These are the first two pages. As I said, it's stunning paper don't you think? Stamperia never disappoints.
For those of you that have followed my creative journey you know I love repurposing things. The parchment bag and the pink doily with the flower cluster were all one bag gifted to me by my friend Paula. I cut the bag top off so I could use bits on both pages. It's the perfect complement to the papers. These are pages 3 and 4.
Pages 5 and 6 share one of the lovely purple hearts my friend Manuela (Bunny Bow on YouTube) gifted to me many moons ago. I've been hoarding but I thought it time to share with whomever purchases this book. Things are always better when shared don't you think?
I have created a playlist for anyone wishing to know how I created any of the elements you see on these pages. Each two pages are a separate video so it will be easy for you to find the correct video without having to wade through all the things you may not be interested in. These are pages 7 and 8. Here I created an acetate window which eventually could house a very special photo.
And as all good things this one ends with pages 9 and 10. I hope you've enjoyed this little visual of the book and pages. Please join me over on YouTube so you can see the whole book, start to finish.
Have a wonderful crafting day my friends!


