Today I'm sharing a fun card made with Graphic 45's new collection Voyage Beneath the Sea. I've fussy cut this lovely Mermaid out to be the focal point on my card. Because the Mermaid is larger my card today measures 4" x 8 1/2".
I used a selection of metals from my crafty stash to embellish over the cogs and gears that had been printed on the paper.
The inside uses a sentiment from the Collection along with a few more metal pieces. I hope you'll join me on today's video where we'll make the card start to finish and I'll show you some more papers from this fun new collection.
Today I'm sharing two tags I've made for my Graphic 45 Children's Hour Mini. I used Graphic 45 Large Ivory tags. If you'd like to follow along for the whole series on how I'm making the pages I have a playlist on my YouTube channel called You and Me Making a Mini.
This is the tag I'll be making start to finish on the video. I used Graphic 45's Children's Hour stamps to emboss the image of the girls. I masked them off with Inkadinkado Stamping Mask Paper and used Tim Holtz Distress inks in Tumbled Glass and Broken China to give the sky background. I also used Ground Espresso Distress Ink around all the edges of both tags.
The bottom of the tag has two pockets to hold a little spot for photos in the first and a journaling tag in the second. The sentiment across the bottom has also been embossed, I used WOW Earthtone Pepper, a great color for my project.
The back is from the back of the print page, it's so hard to cut this pretty paper and even harder to use the back sides sometimes. I wanted this one so this would match the stripe I put on the front pocket.
Here's the second tag, I'll have lots more photo of it on the video. I hope you'll join me. Thanks so much for stopping by.
Supplies from the Cut at Home Store: 4501249: Graphic 45 Children’s Hour 12×12 Paper Pad 4501247: Graphic 45 Children’s Hour 6×6 Patterns and Solids pad 4501259: Graphic 45 Children’s Hour Journaling & Ephemera Pack 4501254: Graphic 45 Children’s Hour Pockets and Tags ICO350: Graphic 45 Children’s Hour Stamp Set 1 ICo351: Graphic 45 Children’s Hour Stamp Set 2 4500849: Graphic 45 Large Ivory Tag SCI-001: Spellbinders Celebra’tions Berry Black Ink TIM21414: Tim Holtz Distress Ink – Broken China TIM27188: Tim Holtz Distress Ink – Tumbled Glass TIM43270: Tim Holtz Distress Ink – Ground Espresso SCT-001: Spellbinders Celebra’tions Linen Thread
Hello everyone, I have many viewers tell me over and over again that they love what I do but they can't do it themselves. I'm here today to tell you that anyone of you CAN make a mini especially with what I share with you today.
I'm using a new product from Heartfelt Creations called the 3D Flip Fold Album. This is a pre-made base for your mini. I think this is what intimidates a lot of you is creating your base with the spine and pages from scratch. Well this is your solution everything is constructed for you, all you need to do is pretty it up! And that's what I'm going to share with you today.
I'm going to marry Heartfelt Creations album with Graphic 45's new Children's Hour collection and share with you the first page I've done. I want to inspire you to take a stab at this yourself if you've never done a mini. Or if you're old hat try it anyway because there are always times when the benefit of having something pre-made out weighs the time of making it yourself. So come join me.
Today I'm using primarily the two March papers from the Children's Hour Collection and some black cardstock. As the mini progresses I will use from all three paper pad sizes (today I've used mostly the 12x12" pad) and the majority of the other products in the collection, stamps - stickers - tags and pockets.
On video I'm going to share how you can start with just a mat and add your photos or continue to step the basic page up to fancier with surprises galore. I've precut everything so you can simply watch the thought process and see how I put it all together. If I get a positive response to share the making of each of the rest of the pages I will turn this in to a series and share how I created each page just as I've done with this one. So if this is something you're interested in seeing please let me know in the comments or on the video comments.
As always today's video will also include lot of tips and tricks I've stumbled upon while making minis, why I do what I do, and a host of other tidbits. Of course there will be many more still photos as well. So come join me on today's video and be sure and stop by Cut at Home and check out all the fabulous things they have in their store. Linked at the bottom of the post are the items I used today.
Measurements for this page:
Solid black mats 6 1/4" x 8 1/4" (I cut 10 because I know I'll need one for each of my pages the front and back insides will require larger mats)
Decorative mats 6" x 8"
Top Insert 5 1/4" x 7 1/4" (this is the maximum this insert can be, you might even want to cut it down to 5" x 7")
Side Insert - 5 3/4" x 7 1/2" (again this is the largest you'll want it to be to allow for easy in and out access from the side, you might want to cut it down to 5 1/2" x 7 1/4" to allow for even more ease.)
Inserted folder: 10 1/2" x 4 1/4" score in the middle and fold at 5 1/4" to make booklet
NOTE: I suggest using the larger measurements for the inserts, seeing how they fit after you make the pockets, if they don't glide in and out easily re-cut them using the smaller measurement. Nothing is worse than struggling to slide your inserts into the pocket, better to cut smaller than to be frustrated and hey this is going to be a fun thing so no frustration allowed!!!
Supplies from the store: HCFA1-432: Heartfelt Creations 3D Flip Fold Album 4501228: Graphic 45 Children’s Hour Collection HCD 727: Heartfelt Creations Vintage Floret dies HCPC 3500: Heartfelt Creations Open Vintage Floret stamps SCT-001: Spellbinders Celebra’tions Linen Thread SCI-001: Spellbinders Celebra’tions Berry Black Ink TIM19541: Tim Holtz Distress Ink – Black Soot
Supplies from my stash: Coredina'tions Black Cat Cardstock 8 1/2" x 11" American Crafts Black Textured Cardstock 12" x 12"
Decorative brads
Strong double sided tape 1/8", 1/4" 1/2"
Strong wet glue
Today I'm featuring two shaker cards. If you've not done a shaker before now is the time to try. You'll love the effect. I'll be doing the pink one start to finish on the video below. Just a note I tried using some fine glitter and chunky glitter inside the red shaker card and ending up ripping everything apart, removing it and starting again. The glitters tended to stick to the acetate instead of shaking around like they are suppose to. I had even used my embossing buddy pillow across the acetate but they still clung, it just wasn't a look I liked.
Here's card one, it's done using Spellbinders Doily Heart Circle for the shaker part and Heartfelt Creations All Glammed Up decorative papers (the LOVE is from an older Bo Bunny collections called Head Over Heels).
Both cards include these darling little bows made from Spellbinders Tiered Multiloop Bow die set. This set has three sizes of bows and you can either cut them with the insert, creating the effect as shown on the bow top above, or plain like the tails above.
Here's the second card, this is the one I'll be doing start to finish on today's video. I love pink and black color combos and this is no exception. This is a really old paper collection from Heidi Grace but perfect for this card. I used Spellbinders Shapeabilities Font One in Lowercase for the Be Mine sentiment on the inside.
Outside I die cut the word Forever from the Sizzix Thinlits die set from Tim Holtz - Friend, in script.
There are a lot of these word sentiment dies in the store, be sure and check them out. I cut mine three times and glued them together to give more of a punch to the word and a semi-chipboard look. All the circles were die cut using Tattered Lace Essentials Decorative Circles die, wow are these die sets a must have, this one has 19 graduated circles in it!
So come join me on today's video, I'll share tips, tricks and ideas for making a shaker card plus lots more still photos.
Supplies from the store include:
S4-316: Spellbinders Nestabilities Doily Heart Circle dies 660225: Sizzix Tim Holtz Thinlits – Friend collection S5-199: Spellbinders Shapeabilities Font One – Lowercase S6-048: Spellbinders Tiered Multiloop Bows HCDP1-260: Heartfelt Creations All Glammed Up paper collection ETL14: Tattered Lace Essentials Decorative Edge Circles TIM43287: Tim Holtz Distress Ink – Candied Apple
Supplies from my crafty stash include: Heidi Grace decorative Valentine papers; Stampin’ Up red Glitter paper; Kraft cardstock: WRMK Corner Chomper; Brads; Wink of Stella; black eyelash trim; Little B Scallop dies; Double sided tape; ATG gun; Black cardstock; Sequins in red and pink, Martha Steward
Hi everyone, today I've got a little different style than what I normally do, it's a cute Foxy card using Sizzix BIGZ die called Fox #2. I ran it through my Big Shot numerous times to get the different pieces to paper piece her together. The papers are from the Tattered Lace magazine, I love that you get papers in each magazine.
Off camera I decide my little Foxy Lady needed a little more glam so I added some Bronze Stickles to her ears and Wink of Stella to her cheeks, tail and tummy.
There will be a complete start to finish on today's video along with more photos so I hope you'll join me there.
Supplies from the Store:
66074: Sizzix BIGZ die Fox 2 658989: Sizzix Textured Impressions 2PK Pinwheel & Stripes embossing folders 139900: Tattered Lace magazine Exclusive Feb 15 edition SCP-013: Spellbinders Celebra'tions Whirl White cardstock SCI-001: Spellbinders Celebra'tions Berry Black ink TIM43218: Tim Holtz Distress Ink Cracked Pistachio
Hi everyone, here's a quick and simple last minute gift idea for you.
I took Costco chocolates and a plastic gift bag from IKEA to make my gifties. Aren't they darling?
The snowflakes are cut from Spellbinders Create a Flake die set, there are four dies in this set and I used three of the graduated snowflakes.
Each snowflake has been cut three times and glued together to form a nice sturdy little flake. I then covered the tops with glue and dipped them in Stampin' Up Dazzling Diamonds dust attached them to the bags with Glue Dots.
To finish them off I cut a swirl from Marianne Designs Creatables Vintage Swirls from Stampin' Up Silver Glitter paper. Oh my this just finishes them off perfectly.
So here you have it a quick and simple gift that shows you took a little time to kick it up into something sweet and personal. Merry Christmas everyone! (and if you don't celebrate Christmas at your house snowflakes are around long after Christmas so fill your bags with New Years treats and surprise someone with this sweet little intro into the New Year.
Supplies: S5-236: Spellbinders Create a Flake dies LR0271: Marianne Designs Creatables Anja's Vintage Swirls SCP-013: Spellbinders Celebra'tions Whirl White Cardstock
Thank you everyone for your interest! USA only Payment via PayPal
Please email me at asoulsheartbeat@gmail.com
The pages in this mini measure 4 1/4" wide by 5 1/2" high and 1" thick, which may expand as you add your own photos. There are 12 tags and 13 mats each will hold a photo just shy of 3"x4". The mats will hold a photo front and back and the tags offer a spot for journaling on the front and a photo on the back. There are magnets under the front flaps which will securely hold the mini closed but for added decoration and in case your mini begins to swell once photos are added I included a seam binding tie which corresponds to the seam binding pulls on the top tags.
Each page has a month tag on it and the papers, tag and elements correspond to the month. The accordion folds completely within the pages housing six pages on one side and seven on the reverse. I chose to use December for the two-page spread.
Today's video will share how to construct this mini, tips, tricks and ideas to help you make your own, a complete walk through of the completed mini and of course lots of still photos to inspire you. Come join me on the video.
Supplies from the Cut at Home Store: 4501248: Graphic 45 Children’s Hour 8×8 Paper Pad 4501257: Graphic 45 Children’s Hour Cardstock Stickers 4501254: Graphic 45 Children’s Hour Tags & Pockets SCD-012: Spellbinders Celebra’tions Pierced Rectangle dies Tim Holtz Distress Inks
in the following colorsWild Honey; Festive Berries; Forest Moss;
Gathered Twigs; Black Soot; Evergreen Bough; Abandoned Coral; Blueprint
Sketch; Wilted Violet 660157: Tim Holtz Butterfly Punch Small
Today I'm sharing an Old World Christmas Card for the Meg's Garden Design Team. I've used the Vintage Christmas Papercrafter Pack with Kraft cardstock to create a 5" x 7" card with a a matching box envelope.
Using Velvet Flowers and leaves along with Jute Ribbon was just the touch to dress the front of the card.
I fussy cut Santa from the paper, placed a hinge on him, hid a magnet underneath and created a great secret flip out to house the tiny tag and a special message.
To tie everything together I've used Art Deco Snow-Tex on the front, inside and back. These little touches of snow make the whole card come together.
Please check out the Meg's Garden of Papercraft Delights store and the Meg's Garden Design Team Blog for lots of inspiration and products to create your Holiday cards, tags and what nots. If time is short you can always purchase the digital edition of the papers to print instantly at home.
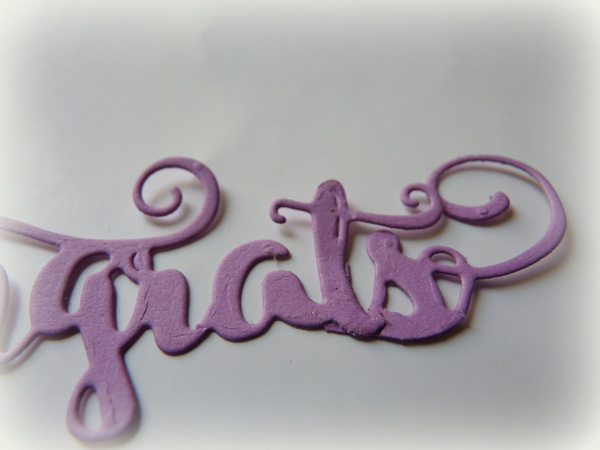
Today I'm sharing a card which I used the free die, Congratulations, and the designer paper that came with the Tattered Lace Magazine issue number 23. Each magazine has one or more free dies along with several pages of designer paper.
I love how Tattered Lace dies cut and this sentiment is no exception. I die cut it four times and glued them all together to form a nice thick embellishment for the front of my card. The die cut comes out clean with no ragged edges and beautiful flourishes. I think when they are stacked this way they even look nicer because everything is so much more pronounced with more definition to the letters.
I carried the same paper theme to the inside of my card. The striped paper from the magazine and the addition of the white doily. I added pearls on the front and inside just altering the sizes. The Celebrate you day sentiment if from JustRite Papercrafters Morning Splendor clear stamp collection. I love this set of eight stamps and I'm sure it's going to make a wonderful set of cards.
Besides the free die each magazine issue give you a section on how you can snip and alter the die cuts to create new words, flourishes frames or embellishments. Please join me on todays video as I share how I changed the free die Congratulations into a Flourish Frame and the shorter word 'Congrats' with a great flourish at the beginning and end.
Supplies will be linked directly below the video. Thanks for stopping by and spending some of your day with me.
Where do you head when your creative process has just up and left? Do you have specific places that start the creative fires burning again? I thought today I'd share what I do and in turn maybe it would help you as well. After all we all those times when we sit down, really wanting to makes something but find there's just no inspiration.
My greatest resources are online, I think most of us are online people anymore so when stumped I visit - - -
Blogs
YouTube
News Feeds
Manufacturer Websites
Magazines
Books
Friends
Groups (like on Facebook)
Facebook pages
Design Team shares
Instagram
Other Social Media
and my favorite Pinterest
Today I'm sharing several cards I've made from inspiration I've gleaned from online. This first one was an email sharing a new tutorial from Split Coast Stampers, one of my go to places to get inspired Laura Lipe had shared her Decorative Corner Card and I just had to try it. Super simple with great results and the bonus is it folds and fits nicely in an A2 size envelope! I'll have links directly below today's video to my Inspiration spots, including Laura's tutorial and the supplies I've used from Cut at Home.
I love that this card takes a standard A2 card base, 8 1/2" x 5 1/2", will stand up when received and fold flat for mailing. I used decorative paper on all four segments on the one card above so I decided to punch a small hole on the top back and attach a tag to write my sentiment on.
My second and third cards are Pinterest inspired. I love grabbing a cup of coffee and sitting down with Pinterest, there is such a wealth of creativeness just oozing from all those pins. Beware though time flies when you're looking!
Please join me on today's video and if you haven't yet subscribed to my blog I hope you'll do that while your here. Thanks for stopping by to share your time with me. Please don't forget to check out the sites that inspired me by clicking their links below and leaving a little love and thank you's on their YouTube, blog and Pinterest to thank them for sharing and inspiring the rest of us.
Supplies from the store: Graphic 45’s Christmas Carol Collection
S6-040: Spellbinders Holiday Holly Frame die set S5-236: Spellbinders Holiday Create a Flake die set ES-015: Spellbinders M-Bossabilities Reindeer Magic folder 660097: Sizzix Tim HOltz Alterations Holiday Words, Handwritten HCD1-774: Heartfelt Creations All Glammed Up Shoe dies
I wanted to share some exciting news. I was selected to become part of the Canvas Corp Brands Crew for 2016! Canvas Corp includes three fabulous companies 7 Gypsies,Tattered Angels and Canvas Home Basics. I am excited to be able to share each of these with you in more depth in the coming year.
The 'Crew' includes fantastically talented crafters from not only the United States but countries around the globe. You can get a full list on the stores blog post here at Canvas Corps The Creative Studio.
You can find products in your local Michaels, JoAnns or a host of other shops but if you happen to be in an area where there aren't stores that carry their fabulous yumminess then check out the Online Shop and and have items sent directly to your home. You certainly don't want to miss out on all the fabulous things available for your creative inspirations.
So subscribe to my blog today so you don't miss out on any of the exciting things I'll be sharing in the months ahead!
I don't know why I don't make more easel cards, I love the look of them and they aren't hard. Today's inspiration came from an assortment of Tattered Lace Magazines (links below the video). Not only do you get free die(s) with each magazine you also get gorgeous designer paper, instructions for projects, templates and an huge amount of inspiration.
I had so many bits and pieces I'd cut out when playing and designing my card I decided to make a second one, this time an A2 card (the easel card is a 6" square). Again using the dies and papers (along with a few other goodies from the store) for this second card.
Come join me on todays video, we'll make the easel card together, I'll share the fabulous, inspirational insides to the magazines and hopefully inspire you to make a few cards yourself.
Supplies from the Cut at Home store: 101064: Tattered Lace Magazine Issue 10 D497: Tattered Lace Floral Crescent die SCP-014: Spellbinders Celebra'tions Cuddle Cream S4-422: Spellbinders Nestabilities Majestic Squares D484: Tattered Lace Adele Flower die 139900: Tattered Lace Magazine Issue Exclusive Feb 15 TIM43263: Tim Holtz Distress Ink Wilted Violet 30-162: Penny Black Eloquence S4-112: Spellbinders Nestabilities Classic Ovals Small 137411: Tattered Lace Magazine Issue 17 660157: Tim Holtz Punch - Small Butterfly
Today I'll be sharing 4 projects that I've made using Heartfelt Creations All Glammed Up collection including paper, dies and stamps. Here's a little peek at my shaped shoe card.
Here's a snippet of my tag, don't you love the dress. You'll see all these projects in their entirety on today's video at the end of this post.
The third project is a card using the unique new dies that have a middle part and two outer cutting dies. By using just one you can get a lovely flourish like the one shown on my card. I'll share just how easy it is to achieve this effect on the video.
Last but not least is a tag gift card holder with more cut aparts and dies from the collection. Fun stuff and an endless amount of projects just awaiting your creative touch with any or all of the All Glammed Up collection. A linked list of the supplies I've used from Cut at Home will be directly below the video.
Supplies from the store:
HCDP1-260: Heartfelt Creations All Glammed 12"x12" Paper Pad
HCD-774 : Heartfelt Creations All Glammed Shoe Dies
HCD-775 : Heartfelt Creations All Glammed Dress and Flourish Dies
HCD-776 : Heartfelt Creations All Glammed Eyelet Oval Dies
HCPC-3702: Heartfelt Creations All Glammed Heels and Roses Cling Stamps
HCPC-3703: Heartfelt Creations All Glammed Up Shoe Cling Stamps
HCPC-3704: Heartfelt Creations All Glammed All Dressed Up Cling Stamps
HCPC-3705: Heartfelt Creations All Glammed Lift Your Soul Cling Stamps
HCPC-3706: Heartfelt Creations All Glammed Fashionista Cling Stamps
HCPC-3707: Heartfelt Creations All Glammed Sentiments Cling Stamps
Today I'm sharing a little bit of Vintage and a little bit of Victorian in a Christmas Card featuring both collections from Meg's Garden of Papercraft Delights Store. There will be links to the products used from the store directly below the video.
I am in love with the old world look of these collections, use one or the other or mix and match them as I've done today. This is a 5"x7" card with a Kraft cardstock base. I added some Diamond Stickles on Santa's beard to give it a little shimmer.
Today's video will walk you through how to do everything from the collage background to adding the decorative flowers. I hope you'll join me there.