Pages

Wednesday, April 29, 2015

Sizzix Fold-A-Longs

a Cut at Home Design Team Project


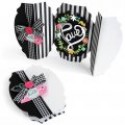
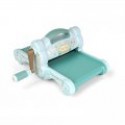
This week I'm sharing cards I've made using Sizzix's Thinlits Fold-A-Long dies.  I love that you can use a die to cut and score for you.  It shortens the time so much when you don't have to figure out your measurements and just zip the die and your paper through your Big Shot!  I used the Sizzix Magnetic Platform with this.  It's just so nice when you have something you want to make sure won't shift in the process to use the Magnetic Platform.  To cut the card base you place the edge of the die on the fold of the cardstock and you certainly don't want it shifting too and fro in the cutting process.

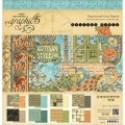
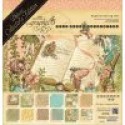
I made two cards the one above with Graphic 45's Artisan Collection and the one below also with Graphic 45 but an older collection Curtain Call.  You only need a few sheets of 12x12" papers to make these cards (you start with a 12" x 6" piece for the base, then you need additional pieces for the decorative mats and envelope).  The cards fold to a standard A2 size so easy to slip in an envelope and mail as long as you keep your embellishments not too bulky.  In all four of these cards I've kept my embellishments to ribbon and paper only.


I hope you'll join me on the video.  I'll not only run through these cards but make another on camera and share a fourth in photos so lots of inspiration and ideas to get you motivated to make your own Fold-A-Long cards.


Supplies from the Cut at Home store:


Wednesday, April 22, 2015

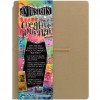
On a Tight-rope - Art Journal Page

a Cut at Home Design Team Project


Well I finally took the plunge and completed my first Art Journal page today.  It was so much fun and so far outside my box and comfort zome.  This is something I've procrastinated about doing for months now.  I discovered as I worked my way through the page I should have done this instead of that, or I should have completed this step before doing that step but that's the whole process of learning something new isn't it?


I'm so in love with these wacky little birds from Tim Holtz new Stampers Anonymous sets that I had no doubt they were going to fly right into my crafty space.  I knew right away what I wanted to do with them, I just wasn't sure I knew how, lol, I'm still not sure I know how :-)

Every time you step away from the things that are familiar to you it's kind of daunting, sitting live in from of a camera knowing all of you would be watching too was even more so.  It took me a little over an hour to do the page, that includes getting up to clean my stencils and brushes throughout.  Don't worry I clipped and sped up the whole thing so you'll not be watching for that long.  

I think one of my favorite outcomes was the brick that I used a Crafter's Workshop stencil on, Liquidtex Modeling Paste and Perfect Pearls in Copper.  The Perfect Pearls just worked wonderfully creating that seasoned brick look.  

Come join me on my video and I'll share the process with you.  If you've been thinking about stepping out of your comfortable crafty box do it now and leave me a note telling me what you've decided to do that you've not done before.  This crafty business is so much fun it's a shame not to at least give things that tickle your fancy a chance.


Supplies:


Wednesday, April 15, 2015

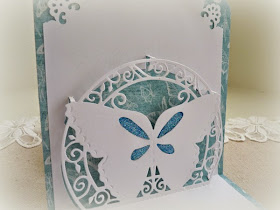
Joy!Crafts Butterfly Pop Out Card

a Cut at Home Design Team Project


Today I'll be using a die from Joy!Crafts which is a pop out Butterfly.  I love how it cuts, goes together and really shines when used for the inside of my card.  The die comes attached to an acrylic sheet which I used as the base size for my inside aperture.  (5 1/2" x 11").


I'll put links to the supplies I used from the Cut at Home store below.  Please check out my video for a start-to-finish sharing how I created this card, the dies and stamps I used and any ideas I can share with you about the process.


Supplies from the
Cut at Home Store:

Wednesday, April 1, 2015

Mmmmmm Smell the Coffee?

a Cut at Home Design Team Project


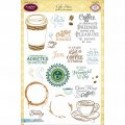
Today I'm sharing three cards using JustRite Stampers Coffee House collection of clear stamps.  I love the sayings and could think of many friends I'd enjoy sending these cards too.  Wouldn't it be fun to include a coffee mug and a bag of specialty coffee?


I'll do one of the cards start-to-finish on the video below, I hope you'll join me.  On this card I used several of the stamps with Versamark and embossing powder to make the background paper pop.  


I used the Angel Craft Podge as a glue this time and also on the coffee lids (the same way you would Glossy Accents or 3D Crystal Lacquer) to give that shiny look.  When you use the Podge this way you need to put a pretty heavy coat on and let it sit quietly in a corner all by it's lonesome until really dry!


Come join me on the video, I'll share lots of idea and many more photos!

Supplies from Cut at Home: