Pages

Saturday, May 31, 2014

New Series ~~~ Triple Flip Mini

Video Tutorial Series


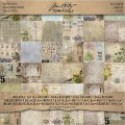
Hi everyone I've started a new series over on my YouTube Channel  for my Triple Flip Mini using Graphic 45's Botanical Tea Collection.  This is the construction I used on my Mother Goose, Not A Scrap Left, Mini #3, wow that's a mouthful.


you can find all the photos to that mini the blog post here

This YouTube series will be 8-10 videos long and will show the basic construction in Video 1 and then cover each page or so in the following videos.  I decided to do page by page videos to keep them around 6-10 minutes long and let you easily find the page you're working on instead of searching an hour long video.  

So come on right now and join me in this super fun and fast mini.  It's the perfect start for those that keep saying "I'm gonna make a mini someday" and just haven't felt they could do it.  Yes, you can do it! It's fun!  But, beware, it's also addicting! I bet you'll love how yours turns out.  


Wednesday, May 28, 2014

Tim Holtz Distressed Doily Cards

a Cut at Home Design Team Project


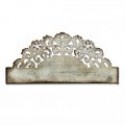
Hi everyone today I'm going to be sharing some cards I made using Tim Holtz On the Edge Distressed Doily Die.  I had been browsing Pinterest for inspiration when I ran across a card that had been made with a doily die on the front.  I've had this die in my crafty drawer for quite some time, just quietly calling me to come and create with it.  Well finally I heard the call and brought it out to see what I could come up with.  I'm pretty happy with the outcome.

I opened up my card base and laid the die on the top and cut it like an arc half way down the card.  I recut it again with a sheet of decorative paper from Tim Holtz Wallflower collection.  Actually you can cut the two together, I discovered this the second time around and I found it will all depend upon the weights of your papers and your die cutting machine, I use a Sizzix Big Shot.  Play around a bit and see if you're able to cut your two layers at one time allowing for a perfect line up.  Since I'd cut my papers separately they were off a little, no problem I lowered the decorative paper a smidge and then added a layer of foam adhesives between them.  Before adhereing the lower edges together I sandwiched a piece of seam binding between them with Scor-Tape.  I dyed the Hug Snug seam binding with Forest Moss Distress Ink making a perfect match with my papers.


To finish off the inside I embossed in black the Just Rite Stampers sentiment from the Black-Eyed Susan Vintage Labels Five set. I mounted the stamped sentiment on a Spellbinders Vintage Label 36 and mounted them atop a piece of frayed burlap. Tucked on the one side were birds and leaves I'd fussy cut from the papers and across the bottom of the sentiment mat I added a Vintage Swirl from Marianne Designs that I'd cut from white and colored with the distress ink.  There's plenty of room on the back of the front to write your personal message.


This time I even added some decorative elements to the back, along with the year and my name.  I always sign and date my cards, I hope you're doing that as well.  Check out my video below to watch the step by step to make the card and a couple of other card ideas for inspiration.  Thanks so much for stopping by I hope you'll become a subscriber to my blog as well as YouTube and Facebook.


~~~Supplies~~~


Thursday, May 22, 2014

JustRite Stampers Coffee Cup Cards

a Cut at Home Design Team Project


Today I'm sharing a pair of cards using JustRite Stampers Coffee Cup Stamp set and on the front their Vintage Labels Five to create the stacked cup effect.  By using 3 of the 4 dies and then using a single layer of foam on the second layer and a double layer of foam the large outer layer you get this great dimensional element for effect. 

I used my water brush and various Tim Holtz distress inks to paint the cup and saucer onto Strathmore Watercolor paper, 90# (190 gsm).  This was a pad of paper I'd gotten for an art class and it was gathering dust in the craft closet.  Wonderful weight and feel to make a card with!  


I have a real thing about finishing the inside of my cards, it just makes me happy.  I used Kaisercraft's Storyteller 6 1/2" paper pad to do the matting on the front and inside. To mat my sentiment (Penny Black's Special Wishes stamp set) I used JustRite's Vintage Labels Six Dies and finished the side off with a flourish cut from Marianne Designs Vintage Swirls.  


What do you think of my stencil work?  Looks just like the Vintage Swirls doesn't it?  I took the negative space that remained when I cut my flourishes out and pounced some ColorBox Craft ink through the openings to create these gorgeous stencils here and a single one on the back.  I cut the flourishes with the leftovers from the card base so it's that same luscious watercolor paper and quite substantial so I think it will hold up to many future uses.  So STOP.... don't throw those negative spaces away stick them back to create your own stencils!

I hope you liked my cards and will give these dies and stamps a try.  I'll show you a step by step of how to make the other card (shown in the first photo above) in my video below.  I'd also like to give a shout out and special thanks to fellow YouTuber Zroby Sama for sharing her video Stamping with Spellbinders Dies. I'll share this technique with you in the video.


Thanks for sharing your time with me, I hope you'll subscribe to my blog, check out my other videos on YouTube and  visit A Soul's Heartbeat on Facebook!

~~~~SUPPLIES~~~~


Wednesday, May 14, 2014

Marianne Design Creatable Cards


What do you get when you combine cardstock and Marianne Design dies?  
Stunning detailed edges that will make anyone who receives the card ooh and ahh.


By double cutting the Marianne Design Creatable Die Anja’s Vintage Decoration cut (cutting it on each edge) and folding them to the middle you create a card within a card.  Untie the died seam binding (Hug Snug Winter White died with tea) and hidden underneath is a beautiful snippet of Heartfelt Creations Daphne paper.


By adding Marianne Design Creatable Die Anja’s Rose Corner Large to the corner I created a little pocket for this tuck in note.


Inside I used Spellbinders Luscious Labels One, the two largest dies, to create a journal or stamping spot for your sentiment.  To add a little more detail I added two cuts from Marianne Design Creatable  Die Anja’s Vintage Swirls.  Now you have an outer and inner spot for those perfect words of love.

Check out the video for step by step instructions on this card and another in black.  You'll be amazed at what a difference a color scheme change can make in the look of your card.


Supplies:


Tuesday, May 6, 2014

Family Time


left to right, my Sister Carol, my Sister-in-law Betty, Me
and front and center, Aunty Hulda

Hello everyone, today I'm posting a non-crafty note.  I've been home in Washington State since April 16th visiting family and friends.  I was fortunate on this trip to be able to travel to Lebanon Oregon to visit my Aunty Hulda who will celebrate her 100th birthday in September.  

This little lady has been a part of my life always, I used to spend summers at her house riding horses with my cousins.  Many memories of days gone by.  Visiting her brought a little of my Momma back to me, she's been gone for 3 years now, seems impossible but any of you that have lost your Mommas know how wonderful it is to have memories flood your mind with stories of yesterdays, that's what Aunty Hulda's visit did to me.  I hope you'll all be able to visit a family member that you haven't seen for a while, give them a big hug, and just enjoy some family time together.  

My visit ends this Saturday and then I'll be hopping the Portland flight back to the desert and my other half who says our house is awfully quiet without me there.  Hmmm now does that mean I talk too much, nope couldn't be that, lol.  I hope you're all having a bright and sunny Spring and working on some fun projects. I'll be back to post more installments in my Mother Goose series shortly.  Until them Happy Crafting everyone!  Hugs, Patti