Pages

Wednesday, January 29, 2014

Filigree Cards

a Cut at Home Design Team Project

Do you ever have a crafty block?  When you just can't seem to think of something to make?  That's how I've been this week.  My mind just refused to focus on one thing and the days kept rolling by, maddening!  Then I woke up the other morning and thought perhaps I'd try some white on white cards, I always say I'm going to do this and then end up adding a color.  

I thought it would be great to just have bunches of stuff on hand and begin to pick and choose and create with what's on my desk.  I started by cutting some card bases with American Craft white cardstock.  Next  I pulled the dies from my stash that had swirls, and twirls, filigrees and curves.  I moved  on to embossing folders that spoke to me.  Oh come on I know your crafty stuff speaks to you too, lol.  Lastly I pulled anything white from my laces and leaves and a few pieces of bling to make flowers.  I used Spellbinders Bella Rose die for the base of my flowers, it has a great flourish that shoots upwards and some great leaves that the flower could adhere to.


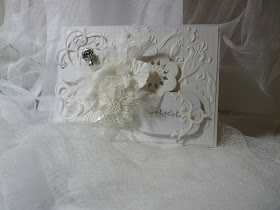
You can see here how I took the Spellbinders Floral Label 4 embossing folder and matted it to the top of my 5"x7" card base.  From there it was a matter of working upward.  I added the flower I'd made with a stickpin tucked in.  


See how different the card is by a change of die cuts and flower?  In this card I used the Spellbinders Filigree Delight frame as my focal point and added upward on it.  The flower is a little smaller and tucked between it and the sentiment is an embossed piece from the Spellbinders Gold Facet collection. This piece just embosses so I took a scallop from Spellbinders Fascination flower set and cut it out with that, I just love how it looks with that edge, a single pearl in the middle finished it off.  I tied it all together with a Die D-Lites Corner Flourish on the bottom right and a portion of the Heartfelt Creations Bella Rose leaf die on the left tucked behind the flower.


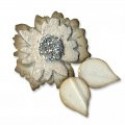
Here's a close up of the  Spellbinders Media Mixage Hatpin.  I used the silver circle hatpin, the smallest one in the pack of four.  It's filled with silver glitter and Glossy Accents with a clear crystal bling in the middle.


Check out my video below 
to see a start to finish and also 
these two addition cards for 
ideas and inspiration.  


Thanks for sharing your time with me, if you're not a follower of my blog I hope you'll become one today.  Comments most welcomed and always appreciated!!

Patti

Supplies:

Friday, January 24, 2014

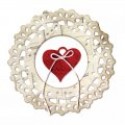
Lacy Heart Topper


If you'll remember a couple of weeks ago I shared with you my first Design Team Package from The Piece by Piece and today I'm sharing my project created with Beverly's gorgeous collection of lace, bits and bobs.


I started with a flip top box I'd purchased from JoAnns.  It measures about 6 inches square.  I covered it all with an old K&CO paper line from Tim Coffey called Cottage Garden inking all the edges thoroughly with Forest Moss distress ink from Tim Holtz.  Next came the fun part, designing the stuffed heart to go atop the box.

Maya Road's Linen Heart was to be the main focus with French Cotton Crochet lace in Mocha and Cream sewed along the edge on the back and the cream French Vensie lace to the front covering the stitching lines that come on the heart.   


Using the cream Angle Trim (yes you can laugh at the video I call it Angel Trim, I transposed the letters, but really it could be called that it's absolutely Heavenly!!) I gathered a piece into a circle and put the honey Flower Gem through the middle cutting off the excess.  (save the part you cut off, I'll tell you why in the video).  Everything is glued in place using Beacon's Fabri-Tac (thank you Corene from Corene's Creations, she shoved me in this fabulous glues direction when I was trying to adhere some lace to a mini a while back).  This glue is amazing, tacky - gooey - get all over yourself sticky - but amazing.  After it dries it's like cement, nothing is going to move!!  I also stuck in a couple of leaves snipped from the Venise Leaf Trim, I used the white, I debated whether I should tea dye them but the white isn't stark and I think blends nicely with the creams.


As I'm putting the heart together I'm thinking I wish I had some batting that would add some padding under the heart so I went hunting to see what was in the cupboards and ran across an old terry washcloth.  I used the heart as a pattern and cut two from the cloth, one I cut about 1/4" smaller so I could stack them.  Again using the Fabri-Tac I glued all the pieces one to the other and then glued them to the top of the box.  

That's it, check out the video below for more photos and 
ideas on how to use this heart other than a box topper.


Stay connected with The Piece by Piece:
Like us on Facebook: http://tinyurl.com/n2ru3kb
Shop our Etsy store:https://www.etsy.com/shop/thepiecebypiece
Visit our Blog: http://thepiecebypiece.blogspot.com

Have fun crafting!!  I hope you'll become a follower and leave a comment, they are most welcome and always appreciated!!

Patti


Wednesday, January 22, 2014

Floral Key Mini Album

a Cut at Home Design Team Project

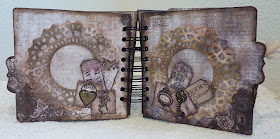
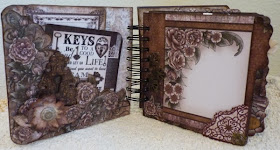
Today I'm sharing a mini album I've made using Heartfelt Creations Floral Key Collection.  I used the 12x12 papers and several of the stamps.  The mini has been bound with my Cinch.  Front and back covers are chipboard cut to 6" x 5.5".  The inside pages were actually a RAK I'd received that had been sitting in one of my crafty drawers. It's a five page chipboard album that came from Michaels.  The holes were punched in the left to insert rings for binding, not my favorite type of binding.  So I cut about a 1/2" (enough to cut off the binding holes) from the left side and bottom. The finished size of the pages were 5 1/4" square (not counting the tabs).  I covered all the pages, including the front and back cover with the papers.  It does take a bit of fiddling around the tab curves but well worth it.  (I used a Basic Grey file set).  Some of the papers I used my ATG gun to glue the papers down, some I used Aleene's Tacky Glue.  I like the tacky glue, it gives you the option to move the pages, but I find I have a waffling on some of my pages that takes some work to get them straight.  I'm curious if any of you have this problem and if so your solution.  I do use a brayer over them to smooth out the glue.

I've fussy cuts bits and pieces from the papers to add corner pockets, photo corners, flowers and pop ups throughout.  On the pockets I used a layer or two of matte medium to give them a little more stability.  When you're taking photo mats in and out of the pockets they can begin to wear down and I find just that little extra matte medium really makes a difference.
I have some very generous crafty friends who did a little EBAY shopping for metal embellishments and shared their hauls with me (thank you Julie and Kathie!!), you'll see them throughout the book.  The corner stopper on the bottom left is cut from a larger piece with a brad inserted in the middle of the flower.  Securing the brad but leaving the metal ornament free you can turn it to keep the insert closed or swing it to open them up.  

On these two pages I used Sizzix Doily Die to create the photo frames, it's hard to see in the photos but there's acetate beneath the frames that the photos will slip behind.  I also used a heart and key charm over top of the printed heart and charm on the papers, I love the difference the charms give the paper.


To see all the pages, flip, flaps and inserts check out my video------>


Thanks for stopping by, I hope you'll subscribe and come back often!!
Patti

Supplies:

Wednesday, January 15, 2014

Butterfly Delight


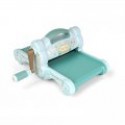
For my birthday my kids gave me money to spend on whatever I thought was missing from my crafty area.  I opted for the Sizzix Magnetic Platform for my Big Shot Machine.  Wow what a great choice that has been!  The magnetic platform holds thin dies in place, you can shake it as hard as you want and they don't budge a bit.  Great for those tiny dies and those thin ones that I'd been trying to hold while cutting with Washi tape, this is so much better!


I decided I'd like to do a trio of cards, one I had completely done, one was the model to show how to use the magnetic platform and the third I created onscreen in the video below, so be sure to check it out to see how I did what.

I used a standard A2 sized card which is 4.25"x5.5".  I think this is my favorite size because most times (notice I said most) it will travel through the mail with only a single stamp.  Now mind you if I get carried away with too many layers or embellishments the price for postage rises.  The frame and aperture are cut with Spellbinders Nestabilities Filigree Delight dies.  


See the difference with this opening from the others?  I added Glossy Accent around the edge and when dried it gave it a beveled almost wooden look, great with the Asian look of the papers.


All the cards are embellished with a trio of butterfly punches.  The one above is a triple layering each sized butterfly on top of the other adding some Wink of Stella Glitter her and there.  I also used flower stamens on the antenna of one of the butterflies, I like that look as well.


The insides are easily finished with a mat of decorative paper, some butterflies, a sentiment and of course a little glitter here and there.


Now you're saying what's she thinking?  This card doesn't match the others and that's just the point.  By changing up the papers and embellishments but using the same dies and format you can change the complete look of the card.  Here I used multiple punches of the heart to create the layered heart embellishment tied with bakers twine and the flower.  Yes the flower is made with the heart punches as well.

I hope I've given you some ideas for using dies with apertures and of course you really must check out the magnetic platform.  The video below has a step by step and more photos of the cards!


Supplies: