Pages

Thursday, December 19, 2013

Holiday Favors

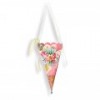
I've hung my Christmas favor on my Nutcrackers arm, wouldn't you love to add this little Holiday favor to your Christmas table?  Put a name inside to simplify your seating arrangement or add a collection of candies and nuts for the recipent to take home with them. However you use them, they're sure to be a hit with all your Holiday Guests.
Using Brenda Walton's BigZ die, Faceted Cone by Sizzix you can create Holiday favors 
for many occasions and Holidays throughout the coming year.

Perhaps New Years:
Include some Holiday Resolutions or Fortunes in the cone
for all your New Year's revelers.  

Don't have the die on hand and can't complete these in time for Christmas or New Years?
Then move on to Valentines Day and surprise some
lovely people in your life with a sweetheart favor
Just the right size to stick in 
some truffles, a gift card, or
a note of love and passion :-)
How about a baby shower favor.
Wouldn't these be darling filled with mints and nuts?
Or perhaps you could use this for the
door prize, give each shower guest one as they come through the door
and have a message inside saying they've won the prize

There are occasions of all kinds, Wedding, Birthday, Anniversary
May Day, 4th of July and the list goes on and on.
By altering the paper and embellishments this one die can get you
through a year of Seasons and Events. 


Christmas is almost here, enjoy the spirit, may it put a twinkle in your eye and a warmth in your heart that carries over into the New Year.  I feel very blessed to have all of you, my crafty friends in Cyber Space, to share my passion with.  
May your New Year be the best year yet!  
Hugs, Patti

Supplies Used:

From my Stash: Decorative paper, embellishments, hot glue, stickles, feathers, flowers, bling

Thursday, December 12, 2013

Frosty Blanket Cards

 A Cut@Home Design Team Project

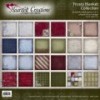
Still have some cards to make?  Perhaps you can do what I did here, take a focal point from your paper, I used Heartfelt Creations - Frosty Blanket Collection.  Find part of the paper that draws you, in this instance it was this gorgeous door and then build your card on that.  I actually have only two layers on the card base, the decorative paper and a brown mat.  By taking the photo of the door, that's printed on the decorative paper, you can expand you card to any degree of fussy.  
I embellished with Martha Stewart's Pine Branch Punch over the top of the printed branches, just following their curve around the door.  Adding snow, in my case, Aleene's Snow Glitter (it looks like toothpaste and dries hard) and some tinsel glitter I've made the snow dimensional.
I added some fussy cut flower papers, a few pine branches, and some snow to the wreath that was already on the door and finished the card with a pearl for the door handle.
Again the inside is the beautiful decorative paper with a simple 
embossed Merry Christmas on it.

So check out your decorative papers today and see what focal points you can use to build up your last minute Christmas Cards.  I love this Frost Blanket Collection and as you watch the video you'll see 3 other examples of how to dress up the paper into wonderful cards.


Wednesday, December 4, 2013

Circle Stand Ups

A Cut@Home Design Team Project

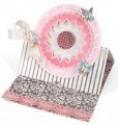
Don't you just love when you get something new that you've not tried before?  That's how I felt when I got my first Sizzix Movers & Shapers XL Die, it's the Circle Stand-Ups Card die that makes the most gorgeous Circle easel cards in a snap!  I also Got the I Love You & Happy Anniversary Stamp and Framelits Die set that accompanies it.  You get 8 dies and stamps that fit the circle of the card base. Now how super simple is that to do??

This is the card I show you, start to finish, in the video (at the bottom of this post)
The Movers and Shapers die cuts the complete card base and
the Framelits and Stamps were used to cut this cute heart border and the stamped message
behind it.  I also used them to cut the popped up center and the tiny hearts.

Don't limit yourself to just what the stamps show you, I made a Christmas Card
And a Get Well Card
This was a fun project and I know I'll be using these dies and stamps again and again.

Here's a few other shots of the cards
On the top left, the Christmas card I used the Heartfelt Creations Christmas Sentiment Circles Stamp
The card on the top right uses the Deep Red stamp collection and it's called Voices In My Head, you can see how I shaped the hearts upward around the stamp to let it peek through.
The bottom card, the one I'll use for an Anniversary or perhaps Valentines Day uses
the stamps that come with the Framelits set I linked to above.

I certainly enjoyed making these cards and I'm sure you will to!


Supplies I used:


Friday, November 15, 2013

Pink Poinsettias

I've been working with the Frosty Blanket Collection from Heartfelt Creations and playing with different combinations of my Spellbinders dies.  This is one of the Christmas Cards I came up with, well actually two cards with a few variations.
I grouped together Spellbinders Shapeabilities Lattice Pendents die with the Nestabilities Filigree Delight die on the left and then stamped JustRight's sentiment from their Christmas Inner Thoughts collection with gold embossing powder.  I also used the same powder on the Heartfelt Creations Christmas Sentiment Circle Stamp on the right.  These stamp sets produce crisp, clear embossing and that's exactly what I want especially when I'm doing sentiments.  On the left side card I grouped Spellbinders Doily Heart Circle over the top of one of the outer dies from the Fascinations die set. 

The papers from the collection actually don't have pink in them but by gently dabbing with Tim Holtz Victorian Velvet distress ink you can get those Pink Poinsettias!  I also died my Snug Bug white seam binding pink with it.  It takes some fussy cutting, some pinching and shaping to create the individual flowers to decorate the card inside and out.  But it's oh so worth it!  I just added some gold Stickles to give the flowers that holiday zing.

Check out my video if you'd like to see step by step the process of making the card on the left above.  I've also included some additions photos of both cards.  I hope this has inspired you to snip, crimp and shape you paper as never before and give some dimension to your Holiday cards as well!

Pink Poinsettias!

Supplies!