Pages

Thursday, October 31, 2013

Jingle Love

A Cut@Home Design Team Project

Isn't it about time to put on that Holiday music and begin to make your Christmas Cards?  I've got a couple today guaranteed to bring smiles to your face the whole time you're gluing and glittering!

As you follow along on my video I'll show you how I created the texture for the Snowman and his colored background.  I'll share a few ideas and tips I discovered as I made my cards.  I think I forgot to mention on the video that on his hat below I used Aleene's Glitter Snow.
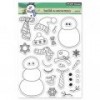
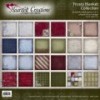
With this fun Build a Snowman stamp set from Penny Black you can choose his hat, his scarf and even his nose!  You can stamp him on white paper and color him like above or paper piece him as I show below.  I used Heartfelt Creations Frosty Blanket Collection on the card below.  (I just LOVE that paper).
Use the Tim Holtz Texture Fades Holiday Words embossing folder to make your sentiment.  Simply emboss, figure out what you want to say, fussy cut the words, ink the edges and glue it down!  I hope you'll join in the fun and make yourself some delightfully fun Snowman Christmas Cards today!


Supplies:

Monday, October 28, 2013

Bridal Matchbox

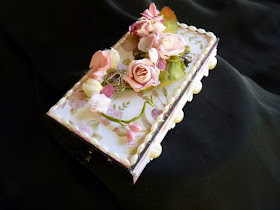
I wanted to share this other matchbox I made for a friend who's getting married.  I tucked a teeny tiny mini inside and thought I'd add a gift card to it for their big day.  Don't you think this is better than just giving them the gift card in an envelope??
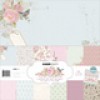
I used Kaisercraft's True Romance, the pretty blossoms here
And the page with all the words on it, I cut the words and inked them
they were perfect to add to the tiny little pocket pages
By cutting small rectangles (4 /1/4"x 2 1/2") of black cardstock, rounding the corners and matting them with the paper I had the start to my little accordion mini.  I just cut a few of the rectangles a little longer and overlapped them one to the other, the paper will cover up the seams.
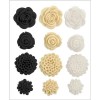
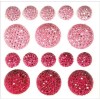
Look around your crafty area and see what bling and baubles you have that
could embellish the top of the box, ribbons for the mini or a little glitter
and glam here and there.


Supplies I used:

Wednesday, October 23, 2013

A Simple Gift - Notepad Holders

A Cut@Home Design Team Project:

It's getting to be that time of year isn't it.  With Fall comes the realization that Christmas is peeking just around the corner.  Isn't it nice to have a stash of inexpensive gifts you can give?  Or what about the rest of the year when you need that quick birthday gift?  Well I've got just the project for you!  It's made with inexpensive note pads, or you can do as I did and make the paper inserts yourself with colored copy weight paper.
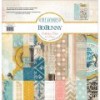
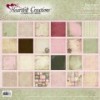
I used Bo Bunny's 'The Avenues' collection and Heartfelt Creations 'Daphne' collection for my decorative paper and 12x12 black or kraft cardstock.  You actually only need one sheet of each a few pieces of bling, flowers, etc from your stash.

After watching my YouTube video (link at the bottom of the post) you'll have all the step-by-step directions you need to make these simple folders to hold the paper pads.  The paper in the folder above is Bo Bunny's The Avenue's Collection, isn't it stunning?  

This one's created with the Daphne Collection from Heartfelt Creations.  Oh how I love their papers, always so soft and elegant looking.  As you follow along on the video you'll see this is the one I show you the complete process.  You'll notice that I add a flower to the inside and some stickles and glossy accents to give it more zing.  The possibilities are literally endless depending on the paper and the embellishments you use.

Have fun creating your own notepad holders, and when you're finished I'd love to have a look-see at what you've done!
Supplies:

Wednesday, October 16, 2013

Accordion Folded Cards

A Cut at Home Design Team Project

Using simple folds you can create a card with lots of interest for the recipient.
Take a card base with measures 5 1/2" x 12" and score it at 
1 3/8" - 2 3/4" - 5 1/4" - 7 3/4"
Crease your score lines creating mountain and valley folds.

By cutting a focal point from your decorative paper you can create a lot of interest on that first fold. For the Reindeer card I fussy cut the deer from the Bo Bunny Silver and Gold collection papers.  I lined his little hinny up with the left edge of the card base, and extended him on the right.  
For the second card I used the Tim Holtz Tattered Poinsettia Bigz die.  I cut it from Kraft paper, inked the edges, glued it together and then ran it through my Cuttlebug using the Textile Embossing folder. What a time saver, all the pieces are embossed in one fast swoop through the embosser!  
Add a few Diamond Stickles to portions of the designer paper to create a lovely front focal feature. Increase the impact by using some glitter, I used Martha Stewart's red tinsel glitter and suddenly the deer begins to take on a life of his own.  I used an old Martha Stewart pine bough punch to punch out green boughs to give dimension to the wreath around his neck and added a glittered snowflake to the middle.  A little pearl eye finishes out his dressings. 
With the Poinsettia Card I matted the card base with designer paper from Heartfelt Creations Frosty Blanket collection and a sentiment from their Christmas Sentiment Circles set.   By cutting a couple of mats from Spellbinders Fascination and Heart Circles I got the perfect backdrop for my embossed sentiment.
Another great feature of this card,
it fits perfectly in a regular sized envelope!

If you watch my video I'll show you step by step how I created the Reindeer card and include more photos to inspire you to make your own Accordion folded cards today!

Supplies I used: